Container Gardening vs Hydroponics

What is Better for Your Indoor Garden?

There are a few factors for you to consider when setting up your indoor garden.  You must first decide if you are going to be using soil or hydroponics.  If you are new to gardening, I suggest starting with soil until you learn the effects of your fertilizer on your plants.  If you are growing a variety of plants, I highly recommended starting with soil.  You can work your way up to hydroponics by building your own drip system for your indoor garden.

Read the Introduction to Drip Systems and then come back here.  If you are ready for hydroponics read this: Guide: Circulating Drip System and then come back.

Benefits of Container Gardening

-Easy to get started

-Easy to maintain

-Little gardening knowledge required
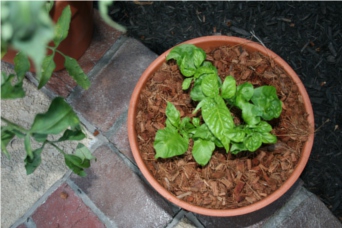
Container Gardens
Container Gardens

Modifying the Circulating Drip System for Soil Container Gardens

To make the Circulating Drip System into a regular drip system for your container garden, you will just need to take the containers off the reservoir and into a Drain Table.  There is a guide for building a homemade drain table here.  It is for small plants, if you fill it with large containers it will tumble over.  For bigger containers, you can buy a strong drain table or just sit them on something you can drain every day.

Benefits of a Hydroponics Garden

-Higher Yields

-More control of what goes into your plants

-Automation
Free Food Grade Plastic Containers


The following post is inspired by a thoughtful contributor at the Helpful Gardener Forums.  You can view the original thread about free/inexpensive plastic containers here.

Plastic containers are a crucial component of most home hydroponics systems.  They can be used as plant containers, reservoirs, rain barrels, and even humidity domes.

Plastic buckets for home hydroponics systems can be expensive and counter productive to the project at hand; saving money and eating healthier in the process.  If you are willing to ask around you can probably find what you need for free.

5 Places You Can Ask For Plastic Containers

1. Deli – Have you thought of using pickle jars or other deli containers?

2. Grocery Store – Sometimes the different departments of the grocery store will be tossing out buckets, see if they can be tossed to you.

3. Ice Cream Shop – 5 gallon buckets of ice cream.

4. Fish Restaurant – They may keep different kinds of food in plastic containers.

5. Various Mom and Pop Restaurants – These places may be more willing to help out local gardeners.

When you are out there, don’t forget, it never hurts to ask. Good luck Green Thumbs!

Have a Weak Drip System or Less Than Powerful Sprayers?

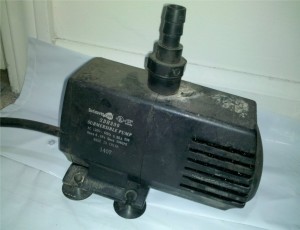
Submersible Water PumpBefore deciding your homemade drip system is non-functional, check your work.  Did you plan the needed gallons per hour your pump would need to push water through the whole system?  Water pumps are rated by GPH(Gallons per Hour).  You will need to know the minimum GPH your drip system needs to pressurize the water and make it through your drip emitters.

New growers seem to back away from home made drip systems because they are unsure of the necessary parts.  Drip irrigation kits are usually over priced and come with some pretty barebones parts.  The kits may also come with a small reservoir, that you are required to use because the pump is attached to it.  Avoid the woes of drip system kits by making your own irrigation system at home.

Home Drip System
Outdoor Drip System with a strong water pump at the heart of the reservoir.

Hydroponic shops carry all the parts you need to set up a custom drip system.  Start with a plan.  If you have not built your grow room yet, you will need to know the number of plants you plan on having and at least the distance the drip line will travel.  It is important to know the distance of the drip line to calculate the power you need for your water pump.

To find out the needed GPH rating start with the length of tubing you are going to use.  For every foot of tubing you use, regardless of size, subtract 1-2 GPH from the water pump’s rating.  Check the packaging for the drip emitters you would like to use.  The packaging should tell you the PSI rating.  Take the PSI and multiply times the number of drippers.  Subtract that number from the remaining GPH of the pump in question.  If the number of GPH remaining is very low or negative, you need a stronger pump.

Calculating GPH for a Drip System:  (2 GPH x 1 ft of tube) + (PSI rating of Drip Emitter x Number of Drip Emitters) = rough estimate of the necessary GPH.   There are outside factors not mentioned in this equation.  The number of connections the water has to travel through will affect the needed GPH.  Bridged drip line connectors like tees and elbows can slow down your water.  Be sure to wash your pump’s pre filter out during reservoir changes to ensure there is no blockage cutting down your GPH.  Follow these simple guidelines to ensure you don’t buy an expensive water pump you don’t need or wind up with a less than functional drip system.

Top Feed
Strong water pumps can forcefully pump water out of open drip lines to feed even the most demanding plants.

Air Pump Broke on Hydroponics System

I have heard of many indoor gardeners plagued with broken air pumps.  Don’t blame the broken air pump on a poorly built product, blame it on a poorly trained user.  Sometimes air pumps won’t turn on after a power outage of some sort.  The reason this happens is water is siphoned into the air pump.  The water destroys the electrical components and the air pump no longer functions.

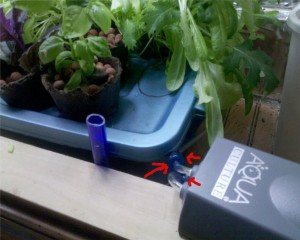
There is a preventative measure growers can take to protect their hydroponic garden from broken air pumps.  The answer is a check valve.  Check valves prevent water from siphoning water into the air pump in the case of a power loss.  They are cheap and easy to install.  You can find check valves in department stores, pet stores, aquarium stores, and of course hydroponics stores.  They are the same type of check valve you put on an aquarium air pump.

Hydro systems with a reservoir should be using an air stone.  The air stone is powered by the air pump.  Nearly all hydroponic systems including drip systems will need an air pump.  A check valve is something everyone should get when ever they get a new air pump.

To install a check valve simply cut air tubing to be secured to both sides of the Check Valve.  Make sure to face the valve the right way so air can flow.   Check Valve will make your hydroponic system more dependable.  Its an awful feeling to lose a good harvest to a hydroponic equipment failure.

Click Here to get your check valves from Amazon.com

Time to Change Your Hydroponic Reservoir: Avoid Salt Lockup

Hydroponic Nutrient Reservoir
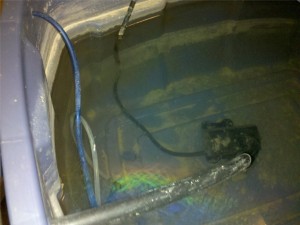
The water in this reservoir is not fit for a hydroponic system.

Reservoir changes are an essential part to all hydroponic systems.  The reservoir is where your oxygenated water and nutrient solution rests in between feedings.  You can read up on res changes if you are unfamiliar with them.  Depending on the size of your reservoir, hydroponic growing system, and nutrient solution your reservoir should be changed every 7-14 days.  Recirculating hydroponic systems need to be monitored closely for signs indicating its time for a res change.  If you procrastinate too long, your plants may become victim to the dreaded salt lock up.  Look for these 5 signs to ensure you don’t wait too long!

1. Discolored Reservoir Water – Hydroponic systems usually have nutrients and potentially an insecticide like Azamax mixed into the reservoir.  After recirculation the solution picks up extra things you do not want to continually recirculate through your system.  If your nutrient solution is not the color it was after you mixed it, it may be time for a res change.

2.Dead bugs – Dead bugs can have germs and carry diseases you do not want transfered to your plants.  If you see floating dead bugs in your reservoir water, change it!

3. Wrong PH/High PPM – If the PH of your water is too high, you could damage your plant’s root system.  You can get products that will adjust your PH, but use them in moderation.  There could be a greater problem you are missing out on if you continually lower your PH with solutions.  A high PPM can lead to nutrient burns and salt lockouts.  You can add plain water to offset a high PPM, but a reservoir change is in place if you made your nutrient solution too strong.

4. Plants are deficient in one nutrient, but over fertilized by another – Using multi part nutrient solutions can give a grower a lot of precision.  If you notice your plants are showing signs of deficiency for potassium, but look over fertilized, they could just need a different ratio of nutrients.  A reservoir change will allow you to start your nutrient mix from a fresh pallet.

5. Two Week Rule – If you have been using the same res water for more than two weeks, its probably time for a change.  Letting your res water evaporate and get low can also spike your PPM.  Don’t let a huge reservoir fool you!  You still need to monitor your PH and PPM because the nutrients do not evaporate out of the water.

GUIDE: Installing an Air Pump in a Hydroponic System

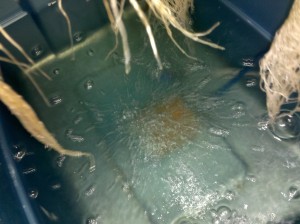
Notice all the bubbles being created, it is hard to see, but there are actually multiple air stones in the reservoir. These plants are thriving in this system.

Virtually all hydroponic and aquaponic systems will require an air pump of some type.  The nutrient reservoir must be oxygenated to maintain maximum efficiency.  If you do not want perfect plants what are you doing here?

Setting up an air pump in your nutrient reservoir is really simple.  I’ll outline the steps below.

1. Figure out the length of air tubing you need for the air stones to sit in the reservoir where you want them.  Leave a little extra tubing- you don’t want too much because air loses power over distance.

2. Put a hole through the side of your reservoir if you want your lid to seal.  Put the hole close to the top where water won’t spill out.  The hole is where the air tubing goes through.

3.  Put your air tubing through the hole you made before connecting the air pump or air stone.

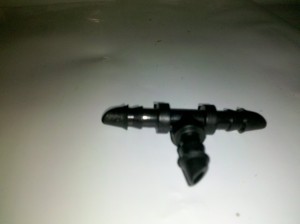
4. Connect any T connectors you plan on using.  T connectors connect two air lines together to aerate two separate stones.  One large air pump can aerate many air stones in one reservoir or provide all the oxygen to many reservoirs.  I use small air pumps for each reservoir so all my eggs aren’t in one basket.  If one air pump aerates all the reservoirs and it malfunctions, all your reservoirs are donezo!

T connectors are used to bridge multiple air lines to the main air line.

5. Cut your air line before it meets each air stone to put in check valves.  Check valves ensure you air pump does not siphon water in the event of power loss.  Siphoned water into your air pump means a broken air pump.

Check Valves
Check Valves prevent water from being siphoned to your air pump.

6. Connect your air lines to your air stones and place them where you want them.  I like heavier air stones that stay in place at the bottom of the reservoir.  If you have multiple air stones, spread them out so your entire reservoir is oxygenated.

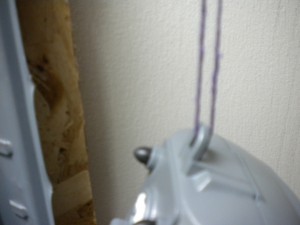
7.. Now is good time to hang your air pump if you plan to do so.  Air pumps can be noisy and sometimes give off a loud vibration that gets really annoying.  A hanging air pump should be a quiet air pump.

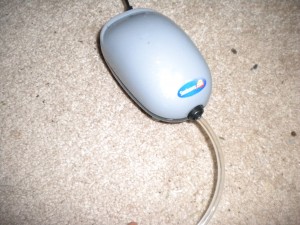
8. Connect the other end of your air tubing to the little connector coming out of the air pump. (shown below)

9.  Plug in you air pump and oxygenate that reservoir!.

Hanging Air Pump
Hanging air pumps reduce noise by eliminating loud vibrations.
Sunleaves Durapump Air
Air pump connected to 1/4inch air tubing oxygenating a large nutrient reservoir.

Collect Rainwater to Fill Your Reservoir

A large hydroponic system can use a lot of water.  Most indoor gardeners are concerned about the environment and wan’t to reduce their carbon footprint.  Growing your own food at home is a great way to be green.  Gardeners don’t want to be consuming more than they have to because that would be completely counter productive.  There are ways to get your water for free and recycle at the same time.  You can use any sturdy food safe container that can withstand your area’s outdoor conditions as a reservoir for rainwater.

Depending on when it rains in your area you may need to plan to catch the rain water during its season.  Collecting rainwater is easy and even though it may not cover all your water uses, it will certainly reduce the amount of water you pull from your city or well.  You don’t have to be an indoor gardener to have uses for rain water, although you should run your water through a reverse osmosis system to make sure its clean.  RO water is better gardeners anyway because you know exactly what you are putting in.  If you would just like to go buy a water collection system your local hydroponics shop should have something you can use.   The water barrels at the hydroponic store are usually 55 gallon barrels with a lid.

I plan to write a detailed guide in the near future on how to start your own homemade rain collection system.  In the meantime, Hydroponic Economics will be accepting pictures of anyone else who has started a rainwater collection system.  Send your pictures to mailbox@hydroponiceconomics.com and you may be featured on the website!

How Often Should You Change Your Water Reservoir?

QUICK ANSWER : Every Seven Days

Longer Answer: When you are trying to decide when to change your nutrient reservoir in your hydroponic recirculation system, there are a few things to consider.  The size of your reservoir, the amount of nutrients remaining in the solution, ph, and how clean the water is. If your water looks gross, it probably is gross.  Gross water = Gross plants.  Gross deserves a capital G for that equation.

The bigger your reservoir the further you can go between res changes(Res change is short for water/nutrient reservoir change ).  Big reservoirs may be more forgiving then a small reservoir.  Small reservoirs may change by hundreds of ppm in a single day.  Hydroponic systems require close monitoring of nutrient levels to avoid burning plants.  If your reservoir loses water to evaporation make sure to top it off with plain water or a very low ppm solution.  Res changes mostly apply to recirculating systems.  Non-recirculating or “run to waste” hydroponic systems only require you to change the solution every two weeks.  The nutrient solution stays clean and the PH is maintained in a non-recirculating system.  The most important part of a good hydroponic system is a clean nutrient reservoir.

A clean nutrient reservoir loaded with Earth Juice Bloom and Azamax

Hydroponic Cloning Tips

If you have wilting clones there could be a number of issues with your hydroponic cloning method.  Make sure to have a thermometer to measure temperature and humidity accurately throughout the day.  You can find digital ones at a department stores or hydro shops that will tell you the current and high/low temps and humidity throughout the day.  The digital ones aren’t expensive in comparison to the knowledge you’ll have.  If you are using a metal halide or other high powered lighting system, the clones must be a few feet away so they receive minimal light.  If they get too much light they will try to work too hard with roots they don’t have.

If the temperature is getting to be in the 80’s F move the lights up more or add a circulation fan on a timer so the humidity stays high.  Having a fan on for an hour at a time 2 or 3 times a day will really help to move the hot air.  Try to use cool burning bulbs like fluorescent tubes so your temperature will stay down.  A high humidity of 90% or higher will help your fresh cuttings more than anything else.  Spray the walls of a clear container with water and put it over your cloning system.  You can also attach spray emitters to a small water pump to spray water automatically for the first few days to ensure success rate.  The humidity needs to be high so the leaves of the cutting can absorb water from the air because it does not have any roots to do that job yet.  It may need a small hole or two for air flow so the temperature stays low and the cuttings have access to as much oxygen as they need.

Use an aeroponic or deep water culture method with aerated water to keep the roots or stems in a 100% humidity environment until they are established for transplant.  You can find cloning systems at your local hydroponics store, online, or even build your own!  Hardware stores and hydroponic shops should have pretty much everything you need to build your own.

Choosing the Right Set of Grow Lights

This post will no where near cover everything you need to know about choosing grow lights.  This post will give you some very helpful hints and considerations to take into account before spending money on an expensive system.

-Number of chambers : Will you have all your plants in one space for their whole life time.  If so you may want to consider a Metal halide Bulb and Ballast for the grow cycle and a high pressure sodium/metal halide conversion bulb for the bloom phase.

-Amount of Space : If your grow spaces are large you will need high powered lights so that all the plants get light.  Keep in mind 400 watt and higher MH and HPS bulbs will benefit greatly from air cooled hoods which require strong inline fans to cool.  The cost of these items may raise your initial setup fee but will pay off by the first harvest by the success of the crop yield and quality.  Without an air cooled hood a 400 watt HPS bulb must be 3-4 feet away from the plants to keep temperatures down.  With an air cooled hood some plants can be nearly touching the glass.  If you have a high powered inline fan the plants can most likely grow up to the hood.  This makes a big difference in yield because light is diminished at higher rates at farther distances.

-2′ x 2′ or 3’x3′ gardens can bloom under 400 watts

-3’x3′ or 4’x4′ gardens could easily use 600 watts

-4’x4′ or 5’x5′ gardens can use 1000 watts of light

-Number of plants: Depending on your style of growing you may want to get a set of 2 lights instead of one big light.  3 x 600 watt lights can outperform 2 x 1000 watt lights in the exact same conditions.   The three 600 watt lights can cover a greater area without losing light from distance.

-Height of Grow Space: If your grow room or grow box is not very tall and you are also concerned with heat, you may want to use compact fluorescent tubes from the hydroponic shop.  You can get high powered tubes for grow and bloom phases.  The height of the ballasted light set is only a few inches so it can fit in short places.  Its great for the grow phase or a mothering chamber.  The bloom tubes will flower plants but sometimes they are lanky unless you use a product like BushMaster.