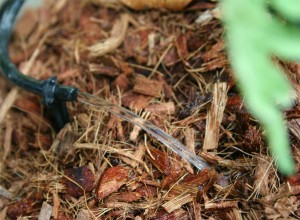
GUIDE: Self-Watering Outdoor Container Garden

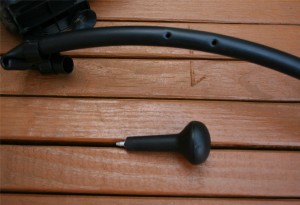
Open ended 1/4 tubing provides the fastest rate of watering.

Automated gardens are the most efficient way to grow fruit and vegetables.  An outdoor garden can still be automated because the sun is the light and you have no control over that.  Watering and feeding can also be automated to ensure your plants are getting everything they need.  Self-watering containers may be the only way to keep plants from drying up in the middle of a hot summer day.  If temperatures are getting above 85F your plants are probably thirsty!  It is too big of a hassle to hand water your plants all day to ensure they get what they need.  You may not be there when they need the water and your plants should not rule your life.  You may be making a homemade irrigation system to water your plants while you are on vacation, but when you return you will ask yourself, “Why don’t I always use an automated system?”

If you are new to drip systems you will want to read the Introduction to Drip Systems to get acquainted with the parts I’ll be discussing.  For this project you’ll need:

As always, your first step is to plan out your container garden.  Find the arrangement you want to use to maximize sunlight.  Keep in mind that your tubing will have to reach from your reservoir to your container garden.  The size of your water pump will
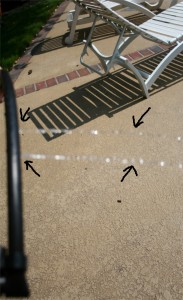
half inch black vinyl tubing
Look at the arrows - The half inch tube is spraying with plenty of force through two holes.

determine how much reach you have to play with.  Don’t forget your water pump also has to power through your connections and drip emitters.  Water pumps are one of the most expensive parts of the home made drip system, but they usually come with at least a one year warranty.  Once you realize the productivity ratio of self-watering containers you will not want to go back to daily hand watering.
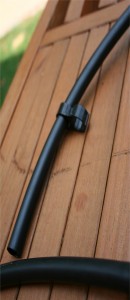
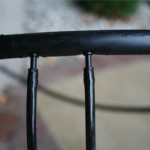
End clamps are an easy way to ensure your half inch tube is closed
Kink the tube at the end.

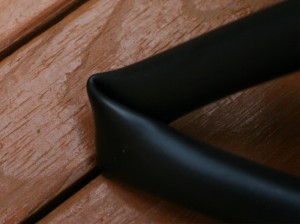
Put the end of the half inch tubing through one end of an end clamp and create a kink.  Wrap the tube around the kink 2-3 times and thread the end through the other side of the end clamp. The result should be a closed off water proof end to create pressure throughout the drip system tubing.
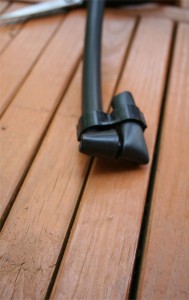
half inch black vinyl tubing clamped at the end.

Put the other end of the 1/2 inch tubing on the end of the water pump.
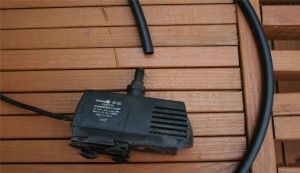
Make sure the half inch tubing is on tight to prevent leaking and loss of pump power.

Once your pump is assembled you are ready to make your drip lines.  Punch holes in the half inch tubing where you want your 1/4 inch drip lines to start.  Don’t push through the vinyl or whatever material tubing you are using too hard or you will go through both ends and create a leak.
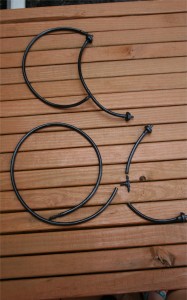
1/4 inch Drip Lines

There is a wide array of drip emitters you can choose from at your hydroponics shop.  You can get inline or compensating drippers which are explained in more detail in the Introduction to Drip Systems guide I mentioned earlier.  You can also get mini sprinklers and other types of emitters for different purposes.  This system is built with compensating drip emitters because the half inch tube sits on the ground and the 1/4 inch tubes climb the length of the container.
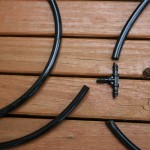
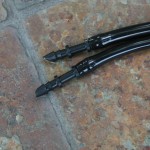
T Connection bridging the main drip line to 2 drip emitters.
Straight Connectors are used to connect the 1/4 inch tube to 1/2 inch tube
Connect your 1/4 inch drip lines to your 1/2 inch main line.

Put 1/4 inch straight connections on the end of the drip line with no drip emitter.  The straight connector goes into the hole you made earlier in the half inch tubing.  The connection is how water gets from your 1/2 inch main tube to your individual drip lines.  Fewer connection bridges and fewer drip emitters means more power and further reach.
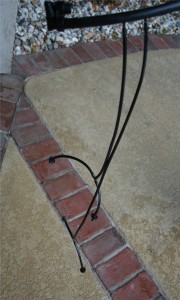
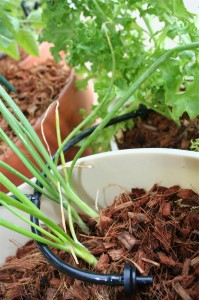
These drip lines are ready to be staked into their containers.

This is a lengthy guide for a homemade drip system, but bare with me and you’ll be on your way to irrigation freedom!  Next step is to prepare your water reservoir.  You’ll want to drill or burn a hole through the side of your reservoir to put the half inch tube through.  If you just want your lid to sit on top of your reservoir that is fine, you can tape it down.  Expect greater evaporation rates and contamination if you don’t use a sealed lid.  Keep in mind a cleaner grow space is better grow space.

You will have to put the end of the half inch tube that is connected to your water pump through the hole before connecting the pump.  The water pump will not fit through your 1/2 inch hole!  This step is really easy using a drill with a 1/2 inch circle drill bit.  If you are using plastic make sure you don’t crack the side of the reservoir.  If it does crack easily you are probably using a material that is too weak to hold water for long periods of time.
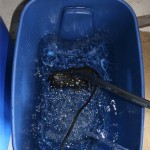
I used a hose to fill the 14 gallons of this reservoir.

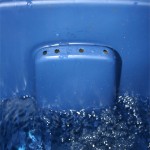
For this outdoor reservoir I bought a container that already had holes in the handle.  Since it could rain in the area where the reservoir is it could fill with rain water and knock the lid off the top.  You can drill your own drain holes with a simple drill bit if you are planning to use a container without them.

Once your water pump is in place and suctioned down to the bottom of your reservoir you are ready to add the aeration device.  The air pump will oxygenate the reservoir and ensure the water keeps moving.  Stagnant water can get pretty nasty and your plants love oxygen in the root zone.  If you are unsure on how to set up an air pump check out my guide on installing air pumps in hydroponic systems.

I like to make sure my reservoirs have over flow holes so they cannot flood.

One thing you will probably not find at your local hydroponics shop is a cheap water proofed air pump.  The lack of water proof air pumps seem to
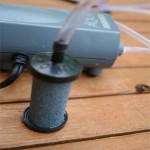
A standard aquarium air pump will work fine. Different air stones will create different aeration patterns. Test different air stones to see what creates the best results.

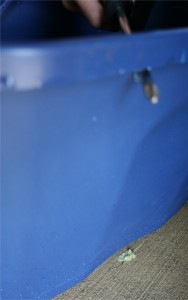
discourage most hydroponics gardeners from using the natural sun.  A smart do it yourself gardener can find a solution.  You will need to get a plastic container of some sort that comes with a lid that seals tight.  Poke a hole in that container near the top.  Make sure the hole is just big enough for your electric plug and air tube to come through.  I used a screwdriver to create a small crack for both things to go through.
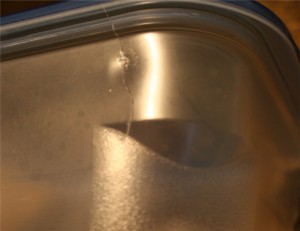
The water proof housing of your air pump.
A small crack in a food storage container.

Put the air tubing through the hole before you connect it to the air pump.  You do not want the hole to be bigger than it has to be.  A large container is safer because the hole can be higher off the ground and away from potential flooding.  Do not put the hole through the lid of the container because rain will get into your electronics!
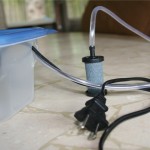
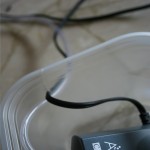
The electronic air pump is sealed in the container the cord and air stone are on the outside.

I placed the reservoir and water proofed air pump in a covered area with electrical outlets.  I had to use extension cords to get the air pump to reach the outlet.  I also needed a 3-prong extension cord for the water pump.  The digital timer you use to automatically turn your water pump on and off also needs to be in a covered area where rain can’t get into the parts.

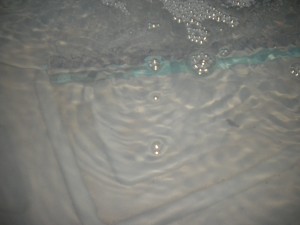
Novice gardeners – don’t get the idea air pumps are too complex or unnecessary for you.  That’s your first mistake as a novice gardener!  Automate your irrigation and add oxygen and whatever else the plants need.  Reaching for 100% is how you get perfect plants!  Click on the picture below to see what an air pump does.
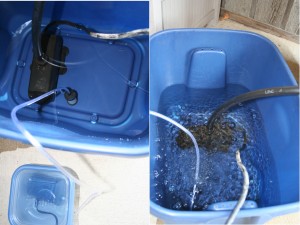
Left: Before air pump || Right: After air pump is turned on

Your friends will be jealous when they see how “high tech” your garden is!  Now that your reservoir is up and running you are ready to finish your automated drip system.
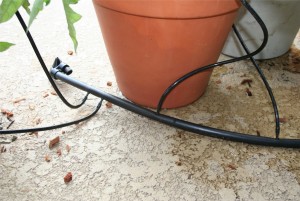
Position your containers so that all your drip lines reach your desired target.

Position your containers around the drip line so all the lines can reach their desired area.  I use two drip emitters on most of these containers because they are three gallons and up.  On 1 -2 gallon containers one drip emitter may cover the whole medium over a drip period of a few minutes.  At the very least it will keep your plants alive while you are on vacation.  Having a small drip cycle with outdoor plants will adjust for rain.  Say you are gone for a week and it rains for three of those days.  Those three days it was unnecessary for your drip system to run!  It may have had a detrimental factor because of excessive watering.  Make sure your containers have good drainage and choose your medium carefully.  Well mixed growing mediums are key to ensuring your plan’ts success.  Different plants benefit from different growing environments and growing mediums.

TIP:  People who have been paying attention can skip this tip because they already realized from the article I suggested on Digital Timers, there is a way to automate their watering schedule.  Some digital timers come with a day setting.  The day setting will allow you to run your drip system every other day or in different intervals.  You may want your drip system to run 3 times a day alternating with 1 time a day.  If this tip is confusing you, come back to it later when you have worked with timer settings for your drip system.
DIY Drip System
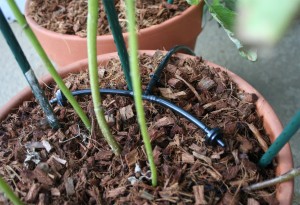
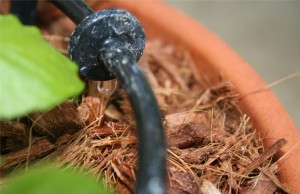
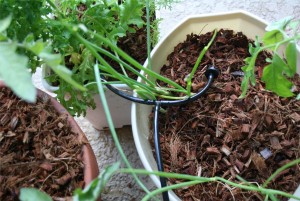
1/4 inch hose split into two drip emitters for two container plants.

Home Drip System
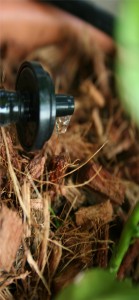
Compensating drip emitter in outdoor drip system for container gardens.
DIY Drip System Container Garden
Two drip emitters in a homemade container garden irrigation system.
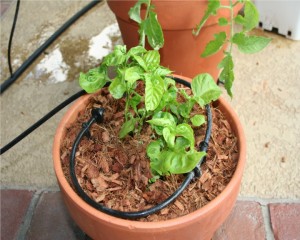
Peppers outside in natural sunlight planted in container with a circle style drip system
Different styles of drip systems and drip emitters can be used to find new ways to efficiently water and feed your container garden.
Inline Drip Emitter Picture
Inline drip emitters can run through 1/4 inch tubing without ending the drip line. They also come in varying drip speeds.

How Often Should You Change Your Water Reservoir?

QUICK ANSWER : Every Seven Days

Longer Answer: When you are trying to decide when to change your nutrient reservoir in your hydroponic recirculation system, there are a few things to consider.  The size of your reservoir, the amount of nutrients remaining in the solution, ph, and how clean the water is. If your water looks gross, it probably is gross.  Gross water = Gross plants.  Gross deserves a capital G for that equation.

The bigger your reservoir the further you can go between res changes(Res change is short for water/nutrient reservoir change ).  Big reservoirs may be more forgiving then a small reservoir.  Small reservoirs may change by hundreds of ppm in a single day.  Hydroponic systems require close monitoring of nutrient levels to avoid burning plants.  If your reservoir loses water to evaporation make sure to top it off with plain water or a very low ppm solution.  Res changes mostly apply to recirculating systems.  Non-recirculating or “run to waste” hydroponic systems only require you to change the solution every two weeks.  The nutrient solution stays clean and the PH is maintained in a non-recirculating system.  The most important part of a good hydroponic system is a clean nutrient reservoir.

A clean nutrient reservoir loaded with Earth Juice Bloom and Azamax

Hydroponic Cloning Tips

If you have wilting clones there could be a number of issues with your hydroponic cloning method.  Make sure to have a thermometer to measure temperature and humidity accurately throughout the day.  You can find digital ones at a department stores or hydro shops that will tell you the current and high/low temps and humidity throughout the day.  The digital ones aren’t expensive in comparison to the knowledge you’ll have.  If you are using a metal halide or other high powered lighting system, the clones must be a few feet away so they receive minimal light.  If they get too much light they will try to work too hard with roots they don’t have.

If the temperature is getting to be in the 80’s F move the lights up more or add a circulation fan on a timer so the humidity stays high.  Having a fan on for an hour at a time 2 or 3 times a day will really help to move the hot air.  Try to use cool burning bulbs like fluorescent tubes so your temperature will stay down.  A high humidity of 90% or higher will help your fresh cuttings more than anything else.  Spray the walls of a clear container with water and put it over your cloning system.  You can also attach spray emitters to a small water pump to spray water automatically for the first few days to ensure success rate.  The humidity needs to be high so the leaves of the cutting can absorb water from the air because it does not have any roots to do that job yet.  It may need a small hole or two for air flow so the temperature stays low and the cuttings have access to as much oxygen as they need.

Use an aeroponic or deep water culture method with aerated water to keep the roots or stems in a 100% humidity environment until they are established for transplant.  You can find cloning systems at your local hydroponics store, online, or even build your own!  Hardware stores and hydroponic shops should have pretty much everything you need to build your own.

Safety tips: Building the Grow Space

Here is a list of a few tips everyone should consider when putting together a hydroponic system or a hydro grow room/box.

1. DON’T OVERLOAD YOUR CIRCUITS.  This goes for circuits, outlets, custom wiring(check the max load), timers, extension cords, and surge protectors.  Its easy to get a room to use enough electricity to trip your circuit.  If the power is too great you could start an electrical fire.  High pressure sodium and metal halide lights 400 watts and over may need to be plugged into a lighting controller that is wired to the house electricity or plugged into the dryer socket.   If you are doing wiring to the main circuit box make sure to shut the power down and have a clear plan of what you are doing.

2.  Keep outlets, surge protectors, timers, light controllers, ballasts, and all electronic components off the floor.  Make sure electronic components are out of reach of sprayers, drip hoses, and any reservoir that could crack or spill.  Plan for the worst!  Keep your electronic components away from the water!

3. Line the room or box with a water proof floor and walls so if something does break or water is spilled it doesn’t ruin the floor or create mold.  If the liner is something like mylar or black and white poly it will be very easy to clean up the water.  Even if you think you have a really tight hydroponic system that will never leak or spill, you are probably wrong.  At some point in time through filling up multiple reservoirs and changing nutrients you will most likely spill something on the floor.  It is much better to already have water proofing there to prevent a mess and mold possibility and its easier to clean up.

4. Turn off fans open or caged fans that you are working by.  I’ve cut my fingers on computer fans in my mini veg box and clipped my ear in one trying to pull a bulb out from deep in the box.

5. Wear gloves – Wearing gloves can protect you and your plants from stress.  Human hands constantly rubbing on your plants is not good.  It may not show negative effects, but it will unlikely show any positive effects.  We want our plants in the best condition possible all the time.  The gloves will also protect you from sprays or bugs on the plant and the possibility of an allergic reaction.

Safe growing!

GUIDE: Building a Simple Drain Table – Part 2

This is part 2 of the DIY Drain Table Guide. Look at part one here.

Okay after you have the right size tub and trays for your set up you can get started.  The size you get depends on your needs but I recommend getting a really sturdy bottom tub(drain off tub where waste goes).  The tub should be able to withstand the pressure of water with out bowing out enough to make your trays fall and CERTAINLY without cracking or breaking.

If a water container you have in one of your hydroponics systems is too weak to withstand the pressure of water constantly pushing on it could crack or break and leak the potential GALLONS of water all over your room and whatever electronics you may have on your floor(Even though all indoor gardeners should be making sure all of their electrical parts are placed on the wall or above where water could potentially spill or spray on them RIGHT?)

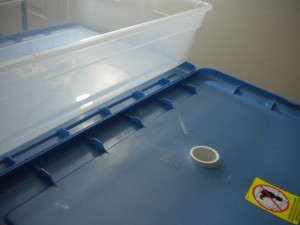
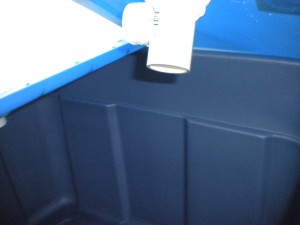
You’ll want to use a drill to drill holes 1 or 2 inches wide in the lids of the containers.  Position the hole so that they will drain into the tub the lids will be sitting on.  Refer to the pictures below.

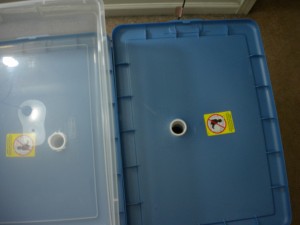
Notice there is a two inch hole drilled into the lid of the container with a two inch diameter PVC joint connector put through it as a drain hole.

Hole from above
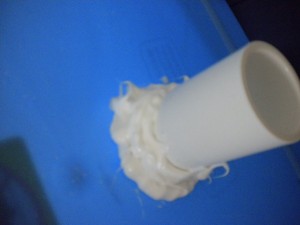
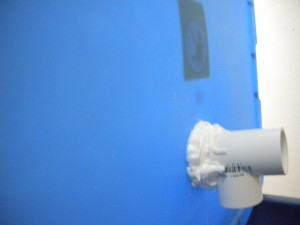
Sealing the drain so water is FORCED through PVC.
To seal the PVC elbow drains in place you can get water proof silicone or a type of strong water proof caulking and apply it with a caulking gun.

Let the sealant set long enough that its not loose – this could take up to 24 hours so BE PATIENT.  Better things come to those who wait. Once the bond is tight you will be able to sit your trays on top of the lids and the drain wont fall off under the pressure of your plants plus extra water.  

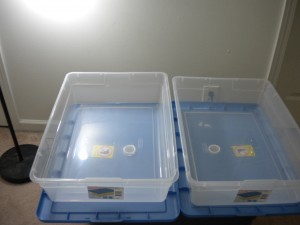
Position your tray on top of the lid like you will have it in your final set up.  You want to put a hole in the space where the PVC hole is so the water from the tray drains out of the hole and through the PVC drain down into the bottom tub/reservoir.

This is pretty much what you’ll have at the end – You can drill holes where the white circles are to drain the clear tray.

A drill should work fine if you are careful not to crack the plastic.  It shouldn’t be a problem either way considering you should be using containers sturdy enough to hold a lot of weight over long periods of time.  If one of your containers break your plants could end up submerged in their own dirty waste water.  You want to plan and account for things like this in the planning of your hydroponic set ups to ensure safety of equipment, plants, and most importantly you and your house.  

Another way to put holes in the plastic trays is to burn a hole.  BE VERY CAREFUL WITH THE FIRE! I heated up a glass rod with a camp fire starting torch – one similar to what you use to start a grill.  Once the rod was glowing orange I pushed it through where the PVC drains were to make a perfect hole.  

Good luck in your constructions and please comment or contact me with any questions.