Time to Change Your Hydroponic Reservoir: Avoid Salt Lockup

Hydroponic Nutrient Reservoir
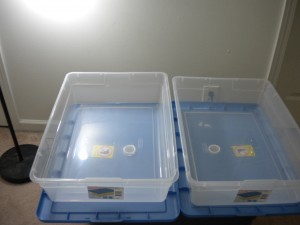
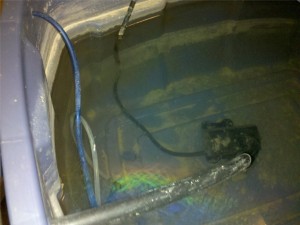
The water in this reservoir is not fit for a hydroponic system.

Reservoir changes are an essential part to all hydroponic systems.  The reservoir is where your oxygenated water and nutrient solution rests in between feedings.  You can read up on res changes if you are unfamiliar with them.  Depending on the size of your reservoir, hydroponic growing system, and nutrient solution your reservoir should be changed every 7-14 days.  Recirculating hydroponic systems need to be monitored closely for signs indicating its time for a res change.  If you procrastinate too long, your plants may become victim to the dreaded salt lock up.  Look for these 5 signs to ensure you don’t wait too long!

1. Discolored Reservoir Water – Hydroponic systems usually have nutrients and potentially an insecticide like Azamax mixed into the reservoir.  After recirculation the solution picks up extra things you do not want to continually recirculate through your system.  If your nutrient solution is not the color it was after you mixed it, it may be time for a res change.

2.Dead bugs – Dead bugs can have germs and carry diseases you do not want transfered to your plants.  If you see floating dead bugs in your reservoir water, change it!

3. Wrong PH/High PPM – If the PH of your water is too high, you could damage your plant’s root system.  You can get products that will adjust your PH, but use them in moderation.  There could be a greater problem you are missing out on if you continually lower your PH with solutions.  A high PPM can lead to nutrient burns and salt lockouts.  You can add plain water to offset a high PPM, but a reservoir change is in place if you made your nutrient solution too strong.

4. Plants are deficient in one nutrient, but over fertilized by another – Using multi part nutrient solutions can give a grower a lot of precision.  If you notice your plants are showing signs of deficiency for potassium, but look over fertilized, they could just need a different ratio of nutrients.  A reservoir change will allow you to start your nutrient mix from a fresh pallet.

5. Two Week Rule – If you have been using the same res water for more than two weeks, its probably time for a change.  Letting your res water evaporate and get low can also spike your PPM.  Don’t let a huge reservoir fool you!  You still need to monitor your PH and PPM because the nutrients do not evaporate out of the water.
GUIDE: How to Mix Fertilizer; Mixing Nutrients in a Hydroponic Reservoir

Mixing nutrients is an essential part to all hydroponic growing systems.  Plants require nutrients to grow.  Hydroponic systems are designed to ensure maximum nutrient uptake.  Use this guide to mix your nutrients correctly every time!  Mixing nutrients in your reservoir is easy – follow the pictures if you are confused.

Water for Hydroponic Reservoir
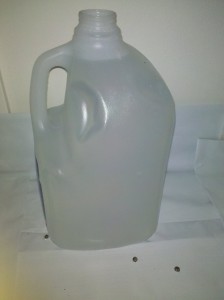
Start with plain water to mix with your hydroponics nutrient.

Start with reverse osmosis water if you can.  I use one gallon jugs to fill water and mix nutrients.  Growers with bigger reservoirs will want to use a 5 gallon bucket to mix nutrients.  Make sure the container you use is food grade.

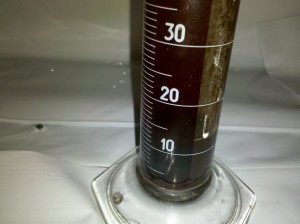
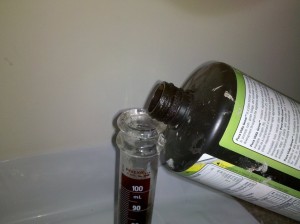
Get a clean measurement tool like a cylinder. Read the label of your nutrients to determine the measurement of nutrients you need per gallon.  If you are using a five gallon bucket make sure to multiply by 5.  I like to start with half of what the bottle recommends to ensure I don’t burn my plants.  Pour your high grade organic nutrients into the measurement tool to make sure you have the correct amount.

Pour Nutrients Into Measurement Tool
Pour your hydroponic plant nutrients into your measurement tool.
Hydroponic Nutrients
Measure and double check your plant nutrient measurement before adding to your water.

Make sure you double check your nutrient measure.  It is good to know the amount of nutrients used and at what time in the plant’s life cycle.  Jotting down quick notes of these metrics and their results can leave you with valuable information for your next crop.  Grow logs are an essential tool in building a better growing environment.

Mix Hydroponic Nutrients with Water
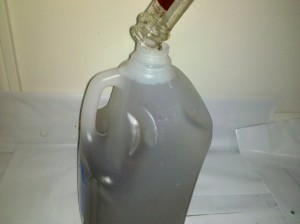
Once you have the correct amount of nutrients, pour them into you water that is to be mixed in the reservoir.

Line up your measurement device with the lip of your container and pour your nutrients in slowly.  If you tilt the cylinder too much you may overshoot your container.  If you spill some the measurement you took is now wrong.  The loss will not affect your grow in a severe manner, but it is nice to have close to accurate measurements.   Even if you are trying to achieve 100% efficiency you are unlikely to do so.

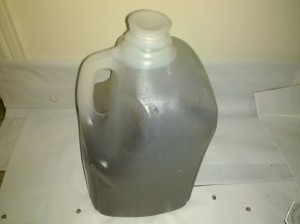
Mixed nutrients.
Cap the container and shake the nutrients until they are well mixed.

Advanced Wind Technology for Better Air Circulation

If desk fans or computer fans weren’t enough for your indoor gardening air circulation needs, check out what the engineers at Dyson have created:

The Dyson Air Multiplier is a great innovation to air flow technology.  The new Air Multiplier may be a little too expensive for some hydroponic setups, but I know there are some people out there who only want the best of the best.  If you have a Dyson Air Multiplier or use one in your indoor garden, please contact me!  You may be featured on this website!

Image source: Dyson.com

Using Hydroponics for Self-Sustaining Food Production

Today I was watching TV and saw a special on the damage a high magnitude earthquake would do to a city like San Francisco, California.  The damage was unbelievable!  Traffic in and out of the city would be at a stand still, if it was even operational.  Communication lines would be down.  A whole mess of things I don’t want to be in.  A specialist said the people who were the most independent and self-sustaining, would be the most likely to survive in a crisis like that.

Hydroponics is a clean and green way to grow food practically anywhere.  Not only can you grow anywhere, you can MAXIMIZE anywhere.  Hydroponic systems are very efficient and practically run themselves with the right equipment and knowledge.  The point is the people of San Francisco and all other urbanized areas, can be just as green as anyone else.  Just because you are a renter in a small apartment with zero yard space does not mean you can’t have a small wheat grass box, a flood and drain tomato table, and a simple deep water culture herb tote for all your cooking spices.  35-40 cubic feet of space(a 3×3 box about 4 or 5 feet high) is more than enough to take up a serious hydroponic hobby and home food production center.  There is nothing better than the satisfaction of eating your own harvest.

Hydroponics are by no means limited to vegetables.  If you are like me and really like fresh strawberries all year round, you have a reason to start an indoor garden!  Not only will you have your favorite fresh fruit to eat whenever you want, but you will also learn A LOT about the plant you choose to grow.  You may find that you can grow a better berry than the local farmers depending on your area.

Pass this knowledge on to a friend whom you think is wasteful or unaware of the many benefits of having a home hydroponics garden.

Reminder – Keep the Grow Space Clean

No matter what plant you are growing or where it is, cleaner conditions can help you and your plants. Here is a list of some quick tips for a clean growing environment.

1. Wash your hands before and after each session with the plants. Wear gloves when handling the plants.

2. Keep special clothes and shoes to wear in your grow area. Keeping outside contaminates away from the grow space can save you the worry of pollen being on your clothes, it could keep out potential pests, and it will reduce the amount of germs brought into the space.

3. Sterilize your equipment including scissors when ever you can.

4. Wash out old containers or throw them away. If you let them sit they could grow mold or mildew and this could become a problem if it goes unnoticed.

5. Vacuum or sweep any medium or soil on the floor so pests can’t make nests in places you aren’t even growing plants.

Plants get enough stress the way it is. If you make sure to reduce as much stress as you can your plants will thrive. These simple cleaning tips will keep your grow space clean and your plants happy!

Humidity is an Overlooked Factor in Cloning Systems

From my experience and what I’ve been reading on hydroponic forums, people all around are having faster cloning rates using a humidity dome. Humidity domes come in many forms. A simple dome is a clear plastic structure with just a few holes for oxygen exchange. The structure sits so that it is covering all the plants without smashing them. Spraying a fine mist along the walls of the dome will help boost the humidity. The more plants per sq. inch of space will also increase the humidity, but having clones packed in too tightly could cause them to fight for light, air, and moisture. The struggle may cause unnecessary stress instead of beneficial humidity. Make sure to keep an eye on the temperature when the humidity dome is on. It may lock in heat in its enclosed structure. Simply remove the dome for a few hours so the temperature can lower and fresh oxygen can be swept to the leaves. This is a good time to re-mist the dome so the humidity is high when you put it back into action.

Preventative Pest Control is the Best Pest Control

Pest control is often a topic shrugged off by novice indoor gardeners.  You might think, oh its indoor, there are  no bugs in here.  WRONG.  You cannot assume things like this when it comes to indoor gardening.  It is better to plan for gnats, flies, aphids, spider mites, and other plant eating bugs before they wipe out your crop with out you noticing.  Don’t underestimate the damage a bad pest infestation can cause.  It may seem like they are only eating a few leaves or slightly discoloring leaves.  The point is all that degradation adds up and what do you have to show for it? Worse crops, bug infested food or flowers, and lower yield!  The point of indoor gardening is to control for a better grow.  Be preventative in your pest control and you may never have to worry about an infestation.

Try using an organic garlic spray to ward off bugs.  Post up yellow sticky paper to catch flying insects.  The yellow sticky paper is great almost anywhere you put it.  I have put them under the lips of containers to catch fresh gnats in the soil.  If you place them up higher you may catch bigger flies.  Try to use organic and natural pest control so you don’t affect the quality of your crops.  Hydro shops also sell predatory bugs that will eat your pest infestation and then eat themselves.  This is a method I have not had to use, but it is one of the most natural pest controls.  Buying live lady bugs or placing them in your garden when you find them around the house will help eliminate small bug populations.

Another method of preventative pest control for an indoor garden is an enclosed growing environment that pests cannot get into.  People may not realize the importance of closed chambers, but they can certainly help isolate a pest problem.  If you anticipate a possible aphid or spider mite problem try a very light solution of a spray like AzaMax to ward off any pest infestation attempts. I’ve wiped out whole aphid colonies with only off-brand Neem before as well, but I’m sure that won’t work for all.

Green Moral of the Story: Preventative pest control can save you many headaches from dealing with nasty bugs and sprays.  Preventative pest control can also ensure your crops will stay healthy and yield at their highest potential, and that’s what we’re after.

Get General Hydroponics AzaMax at Amazon today to protect your indoor garden investment. You can also read customer reviews here.

Safety tips: Building the Grow Space

Here is a list of a few tips everyone should consider when putting together a hydroponic system or a hydro grow room/box.

1. DON’T OVERLOAD YOUR CIRCUITS.  This goes for circuits, outlets, custom wiring(check the max load), timers, extension cords, and surge protectors.  Its easy to get a room to use enough electricity to trip your circuit.  If the power is too great you could start an electrical fire.  High pressure sodium and metal halide lights 400 watts and over may need to be plugged into a lighting controller that is wired to the house electricity or plugged into the dryer socket.   If you are doing wiring to the main circuit box make sure to shut the power down and have a clear plan of what you are doing.

2.  Keep outlets, surge protectors, timers, light controllers, ballasts, and all electronic components off the floor.  Make sure electronic components are out of reach of sprayers, drip hoses, and any reservoir that could crack or spill.  Plan for the worst!  Keep your electronic components away from the water!

3. Line the room or box with a water proof floor and walls so if something does break or water is spilled it doesn’t ruin the floor or create mold.  If the liner is something like mylar or black and white poly it will be very easy to clean up the water.  Even if you think you have a really tight hydroponic system that will never leak or spill, you are probably wrong.  At some point in time through filling up multiple reservoirs and changing nutrients you will most likely spill something on the floor.  It is much better to already have water proofing there to prevent a mess and mold possibility and its easier to clean up.

4. Turn off fans open or caged fans that you are working by.  I’ve cut my fingers on computer fans in my mini veg box and clipped my ear in one trying to pull a bulb out from deep in the box.

5. Wear gloves – Wearing gloves can protect you and your plants from stress.  Human hands constantly rubbing on your plants is not good.  It may not show negative effects, but it will unlikely show any positive effects.  We want our plants in the best condition possible all the time.  The gloves will also protect you from sprays or bugs on the plant and the possibility of an allergic reaction.

Safe growing!

GUIDE: Building a Simple Drain Table – Part 2

This is part 2 of the DIY Drain Table Guide. Look at part one here.

Okay after you have the right size tub and trays for your set up you can get started.  The size you get depends on your needs but I recommend getting a really sturdy bottom tub(drain off tub where waste goes).  The tub should be able to withstand the pressure of water with out bowing out enough to make your trays fall and CERTAINLY without cracking or breaking.

If a water container you have in one of your hydroponics systems is too weak to withstand the pressure of water constantly pushing on it could crack or break and leak the potential GALLONS of water all over your room and whatever electronics you may have on your floor(Even though all indoor gardeners should be making sure all of their electrical parts are placed on the wall or above where water could potentially spill or spray on them RIGHT?)

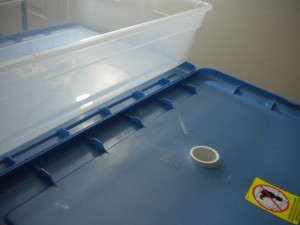
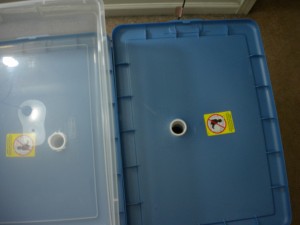
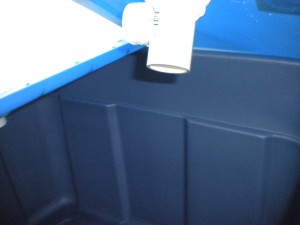
You’ll want to use a drill to drill holes 1 or 2 inches wide in the lids of the containers.  Position the hole so that they will drain into the tub the lids will be sitting on.  Refer to the pictures below.

Notice there is a two inch hole drilled into the lid of the container with a two inch diameter PVC joint connector put through it as a drain hole.

Hole from above
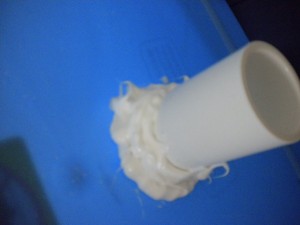
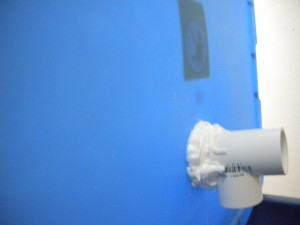
Sealing the drain so water is FORCED through PVC.
To seal the PVC elbow drains in place you can get water proof silicone or a type of strong water proof caulking and apply it with a caulking gun.

Let the sealant set long enough that its not loose – this could take up to 24 hours so BE PATIENT.  Better things come to those who wait. Once the bond is tight you will be able to sit your trays on top of the lids and the drain wont fall off under the pressure of your plants plus extra water.  

Position your tray on top of the lid like you will have it in your final set up.  You want to put a hole in the space where the PVC hole is so the water from the tray drains out of the hole and through the PVC drain down into the bottom tub/reservoir.

This is pretty much what you’ll have at the end – You can drill holes where the white circles are to drain the clear tray.

A drill should work fine if you are careful not to crack the plastic.  It shouldn’t be a problem either way considering you should be using containers sturdy enough to hold a lot of weight over long periods of time.  If one of your containers break your plants could end up submerged in their own dirty waste water.  You want to plan and account for things like this in the planning of your hydroponic set ups to ensure safety of equipment, plants, and most importantly you and your house.  

Another way to put holes in the plastic trays is to burn a hole.  BE VERY CAREFUL WITH THE FIRE! I heated up a glass rod with a camp fire starting torch – one similar to what you use to start a grill.  Once the rod was glowing orange I pushed it through where the PVC drains were to make a perfect hole.  

Good luck in your constructions and please comment or contact me with any questions.

A Quick HYDROduction to Hydroponics

For the people who are new to hydroponics or are just looking to learn about what it is, this video will explain some of the different hydroponic possibilities.  By NO means are these methods the ONLY hydroponic methods.  There are virtually limitless possibilities with home made hydroponic systems. The narrator of this video is a little lacking but the ideas are presented quickly and simply for people looking for an introduction to hydroponic setups.