Germination Techniques Video

Guest Post by: Mister H. of Frugal Hydroponics

After getting several germination questions I decided to create a quick video on some techniques and tips I have learned over time. It is important to point out that nature makes germination a simple process. A warming ground, increasing light, available moisture, and a medium to allow roots to expand and anchor the plant all combine to set the seed in motion to create a new plant.

With that being said, there is no “best” method, but the simple basics will almost always allow success. I present a method and a few products that economically fit my goals and current growing systems. I will “up-pot” the starts destined for outdoors soil in coir as it is sterile and will do well in soil. Those will be germinated in peat pellets or under paper towels. All plants going into hydroponic systems (indoors or outdoors) will be germinated under paper towels or in rockwool. They will then be”up-potted” into silica stone grow media.

The methods I outline allow me to “up-pot” into both soil based raised
beds and containers or hydro media with a consistent method and products (peat pellets / rockwool) while using a common lighting system and 1020 trays. My goal of a completely “soiless” environment in my basement start and hydroponic grow room is achieved.

I also posted this under the youtube channel “Misterhalfwaythere1” along with the rest of the hydroponic growing videos at the Mister Halfway Youtube Channel Don’t forget to subscribe!

About Mister H: I journal my hydroponic growing endeavor in my blog at Frugal Hydroponics. After prompting from friends and family and seeing a need to better record my results, the blog has proven a great platform for videos and photos of my progress, techniques, and of course results. Hydroponics is highly efficient and a great complement to our soil-based containers and raised beds.
Spring Garden Planning: When to Start Seeds

Are you preparing for your Spring Garden?  Do you know when to start your seeds or is that why you’re here?  Its a common question/anticipation between gardeners everywhere.  When should I start my seeds?

You can closely watch your weather forecasts and plan the frost dates of your zone, but it takes a lot of time.  Time that a lot of you don’t have.  I’ve found an easy solution to the age old Spring Garden planning dilemma.

Do you want to know what it is?  GrowVeg.com

What is GrowVeg.com?

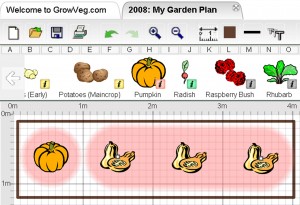
GrowVeg.com is a Garden Planning service.  You sign up for an account(Free 30 Day Trial) and plan out your garden.  You can choose the type of plants you are growing and set up automatic reminders for yourself.

Garden Plan
GrowVeg.com Client Area

Why Should You Care?

You can plan out the varieties of plants you want so you don’t forget any.  GrowVeg also allows you to setup automatic reminders, so you can plant varieties on the exact days you want.  GrowVeg will adapt to your zone and tell you when to plant your seeds.  You will get a reminder saying when its time to start seeds.

GrowVeg also remembers your garden for next year.  You won’t have to replan your garden.  When Spring time comes around, planning your garden will be a piece of cake.

What are you waiting for?  Give it a shot for Free here.

GUIDE: Build a Super Cheap Bubbleponic Cloner

Stronger Clones Start Here

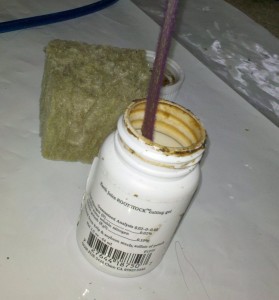
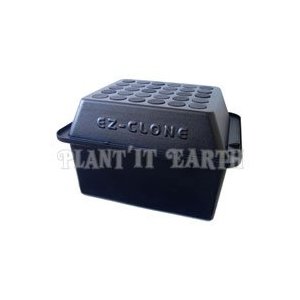
Bubbleponic cloning systems are an easy to build solution to weak and limpy clones.  The entire system will not cost you very much.  If you use neorepene discs, like the E-Z Clone uses,  you will have an efficient cloning system that uses no growth medium.  The aeroponic cloner you will have after this guide can root clones in as little as 7  days with an organic rooting gel like Earth Juice Earthstock.  There are plenty of other types of rooting gels and powders.  Clonex and Olivia’s are two other gels that work well.

Example

Aeroponic Cloner
Check out this Pre-Assembled Aeroponic Cloning System

Supply List

-Storage Tote

-Neorepene EZ Clone Discs

-Air Pump

-Air Tubing

-Air Stones

-Power Drill w/ drill bit that is the same size as your discs.

Light Proof Your Tote

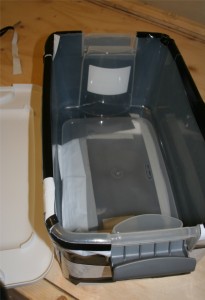
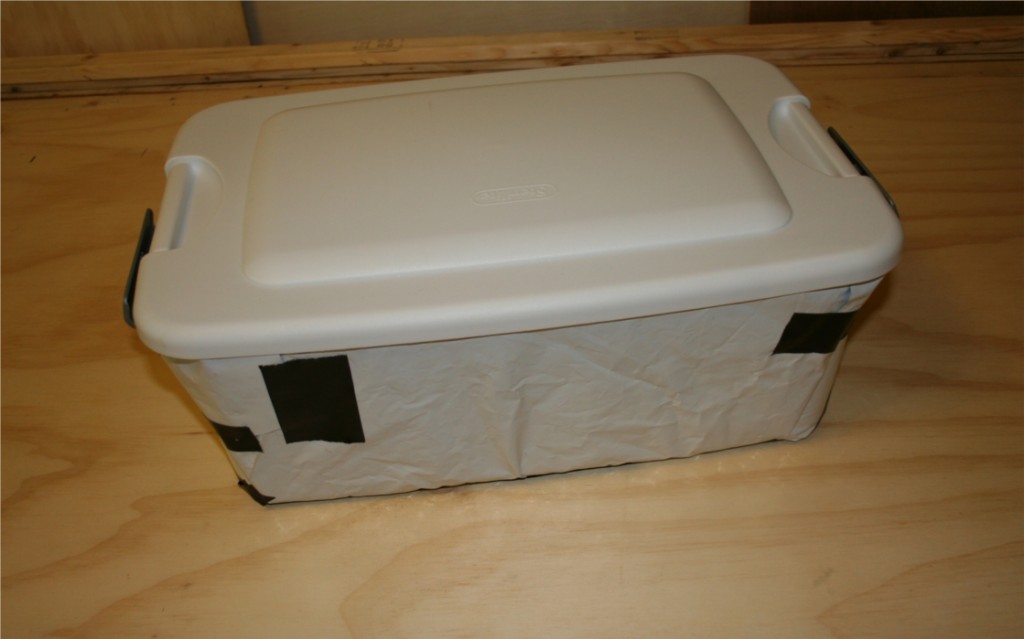
Future ReservoirIf you bought a light proof tote, you can skip this step.  If it is clear or semi clear you need to wrap it in a reflective material.  You can use Christmas wrapping paper if you do not have access to something else.  You just want to make sure no light comes in through the walls of your tote.  The storage tote will be the water reservoir for your cloning system.

Use HDPE Food Grade plastics for your storage tote if you plan on cloning consumable plants like fruits or veggies.  Food grade plastics ensure the safety of you and your family.  If the cloning system is only for flowers, there is no risk since you will not ingest the chemicals.

Continue reading “GUIDE: Build a Super Cheap Bubbleponic Cloner”

GUIDE:How to Successfully Take Plant Cuttings From a Mother Plant

The key to keeping mother plants small lies in taking strong cuttings.  Strong cuttings will root fast and grow into large plants of higher quality.  Weak clones are susceptible to disease and bug infestation.  Cloning is very rough on the mother and fresh cutting.  Avoid taking too many clones from one mother plant in one day.  When mother plants lose a lot of their vegetative growth, they can become weak.  A weak mother plant can only provide weak clones(a problem you are already trying to avoid).

Follow these step by step instructions to ensure you have a successful cloning system.

The mother plant could produce 4 or 5 fresh cuttings at this point.

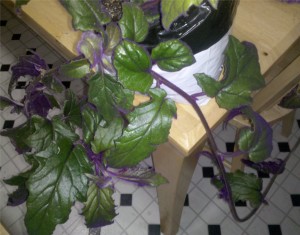
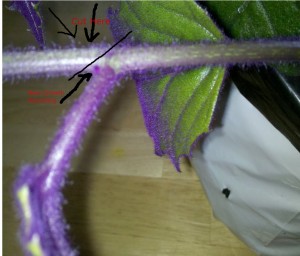
First identify the best part of the plant to clone.  This can vary a little depending on the type of plant.  For the most part you want to have a long enough stem to fit through your growth medium.  Use a razor blade or trimmers to cut a clone at a 45 degree angle.  Cut at a node where another branch will grow out.  The old stem will appear to split into two new stems.  Those two stems can turn into two strong clones or one very strong clone.  You have the power to decide.

Plant propagation
The line is exactly where you should cut your clone. Below the line the new growth is sprouting out.

Once you have cut the clone from the main stem, you want to cut off any large leaves because they will drain the cutting of its moisture.  Do not fear, the leaves will grow back.  The bottom 6-8 inches of the steam should be completely clear of leaves.

Dip the end of the stem in your favorite Cloning Gel. I prefer Earth Juice for organic applications and Clonex for flower types.

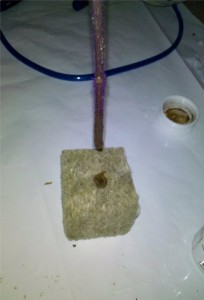
Next put the cutting into its own growth medium to be put into your cloning system.  The growth medium could be a rockwool cube, a net pot of hydroton, or a neorepene disc.  After a few hours if you notice your clones are sagging or wilting, gently mist them with plain water.  DO NOT OVER DO IT. You want the plant to feel the need to grow roots to find water and nutrients.  Good Luck Gardeners!  Feel free to leave comments below if you have any questions.

Homemade Humidity Dome

Humidity is an important factor in many plant propagation systems.  Some cloning systems come with humidity domes.  A humidity dome is a small imitation of a green house.  The humidity dome keeps the humidity high in the area it covers.  To keep your humidity dome working properly, spray fine mists on the walls of the dome.  You can also use digital timers and water pumps to automate sprinklers to spray the mists for you.

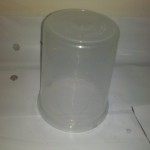
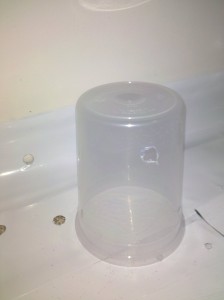
You can create single plant or large humidity domes at home.  I used a Chinese food carryout container to make an extra humidity dome.

Food Grade Plastic
A food grade plastic container recycled into a useful humidity dome.
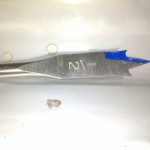
Use a small drill bit to drill an air hole in your humidity dome.

Use a drill to put a small hole in the container. The hole will let the container get a little air flow while keeping the humidity up. The small hole will also help to prevent the temperature from rising in your humidity dome.  Mist the sides of the container with small water drops.  Put the container over your plant or clone to put it in a high humidity environment.  Fresh cuttings like to be in an environment with 90-100% humidity.  Some thermometers have humidity measurements on them.  A humidity thermometer is called a humidity hygrometer.  Technically humidity meter is incorrect for the situation you will be using the tool.  Use home made humidity domes from house hold items to stay economical and green!

Finished Homemade Humidity Dome
This is the final product. Mist the walls of the humidity dome to create a wet environment with a high humidity.

7 Tips to Keep Your Mother Plants Healthy

Mother plants are essential for maintaining a continual propagation system.  A strong mother plant is the first step to taking perfect cuttings.  Weak cuttings turn into slow and sometimes weak plants.  A weak clone is very susceptible to pest and disease problems.  The plant is already under going immense stress and an unnoticed infestation can kill it.  Here are 7 tips to keep your mother plants healthy and inevitably take stronger cuttings.

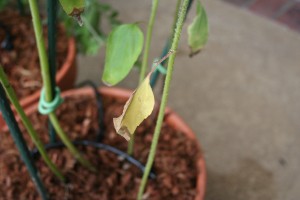
1. Trim off yellowing, brown, dried, wilted, and dead leaves – Dying leaves are a great place for bugs to hang out.  Your mother plant may be wasting energy trying to save dying leaves.  Cut your losses and focus the new growth.

Trim dying leaves as a method of pest and disease control
Cut leaves like the yellow ones off. The leaf that is mostly green and brown and the tip is worth keeping on the plant. Trim the brown part and the plant will still utilize the leaf for energy.

2. Use small amounts of nutrients – Salt lock up and over-fertilization are the last thing you want for your beautiful mother plant.

3. Try Mother Plant nutrient formula – I have personally not tried this bio-organic formula, but I have heard it works pretty well.  There seems to be a lot of buzz about it in the indoor gardening magazines.

4. Use a big container if you plan to take many clones from a large mother plant – Roots are a vital part of healthy vigorous growth.  A dense root zone will allow your mother to recover from cuttings quicker.  Bigger roots means bigger plants.

5. Water frequently – Use a drip system or hydroponic method to ensure your mother plant gets as much water as it needs.

6. Do not cut more than 20% of the healthy foliage at a time.  Taking too many cuttings at a time can stress your mother plant.  The plant should recover, but it may actually slow down growth because of the amount of energy it takes to recover.  The plant needs leaves to catch sunlight for photosynthesis.

7. Watch Closely for bugs and pests – Use a magnifying glass to check your plants!  You never know what you may find.  Any small pest infestation on your plant will transfer to your clones and potentially your whole cloning system.  If it makes to the next stage before you notice you may be dealing with a major infestation later on.  Preventative pest control is the best pest control.

BONUS TIP: Do not keep mother plants with a disease or genetic disorder.  It sounds prejudice, but they aren’t people.  Diseased mothers can pass the disease on to the clones.  The disease may not strike the plant until late in it’s lifetime.  By this time it is too late and you have already wasted your resources.  Not Hydroponic Economical… Keep the green thumbs up!

It Starts with Good Genetics

Have you ever started a batch of seeds and had a really top notch plant that just seemed better than the rest?  Have you ever been to a friend’s place and seen an interesting plant you would like to add to your collection?  It is actually relatively simple to do these things without going out and buying another version of the same plant.  When a cutting is taken from a ‘mother plant’ and dipped in rooting hormone, roots will form and it will become a new plant.  The new plant will be exactly like the old one in every way.  That is the reason you hear people talking about cloning plants.  There is no top secret cloning machine that pops out perfect plants ready to flower every time.  Although. . . that would be nice… but that takes the method out of proper clone taking practices.

If you get a seedling that is just plain better than the others or is one you would like to keep for your next crop, keep it around.  Once its established you can cuttings from strong stems to become healthy new plants.  There is sacrifice when you give up your best plant, but it more than pays its self back.  Your next harvest could be a set of clones from your strong mother plant.  That means every plant will be as strong as the strongest one on your second round and however long you keep the mother thriving.  You can take clones of clones for up to 20 generations.  There are limitless ways to keep genetics around.  Sometimes after so many cuttings are taken, the plant may become weaker and grow slower than it originally was.  That means its time to get out the seed starting kit and look for a new mother.

Hydroponic Cloning Tips

If you have wilting clones there could be a number of issues with your hydroponic cloning method.  Make sure to have a thermometer to measure temperature and humidity accurately throughout the day.  You can find digital ones at a department stores or hydro shops that will tell you the current and high/low temps and humidity throughout the day.  The digital ones aren’t expensive in comparison to the knowledge you’ll have.  If you are using a metal halide or other high powered lighting system, the clones must be a few feet away so they receive minimal light.  If they get too much light they will try to work too hard with roots they don’t have.

If the temperature is getting to be in the 80’s F move the lights up more or add a circulation fan on a timer so the humidity stays high.  Having a fan on for an hour at a time 2 or 3 times a day will really help to move the hot air.  Try to use cool burning bulbs like fluorescent tubes so your temperature will stay down.  A high humidity of 90% or higher will help your fresh cuttings more than anything else.  Spray the walls of a clear container with water and put it over your cloning system.  You can also attach spray emitters to a small water pump to spray water automatically for the first few days to ensure success rate.  The humidity needs to be high so the leaves of the cutting can absorb water from the air because it does not have any roots to do that job yet.  It may need a small hole or two for air flow so the temperature stays low and the cuttings have access to as much oxygen as they need.

Use an aeroponic or deep water culture method with aerated water to keep the roots or stems in a 100% humidity environment until they are established for transplant.  You can find cloning systems at your local hydroponics store, online, or even build your own!  Hardware stores and hydroponic shops should have pretty much everything you need to build your own.

Humidity is an Overlooked Factor in Cloning Systems

From my experience and what I’ve been reading on hydroponic forums, people all around are having faster cloning rates using a humidity dome. Humidity domes come in many forms. A simple dome is a clear plastic structure with just a few holes for oxygen exchange. The structure sits so that it is covering all the plants without smashing them. Spraying a fine mist along the walls of the dome will help boost the humidity. The more plants per sq. inch of space will also increase the humidity, but having clones packed in too tightly could cause them to fight for light, air, and moisture. The struggle may cause unnecessary stress instead of beneficial humidity. Make sure to keep an eye on the temperature when the humidity dome is on. It may lock in heat in its enclosed structure. Simply remove the dome for a few hours so the temperature can lower and fresh oxygen can be swept to the leaves. This is a good time to re-mist the dome so the humidity is high when you put it back into action.