GUIDE: Installing an Air Pump in a Hydroponic System

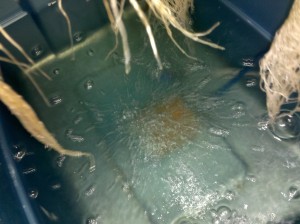
Notice all the bubbles being created, it is hard to see, but there are actually multiple air stones in the reservoir. These plants are thriving in this system.

Virtually all hydroponic and aquaponic systems will require an air pump of some type.  The nutrient reservoir must be oxygenated to maintain maximum efficiency.  If you do not want perfect plants what are you doing here?

Setting up an air pump in your nutrient reservoir is really simple.  I’ll outline the steps below.

1. Figure out the length of air tubing you need for the air stones to sit in the reservoir where you want them.  Leave a little extra tubing- you don’t want too much because air loses power over distance.

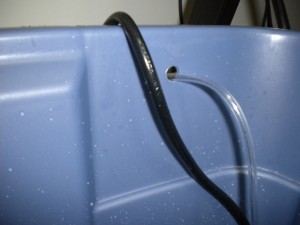
2. Put a hole through the side of your reservoir if you want your lid to seal.  Put the hole close to the top where water won’t spill out.  The hole is where the air tubing goes through.

3.  Put your air tubing through the hole you made before connecting the air pump or air stone.

4. Connect any T connectors you plan on using.  T connectors connect two air lines together to aerate two separate stones.  One large air pump can aerate many air stones in one reservoir or provide all the oxygen to many reservoirs.  I use small air pumps for each reservoir so all my eggs aren’t in one basket.  If one air pump aerates all the reservoirs and it malfunctions, all your reservoirs are donezo!
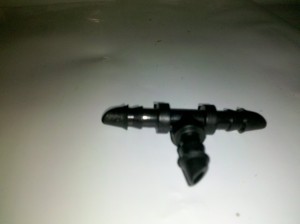
T connectors are used to bridge multiple air lines to the main air line.

5. Cut your air line before it meets each air stone to put in check valves.  Check valves ensure you air pump does not siphon water in the event of power loss.  Siphoned water into your air pump means a broken air pump.
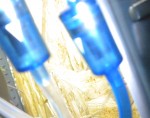
Check Valves
Check Valves prevent water from being siphoned to your air pump.

6. Connect your air lines to your air stones and place them where you want them.  I like heavier air stones that stay in place at the bottom of the reservoir.  If you have multiple air stones, spread them out so your entire reservoir is oxygenated.

7.. Now is good time to hang your air pump if you plan to do so.  Air pumps can be noisy and sometimes give off a loud vibration that gets really annoying.  A hanging air pump should be a quiet air pump.

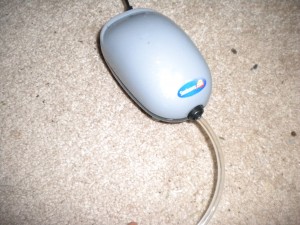
8. Connect the other end of your air tubing to the little connector coming out of the air pump. (shown below)

9.  Plug in you air pump and oxygenate that reservoir!.
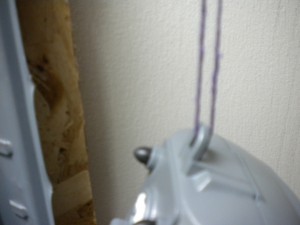
Hanging Air Pump
Hanging air pumps reduce noise by eliminating loud vibrations.
Sunleaves Durapump Air
Air pump connected to 1/4inch air tubing oxygenating a large nutrient reservoir.

Introduction to Drip Systems

Drip systems are an extremely important component to any top level gardener using soil or top feed systems.    Drip systems can be used outdoors to irrigate small or large gardens and lawns.  They are a great investment for indoor gardeners because it takes the manual labor out of watering and feeding.  It also benefits your plants by ensuring they receive water every day in proper amounts.  The extra time will allow you to create a bigger garden or simply spend less time with your garden for the same benefits.  Indoor gardens must consider the gardener and the plants needs because the relationship is dependent on each other.  If someone feels they are spending too much time in the garden for little reward they may be discouraged and give up the greener lifestyle.

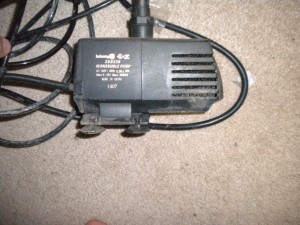
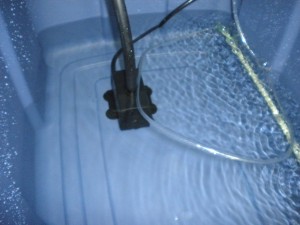
Submersible pumps like this one have rubber suction feet to stick to the bottom of your water or nutrient reservoir

I’ll start by explaining the heart of the drip system.  The most expensive part of your drip system is the water pump.  There are submersible and non-submersible water pumps.  Small gardens and reservoirs will usually use a submersible pump.  If you are setting up your first drip system a small submersible pump should be enough.  Water pumps in the US are rated by Gallons Per Hour(GPH).  The GPH rating of your water pump will come into play when you are deciding what size water pump you will need.  I’ll explain how to calculate the necessary GPH for your drip system in a later article.

The thick blue storage tote is the container or reservoir for the water.

Creativity might be handy when deciding what to use for a water reservoir.  If you are at all concerned about your health, and you most likely are if you have decided to grow your own food, you should try to stick to food grade plastics for all the parts in your garden setup.  You can buy reservoirs at hydroponic shops, but they can have a high ticket.  It is easy to find something around the house or at local department stores to use as a reservoir.  You can also go to US Plastics to order food grade plastic.  A bigger reservoir can mean a longer span in between reservoir changes and topping off with water to compensate for evaporation.  I always get reservoirs with lids or make my own.  Lids will help to prevent algae from growing in your water.  It can also keep pests and other contaminates out of your solution.

The next important piece of the drip system is the air pump.  The air pump brings fresh oxygen from the room through an air tube and out of a submerged air stone.  The air stone will help to keep the reservoir full of oxygen.  The water will bubble and agitate the water so it does not become stagnant.

Drill a hole through the reservoir wall towards the top so you can put tubes and cords through it.

If you are making a home made drip system, you will need 1/2″ tubing for the water to transfer from your submersible pump through the drip lines.  Use a hole puncher made for drip lines to poke perfect holes in the 1/2″ tubing.  The holes are for connectors to be put in to make bridges between 1/2″ tubing and 1/4″ tubing.  Most drippers connect to 1/4″ tubing.  The great thing about homemade drip systems is you can customize them to your hydroponic setup.  No matter what type of garden you have, a drip system should be your next upgrade.  If you already have a drip system than be sure to watch for the upcoming articles about building bigger and more advanced drip and top feed systems.

The air pump delivers fresh oxygen via air tubing to the water or nutrient reservoir

You can get all sorts of connectors to for the tubing so anything is possible.  When the 1/4″ tubing is secured to the connectors attached to your 1/2″ tubing you are ready to add drip emitters, drip lines, or sprayers.  Whatever you choose as your water delivery method, make sure there is somewhere for it to drain off.  In recirculating systems the run off goes back into the water reservoir to be used again.  It’s more economical this way for water and nutrients if you are using them.  The other option is a run to waste option.  I have also put a guide up for building a simple run off table.  Its a very simple design that anyone can build.  Homemade hydroponics can be easy with the right knowledge and the right set of tools.  Refer to the pictures below for more details and if you would like to know more about drip hydroponics check back in the next few weeks to get some in depth knowledge.  Sign up for the RSS to get the articles sent to your favorite feed reader or email address!

Inline drippers have 1/4" tubing on both ends so the drip line can continue running to the final destination. The Red dripper will drop 1/2 gallon of water per hour into the medium while the pump is on.

The open ended 1/4″ tubing will deliver the most water per hour, but small pumps have a hard time holding a steady stream for multiple 1/4″ tubes. Distance also slows down the performance of the pump
Stakes are used to hold the drip lines in place. Make sure the medium is secure around the stakes. Try not to damage roots when placing stakes in growing medium.