Mother Nature has Wind, You Should Too

Fans are not just for cooling your high powered grow lights and ballasts.  I use fans in every grow space to create wind.  Wind will help to move the air around in your room so it does not stagnate and get used up.  Plant leaves like oxygen and breathe like we do.  They need a constant supply of fresh oxygen to be used at any given time.  If your air never moves, your plants are losing all the extra oxygen they could be pulling from fresh air.  An exhaust duct with a strong inline fan will move some air from negative pressure, but it is no where near what the plants are used to from Mother Nature.

Take a look out your window.  If there are trees around you, see if their branches are blowing in the wind.  Think about how brutally bent you’ve seen some trees and plants after a storm.  If the plant is not uprooted or snapped, it seems to recover from the storm.  You do not want to create a wind tunnel that has your plants curving to the ground, but a nice breeze is a good idea.  The best thing about indoor gardening is you become Mother Nature.  That means you choose the time and strength of the wind.

I use desk fans of various sizes to control air circulation in my indoor garden.  I look for fans with various speeds that can be easily hung in the space I need.  Letting the fans sit on the ground causes loud vibrations that get annoying after a few hours.  I suggest hanging inline fans as well for the same reason.  High power inline fans can get extremely loud if not hung.You can decide the location of the fans inside your grow room.  I like to position at least one towards the center of the light so the hot air is pushed where the exhaust fan can pull it out.  Another good place for a circulation fan is close to the intake fan.  The circulation fan will move the colder fresh air where it can be used by all your plants.  Check your plants needs to make sure this won’t make your medium too dry or too cold.  Sometimes having a warm ballast in the room is needed for heat depending on your complete cooling system.

Wind will make your plants tough and force them to thicken their stems.  Thicker stems can be beneficial for supporting a plant’s weight and ensuring the proper amount of nutrients and water to each stem.  If your plants never experience wind they may be limp or droopy.  If you do not introduce a plant to wind early, it may develop too thin and weak.  A plant that is weak will suffer stress when it is first introduced to heavy winds.  It should eventually adjust and strengthen its stem, but you may be diminishing your yield from a lack of planning.  Starting seeds inside that will be transplanted outside need to be hardened off.  You must gradually expose them to more light and wind until they can handle the harsh outdoors.  You may have two fans of different strengths placed in two different spaces in your grow room on two different time settings.  Having this much variation would vary the speed, and direction of the wind throughout the day.  That type of air circulation is closer to the real experience for the plants.
Choose Forgiving Nutrients in a New Hydroponic System

When you buy a new hydroponic system or build your own, you have to be careful and observant the first time you use it.  Since you are not familiar with how your plants will grow in your new system you have to be extra careful to make sure you do not push them too hard.  Many things come into play when trying to figure out how much to feed your plants.  The first season you have with your system will most likely be the worst one.  Once you get a feel for your system you realize where you can make adjustments.  The next season will be much better because you already know what to expect.  Nutrient burns and salt lock ups are very common mistakes made by new indoor gardeners trying to push their plants too hard before finding out what they are actually using.  In my opinion, it is safer to diminish your overall harvest weight for the sake of quality.  If you cut back on the feeding regimen before there is salt lock up or over fertilization, you will end up with a better quality food product.

You should always stay on the light side of a nutrient solution when using a hydroponic system for the first time.  To dilute your solution you just add plain water.  Use hydroponic fertilizers that are water soluble so the nutrients will soak into the water in your reservoir.  When oxygen is being delivered to the reservoir you will get much better results with your nutrients.  The aerated nutrient delivery is a much more efficient way to feed plants over traditional watering practices.  Usually OMRI listed nutrients are safer and more forgiving.  If you have questions about a specific bottle just ask the person working at the hydroponics shop.  They will be more than happy to show you which nutrients are more forgiving.  I suggest using only half what the bottle recommends for the first run.  When you start to see signs of over fertilization you know your solution is too strong.  If your plants are showing signs of nutrient deficiencies you may need to strengthen your nutrient solution. PH and Electrical Conductivity (EC) meters can help keep you in the safe range, but they are not always necessary if you can’t afford them.  Of course there is much much more to nutrient solutions, but it cannot be covered in one post.  These guidelines will help you stay out of trouble and keep your plants healthy until you fully understand YOUR hydroponic system.

Using Analog and Digital Timers to Automate Your Garden

  
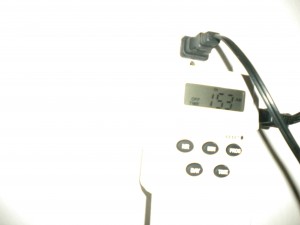
This 24 hour timer allows you to set the digital time and has 6 different on/off settings. You can also choose what days for the timer to run. This is useful if you are going on vacation for 2 weeks and you are still feeding your garden regularly with a dry day at the end of the week for the soil to dry out and expand root growth. The dry period will reduce the risk of over-saturation problems.

Electronic timers have a variety of uses in the grow room.  I use relatively cheap timers from a department store, but the turnover rate is rather high.  If you plan on leaving your system running for a few days without checking it, you may want to invest in the high end timers to ensure they will not die or malfunction on you.  The cheap timers come with a battery backup so the time is not lost in case there is a power outage.  That does not mean that the device plugged in to the timer will still run at its designated time.  There will not be enough power for that.  All the battery does is ensure the device plugged into the timer still comes on at the right time given the power comes back on.

SAFETY TIP: Keep electronic components, surge protectors, timers, extension cords, and all devices with a plug off the ground of the grow space.  Hang them high on the wall where they will not possibly be sprayed.  Also make sure they are not in the path of ANY potential flood. You can also make a waterproof box for your electronic components. DO NOT OVERLOOK THIS STEP!!  IT COULD SAVE YOUR LIFE AND YOUR HOUSE!

Digital Timers are useful for things like air circulation, water pumps, and sometimes air pumps if you need your aeration cycled.  If you are trying to manually control temperature and wind a timer will come in handy.  It will allow to set precise on/off timings for your fans.  Make sure to check the timer you buy to make sure it has what you need.  Some do not have the 3 prong connection and can only use smaller 2 prong cords.

SAFETY TIP: I know what you are thinking, “I’ll just get a plug converter to make the larger size fit.”  DO NOT OVERLOAD SURGE PROTECTORS, TIMERS, OR OUTLETS.  Do not attempt to give a circuit something it is not rated for.  Using the right size electrical components is a good and SAFE habit to get into from the start.  Losing your house to an electrical fire while you were gone is not worth saving a few dollars on a timer or extension cord.

Most people will use digital timers to control their water pump.  The timer will tell the pump when to run so you can control your watering and feeding schedule without being there.  You can set any type of schedule you want with timers.  You will have full control without ever being present.  Many cloning systems need timers to have a mister or fogger automatically raise the humidity every day.  Digital timers can also be used for lighting systems to precisely control the light cycles.

Analog timers can be used when you need many intervals of on/off cycles.  Things like aeroponic and bubbleponic cloners might use something like this.  These timers also work fine for lighting systems.  Just push down the pins or put the on/off pins on the times you need.  Pay attention to the timers clock and the order of times.  Not all analog timers have the times in the order they would happen.


Reaching Top Level Gardening

The only way to be the best gardener possible, is to try to be the best possible.  If you only put forth a little effort, you will only get a little return.  In this case, your return is your harvest.  Even when you give it 100% and make your garden your first priority, you won’t be 100% successful all the time.  Do not be discouraged!  There is hope for gardeners of all skill levels.  Gardeners can start to grow in the direction of perfection by aiming for perfection.  Aim for maximum yields and healthy plants and you will be rewarded.

Moral of the Story:  It’s easy to keep a plant alive, but nearly impossible to grow one perfectly.

The idea for this post was inspired by Darren Rowse at ProBlogger.

AzaMax: Hydroponic Solutions for Pest Control

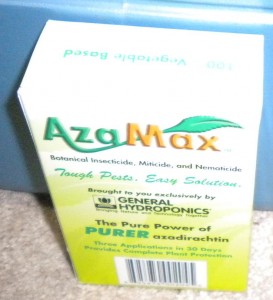
AzaMax by General Hydroponics has a lot of different uses and applications.  Today I will be focusing on the reservoir applications for recirculating and run to waste type systems. The amount of AzaMax to use depends on the size of your hydroponic system and type of infestation you are dealing with.  For a minor to severe spider mite infestation, only the weaker end of the product recommendations are required to eliminate the problem without over affecting crop quality.  Believe me, I’ve seen a few different pest control options, a lot of the products do work like they say, however you may have to live with the slight taste of bug spray on your prized fruits and veggies.  AzaMax is one of the few hydroponic solutions that is safe for the reservoir and can be mixed right in with the nutrient solution.  When the plant absorbs the solution this way, it pest proofs the plant from the inside out.  The inside out method is useful because the solution can be applied at any time without getting residue on fruits or veggies close to consumption.  It also ensures there will be no light burn on the leaves from the water magnifying the light.

Be warned – The AzaMax solution may change the color of your water a bit to a more milky color.  This is natural and also happens when you mix it with water for foliar applications.  Since AzaMax has the nice little measurement cup added to the bottle you can squeeze up the same amount or a semi precise amount without busting out the glassware.  For my reservoir applications I try about 5 ML of AzaMax for every 5 or so gallons of water.  That is about 1 Ml per gallon of water which is about .034 fl oz.  The solution I use ranks below the lowest end of the spectrum according to AzaMax’s chart that comes with the bottle.  Remember, those tables are guides and your application may vary from what others use.  The solution I mention is what I use as my preventative measure!  If you notice pests for weeks after your initial application, try adding more AzaMax on your next reservoir change.

Get General Hydroponics AzaMax at Amazon today to protect your indoor garden investment. You can also read customer reviews here.

Stay tuned on pest control with HPE – I’ll be posting more articles about AzaMax and its many uses in the future.  I’ll also be posting some good home made natural pest remedies soon.  If you have any comments or questions about AzaMax feel free to email me or reply with a comment below.  Stay Green!

It Starts with Good Genetics

Have you ever started a batch of seeds and had a really top notch plant that just seemed better than the rest?  Have you ever been to a friend’s place and seen an interesting plant you would like to add to your collection?  It is actually relatively simple to do these things without going out and buying another version of the same plant.  When a cutting is taken from a ‘mother plant’ and dipped in rooting hormone, roots will form and it will become a new plant.  The new plant will be exactly like the old one in every way.  That is the reason you hear people talking about cloning plants.  There is no top secret cloning machine that pops out perfect plants ready to flower every time.  Although. . . that would be nice… but that takes the method out of proper clone taking practices.

If you get a seedling that is just plain better than the others or is one you would like to keep for your next crop, keep it around.  Once its established you can cuttings from strong stems to become healthy new plants.  There is sacrifice when you give up your best plant, but it more than pays its self back.  Your next harvest could be a set of clones from your strong mother plant.  That means every plant will be as strong as the strongest one on your second round and however long you keep the mother thriving.  You can take clones of clones for up to 20 generations.  There are limitless ways to keep genetics around.  Sometimes after so many cuttings are taken, the plant may become weaker and grow slower than it originally was.  That means its time to get out the seed starting kit and look for a new mother.

Hydroponic Cloning Tips

If you have wilting clones there could be a number of issues with your hydroponic cloning method.  Make sure to have a thermometer to measure temperature and humidity accurately throughout the day.  You can find digital ones at a department stores or hydro shops that will tell you the current and high/low temps and humidity throughout the day.  The digital ones aren’t expensive in comparison to the knowledge you’ll have.  If you are using a metal halide or other high powered lighting system, the clones must be a few feet away so they receive minimal light.  If they get too much light they will try to work too hard with roots they don’t have.

If the temperature is getting to be in the 80’s F move the lights up more or add a circulation fan on a timer so the humidity stays high.  Having a fan on for an hour at a time 2 or 3 times a day will really help to move the hot air.  Try to use cool burning bulbs like fluorescent tubes so your temperature will stay down.  A high humidity of 90% or higher will help your fresh cuttings more than anything else.  Spray the walls of a clear container with water and put it over your cloning system.  You can also attach spray emitters to a small water pump to spray water automatically for the first few days to ensure success rate.  The humidity needs to be high so the leaves of the cutting can absorb water from the air because it does not have any roots to do that job yet.  It may need a small hole or two for air flow so the temperature stays low and the cuttings have access to as much oxygen as they need.

Use an aeroponic or deep water culture method with aerated water to keep the roots or stems in a 100% humidity environment until they are established for transplant.  You can find cloning systems at your local hydroponics store, online, or even build your own!  Hardware stores and hydroponic shops should have pretty much everything you need to build your own.

Reminder – Keep the Grow Space Clean

No matter what plant you are growing or where it is, cleaner conditions can help you and your plants. Here is a list of some quick tips for a clean growing environment.

1. Wash your hands before and after each session with the plants. Wear gloves when handling the plants.

2. Keep special clothes and shoes to wear in your grow area. Keeping outside contaminates away from the grow space can save you the worry of pollen being on your clothes, it could keep out potential pests, and it will reduce the amount of germs brought into the space.

3. Sterilize your equipment including scissors when ever you can.

4. Wash out old containers or throw them away. If you let them sit they could grow mold or mildew and this could become a problem if it goes unnoticed.

5. Vacuum or sweep any medium or soil on the floor so pests can’t make nests in places you aren’t even growing plants.

Plants get enough stress the way it is. If you make sure to reduce as much stress as you can your plants will thrive. These simple cleaning tips will keep your grow space clean and your plants happy!

Humidity is an Overlooked Factor in Cloning Systems

From my experience and what I’ve been reading on hydroponic forums, people all around are having faster cloning rates using a humidity dome. Humidity domes come in many forms. A simple dome is a clear plastic structure with just a few holes for oxygen exchange. The structure sits so that it is covering all the plants without smashing them. Spraying a fine mist along the walls of the dome will help boost the humidity. The more plants per sq. inch of space will also increase the humidity, but having clones packed in too tightly could cause them to fight for light, air, and moisture. The struggle may cause unnecessary stress instead of beneficial humidity. Make sure to keep an eye on the temperature when the humidity dome is on. It may lock in heat in its enclosed structure. Simply remove the dome for a few hours so the temperature can lower and fresh oxygen can be swept to the leaves. This is a good time to re-mist the dome so the humidity is high when you put it back into action.

Soil-less Growing – Happy Medium

Soil-less growing is the alternative to growing in soil or hydroponics.  Some soil-less grow systems could be considered hydroponic.  An example would be a top feed system in rockwool cubes placed on rockwool slabs.  I would also consider a container plant using hydro clay as the medium would be a soil-less grow.  These systems can be easily maintained using a  water pump to feed water and nutrients to each container or plant.

There are a multitude of reasons to choose a soil-less grow over a soil grow and vice versa.  First, soil can be VERY messy.  Accidentally knocking over a container that is pre-filled with dirt for a fresh transplant costs minutes of cleaning and a loss of soil.  You can also contaminate your soil with whats on the floor if you try to put it back in the container.  Soil is also a nesting haven for a lot of different bugs like gnats and crawling insects.  Gnat nests buried in soil can be hazardous to your plants.  The bugs can eat at the roots of your plants without you even knowing.

Simply switching the growing substrate to hydroclay or hydrorocks can help to control the problem.  There are a wide variety of mediums to choose from when growing soil-less.  There are also rockwool grow cubes, coco coir, and perilite.  You can always mix a variety of things to create your own soil-less mix to create the environment you want for your plants root system.