Hydroponic Growth Medium: Rockwool or Starter Plugs

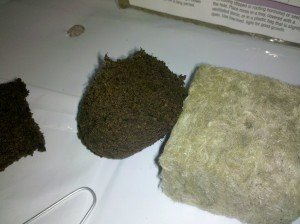
Both mediums have small precut holes perfect for plant stems. You can also start your own small hole somewhere on the cube for stems.

Hydroponic growth medium is an important choice depending on your grow style.  Different growth medias have different strengths and weaknesses.  Many growers turn to hydroponic growing methods for their propagation systems.  By doing so, growers are given a wide array of options to optimize their growing efficiency.  Economical growers do not want to see a decrease in yield or harvest quality due to a growing media issue.
Cloning medium
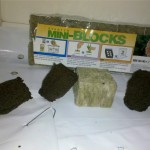
Try different cloning mediums to find what works for YOU.

Below are the pros and cons for both mediums.  You should experiment with both to see what you find.  You never know what you may find out from trying different soil less mediums.  Search for what works best in the system you use.

Starter Plug Pros:

-Simple, Plugs usually come in a float n grow type system with instructions.

-Only need to be dipped in water to be ready to go.

Starter Plug Cons:

The float n grow system is not really re-usable, rendering the starter plug replacement packs nearly useless.

-Aside from the float n grow – the starter plugs seem to be susceptible to powdery mildew but careful planning can defend against it.

Rockwool Pros:

-The design is made to give the roots the best air to moisture ratio, if used properly.

Rockwool is not messy whatsoever.

-Holds moisture well – Important for cloning.

-Comes in various sizes.

Rockwool Cons:

May not be a good choice for plants that require a dry start  for success.

-Rough handling, and lack of attention could lead to an incorrect air to moisture ratio.

-Should be sitting flat.

I cannot say which will prove to be more successful to you, but I had better luck with the rockwool cubes.  The Starter Plugs stayed in water for too long.  I also tried re-using a float n grow through multiple sets of cloning cycles.  The float n grow needs to be cleaned and sterilized to go through a refill.  The rockwool cubes did not do well sitting in a flood tray of water, but they did hold up well in a bubble cloner.  Go for 100% and try out all the different cloning mediums!  Share your experience below!
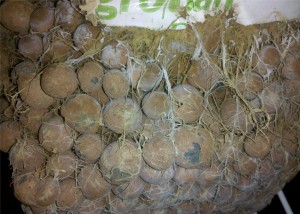
Good Hydroponic Growing Medium: Hydroton Clay Pebbles

Hydroton Clay Pebbles
The root system of this plant held the clay pebbles close together to form a solid root ball

The growth medium you choose for your plants is important.  The hydroponic growing medium can determine the time settings you need to run for your drip emitters or ebb and flow system.  Today I’ve written a little post about my experience with expanded clay pellets.

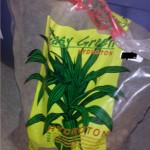
The expanded clay I used was Easy Green Hydroton.  It comes in two sizes: 4/8 and 8/16.  I used a mix of both and had great results.  Expanded clay pellets mix well with other mediums for hybrid mixes as well.  Make soil less mixes from grow mediums that are clean.  New packaged growth mediums should be labeled sterile and most are PH balanced.  In the picture you can see I have a rockwool cube attached to a thick hydroton root ball.

Easy green Hydroton
Bag of hydroton clay pebbles

The hydroton drained well and could be watered many times a day.  Expanded clay wicks moisture from rockwool so be sure to place a drip emitter on your rockwool cube.  My rockwool cube had the main part of root system in it.  If that part of the root system dries and dies the rest of the root system is useless.

You will have to play with the watering intervals for your plants in this growth medium.  Hydroclay dries out fast so water often.  To avoid over fertilization fill your reservoir with a weak soluble fertilizer.  A weak nutrient solution can be fed to your plant many times a day without causing nutrient burn or salt lock up.  

Read customer reviews of the popular Hydroton brand Clay Pebbles here.

Homemade Humidity Dome

Humidity is an important factor in many plant propagation systems.  Some cloning systems come with humidity domes.  A humidity dome is a small imitation of a green house.  The humidity dome keeps the humidity high in the area it covers.  To keep your humidity dome working properly, spray fine mists on the walls of the dome.  You can also use digital timers and water pumps to automate sprinklers to spray the mists for you.

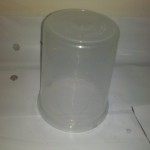
You can create single plant or large humidity domes at home.  I used a Chinese food carryout container to make an extra humidity dome.

Food Grade Plastic
A food grade plastic container recycled into a useful humidity dome.
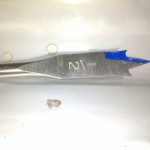
Use a small drill bit to drill an air hole in your humidity dome.

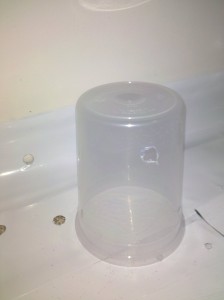
Use a drill to put a small hole in the container. The hole will let the container get a little air flow while keeping the humidity up. The small hole will also help to prevent the temperature from rising in your humidity dome.  Mist the sides of the container with small water drops.  Put the container over your plant or clone to put it in a high humidity environment.  Fresh cuttings like to be in an environment with 90-100% humidity.  Some thermometers have humidity measurements on them.  A humidity thermometer is called a humidity hygrometer.  Technically humidity meter is incorrect for the situation you will be using the tool.  Use home made humidity domes from house hold items to stay economical and green!

Finished Homemade Humidity Dome
This is the final product. Mist the walls of the humidity dome to create a wet environment with a high humidity.

GUIDE: How to Mix Fertilizer; Mixing Nutrients in a Hydroponic Reservoir

Mixing nutrients is an essential part to all hydroponic growing systems.  Plants require nutrients to grow.  Hydroponic systems are designed to ensure maximum nutrient uptake.  Use this guide to mix your nutrients correctly every time!  Mixing nutrients in your reservoir is easy – follow the pictures if you are confused.

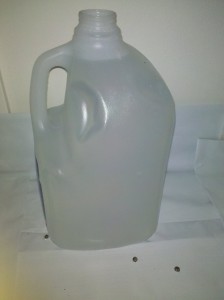
Water for Hydroponic Reservoir
Start with plain water to mix with your hydroponics nutrient.

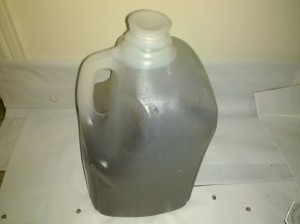
Start with reverse osmosis water if you can.  I use one gallon jugs to fill water and mix nutrients.  Growers with bigger reservoirs will want to use a 5 gallon bucket to mix nutrients.  Make sure the container you use is food grade.

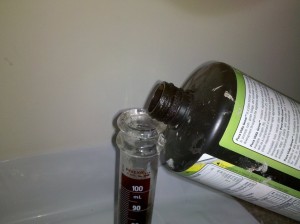
Get a clean measurement tool like a cylinder. Read the label of your nutrients to determine the measurement of nutrients you need per gallon.  If you are using a five gallon bucket make sure to multiply by 5.  I like to start with half of what the bottle recommends to ensure I don’t burn my plants.  Pour your high grade organic nutrients into the measurement tool to make sure you have the correct amount.

Pour Nutrients Into Measurement Tool
Pour your hydroponic plant nutrients into your measurement tool.
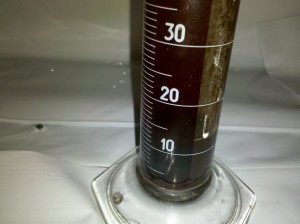
Hydroponic Nutrients
Measure and double check your plant nutrient measurement before adding to your water.

Make sure you double check your nutrient measure.  It is good to know the amount of nutrients used and at what time in the plant’s life cycle.  Jotting down quick notes of these metrics and their results can leave you with valuable information for your next crop.  Grow logs are an essential tool in building a better growing environment.

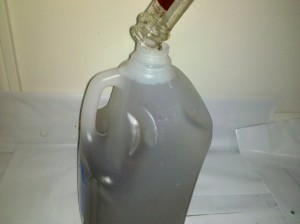
Mix Hydroponic Nutrients with Water
Once you have the correct amount of nutrients, pour them into you water that is to be mixed in the reservoir.

Line up your measurement device with the lip of your container and pour your nutrients in slowly.  If you tilt the cylinder too much you may overshoot your container.  If you spill some the measurement you took is now wrong.  The loss will not affect your grow in a severe manner, but it is nice to have close to accurate measurements.   Even if you are trying to achieve 100% efficiency you are unlikely to do so.

Mixed nutrients.
Cap the container and shake the nutrients until they are well mixed.

Does Azamax Affect Taste?

Many indoor gardeners are looking for organic pest control answers.  Some growers forget about certain natural resources they should be using to help avoid pests.  Natural pest guards are plants like garlic and fly eating plants.  The indoor gardener faces a mini pest that is hard to detect and multiplies rapidly.  The dreaded spider mite!  Spider mites are indoor grower’s worst nightmare.  General Hydroponics offers an OMRI listed pesticide that can kill spider mites.  The solution can be used up to the day of harvest and can be sprayed on fruits and veggies.

I have played with Azamax myself to find if the residue would leave a taste on my harvest.  The taste of Azamax will be left on your food depending on how you applied Azamax.  If you can avoid bugs the last week of harvest you should be able to effectively rinse it out of the plant.  Some growers use a final flush solution to clean their hydroponic plants.  Mixing Azamax in the nutrient reservoir is effective for preventative pest control, and quick solutions.  It is easy to put too much Azamax in your reservoir, but it is also easy to fix.  Just add more plain water to your reservoir to help offset the percentage of Azamax.

Foliar applications are the quickest way to kill bugs using Azamax.  I use 5ml Azamax per 2L of plain water for foliar applications.  Using Azamax as an organic bug spray is very effective against spider mites.  DO NOT WASTE YOUR SPRAYS!  If you spray too much Azamax on your plants you will be left with a funky tasting food.  The key is moderation and effective aiming.  Mist the whole plant very lightly from a foot away to give it a spider mite shield.  Directly spray the areas with the most spider mites.  Spray the undersides of the leaves to kill hatching babies.  Spider mites multiply very rapidly, but Azamax will slow down their reproduction.  Azamax can affect the taste of your crop if you use too much.  Follow the preventative pest control measures to move Azamax to your last resort.

Before harvest time spray your plants with plain water.  Start spraying them 2 or 3 days before harvest to rinse off the Azamax residue.  Don’t spray them under intense lighting because you will burn the leaves.  Try feeding your plant only plain water right before harvest to flush the remaining Azamax.  Finally dunk your crop in water as you cut it down to remove the rest of the dust, pests, and sprays.

Get General Hydroponics AzaMax at Amazon today to protect your indoor garden investment. You can also read customer reviews here.

Hydroponic Economics wants to know how your experience with Azamax has been!  Kick off the conversation in the comments section below.

Garden Drainage is Very Important

A good garden has places where water can drain away from the soil.  Drainage mostly applies to container gardens and raised garden beds.  The amount of drainage versus the growing medium’s ability to hold water are important ratios to consider when setting up a garden for a new plant.  Some plants require a lot of moisture while others may need their containers to dry out in between waterings.  The ratio the plant requires will determine the type of growing medium, the type of drip emitter to use, and how much to water the plant each day.

Garden Containers
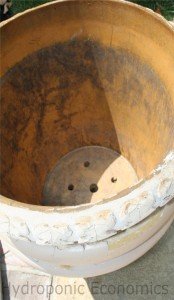
Holes are mandatory in the bottom of containers being used for plants in container gardens.

There are countless designs for containers featuring different types of drainage.  The container on the left is a massive planter and just has a few large holes on the bottom.  You would want to put some small rocks or hydroclay over these holes.  Most gardeners cover the bottom of the container with rocks so soil won’t drain out with the water.  I like soil less growing medium rocks that can be used in hydroponic systems for a similar purpose.  Some plastic containers also feature side drainage holes.  It really depends on what you prefer.

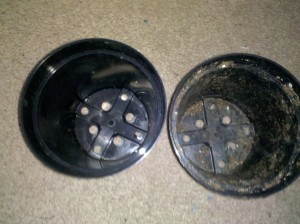
These plastic containers are small and drain through the bottom with many drain holes.

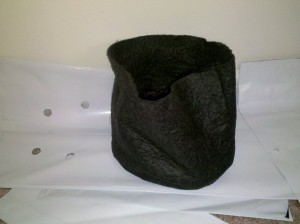
There are also containers that promote high oxygen levels in the root zone.  Containers like Smart Pots have great drainage.  Good drainage is key to maximizing the oxygen in the root zone.  Smart pots can be used in soil and hydroponics gardens.  They come in many sizes and can be used indoor or out.  Economical gardeners favor them because they are high quality, highly productive, and washable.  The Smart Pots can be re used or transplanted directly to the next pot or outdoor garden.

Smart Pot
Smart pots are great containers for all types of gardeners.

Some reasons drainage is important:

  • Too much water is bad for your plants if they don’t need it.
  • Do everything you can to prevent mold and mildew.
  • Leaving water in the grow space can mean spills for indoor gardeners
  • Bugs and Pests love a little extra water potentially filled with nutrients or sugars.
  • Roots filled with too much water are being suffocated because they are not receiving enough oxygen

Review: Ortho Home Defense MAX


A lot of indoor gardeners have trouble getting rid of bugs and insects in the grow room and around the house.  The aroma of fresh fruit and blooming flowers attract swarms of bugs and insects.  Chemical pest control is not always the best route, but it can provide a secure block around the house.  I tried spraying Home Defense Max outside around the perimeter of my house.  I also sprayed the cracks in all the doorways and windows.  Next, I sprayed a line on the floor around the kitchen.  I used the whole bottle around my house after two separate applications about a week apart.  If you plan to use Home Defense Max around your grow room or grow box, I would remove your plants from the room before spraying the areas you want to protect.  Once the spray drys out and the room airs out you are safe to put your plants back in.

The bug spray is a chemical type of spray with a weird scent.  It was not overwhelming though in comparison to some other sprays.  I wouldn’t keep this bottle around the children, but I also wouldn’t keep salmonella carrying roaches around either.  Make sure to spray with enough time that the zone will not be bothered so it can dry and air out.   Despite the chemicals in Home Defense Max- the product seemed to work very well.  At the time of spraying I actually wiped out a bunch of bugs just hanging out in the spots I was spraying.  Those bugs could have reproduced and made many more bugs.  Catch bug infestations early and you will be glad you did.  Ortho’s Home Defense Max will help you with your current bug problem and prevent you from having another one.

Buy or read customer reviews of Ortho Home Defense Max here.

7 Tips to Keep Your Mother Plants Healthy

Mother plants are essential for maintaining a continual propagation system.  A strong mother plant is the first step to taking perfect cuttings.  Weak cuttings turn into slow and sometimes weak plants.  A weak clone is very susceptible to pest and disease problems.  The plant is already under going immense stress and an unnoticed infestation can kill it.  Here are 7 tips to keep your mother plants healthy and inevitably take stronger cuttings.

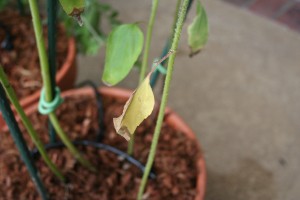
1. Trim off yellowing, brown, dried, wilted, and dead leaves – Dying leaves are a great place for bugs to hang out.  Your mother plant may be wasting energy trying to save dying leaves.  Cut your losses and focus the new growth.

Trim dying leaves as a method of pest and disease control
Cut leaves like the yellow ones off. The leaf that is mostly green and brown and the tip is worth keeping on the plant. Trim the brown part and the plant will still utilize the leaf for energy.

2. Use small amounts of nutrients – Salt lock up and over-fertilization are the last thing you want for your beautiful mother plant.

3. Try Mother Plant nutrient formula – I have personally not tried this bio-organic formula, but I have heard it works pretty well.  There seems to be a lot of buzz about it in the indoor gardening magazines.

4. Use a big container if you plan to take many clones from a large mother plant – Roots are a vital part of healthy vigorous growth.  A dense root zone will allow your mother to recover from cuttings quicker.  Bigger roots means bigger plants.

5. Water frequently – Use a drip system or hydroponic method to ensure your mother plant gets as much water as it needs.

6. Do not cut more than 20% of the healthy foliage at a time.  Taking too many cuttings at a time can stress your mother plant.  The plant should recover, but it may actually slow down growth because of the amount of energy it takes to recover.  The plant needs leaves to catch sunlight for photosynthesis.

7. Watch Closely for bugs and pests – Use a magnifying glass to check your plants!  You never know what you may find.  Any small pest infestation on your plant will transfer to your clones and potentially your whole cloning system.  If it makes to the next stage before you notice you may be dealing with a major infestation later on.  Preventative pest control is the best pest control.

BONUS TIP: Do not keep mother plants with a disease or genetic disorder.  It sounds prejudice, but they aren’t people.  Diseased mothers can pass the disease on to the clones.  The disease may not strike the plant until late in it’s lifetime.  By this time it is too late and you have already wasted your resources.  Not Hydroponic Economical… Keep the green thumbs up!

How Often Should You Change Your Water Reservoir?

QUICK ANSWER : Every Seven Days

Longer Answer: When you are trying to decide when to change your nutrient reservoir in your hydroponic recirculation system, there are a few things to consider.  The size of your reservoir, the amount of nutrients remaining in the solution, ph, and how clean the water is. If your water looks gross, it probably is gross.  Gross water = Gross plants.  Gross deserves a capital G for that equation.

The bigger your reservoir the further you can go between res changes(Res change is short for water/nutrient reservoir change ).  Big reservoirs may be more forgiving then a small reservoir.  Small reservoirs may change by hundreds of ppm in a single day.  Hydroponic systems require close monitoring of nutrient levels to avoid burning plants.  If your reservoir loses water to evaporation make sure to top it off with plain water or a very low ppm solution.  Res changes mostly apply to recirculating systems.  Non-recirculating or “run to waste” hydroponic systems only require you to change the solution every two weeks.  The nutrient solution stays clean and the PH is maintained in a non-recirculating system.  The most important part of a good hydroponic system is a clean nutrient reservoir.

A clean nutrient reservoir loaded with Earth Juice Bloom and Azamax

Advanced Wind Technology for Better Air Circulation

If desk fans or computer fans weren’t enough for your indoor gardening air circulation needs, check out what the engineers at Dyson have created:

The Dyson Air Multiplier is a great innovation to air flow technology.  The new Air Multiplier may be a little too expensive for some hydroponic setups, but I know there are some people out there who only want the best of the best.  If you have a Dyson Air Multiplier or use one in your indoor garden, please contact me!  You may be featured on this website!

Image source: Dyson.com