Garden Drainage is Very Important

A good garden has places where water can drain away from the soil.  Drainage mostly applies to container gardens and raised garden beds.  The amount of drainage versus the growing medium’s ability to hold water are important ratios to consider when setting up a garden for a new plant.  Some plants require a lot of moisture while others may need their containers to dry out in between waterings.  The ratio the plant requires will determine the type of growing medium, the type of drip emitter to use, and how much to water the plant each day.
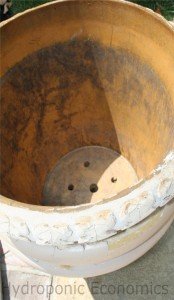
Garden Containers
Holes are mandatory in the bottom of containers being used for plants in container gardens.

There are countless designs for containers featuring different types of drainage.  The container on the left is a massive planter and just has a few large holes on the bottom.  You would want to put some small rocks or hydroclay over these holes.  Most gardeners cover the bottom of the container with rocks so soil won’t drain out with the water.  I like soil less growing medium rocks that can be used in hydroponic systems for a similar purpose.  Some plastic containers also feature side drainage holes.  It really depends on what you prefer.
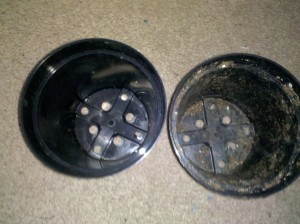
These plastic containers are small and drain through the bottom with many drain holes.

There are also containers that promote high oxygen levels in the root zone.  Containers like Smart Pots have great drainage.  Good drainage is key to maximizing the oxygen in the root zone.  Smart pots can be used in soil and hydroponics gardens.  They come in many sizes and can be used indoor or out.  Economical gardeners favor them because they are high quality, highly productive, and washable.  The Smart Pots can be re used or transplanted directly to the next pot or outdoor garden.
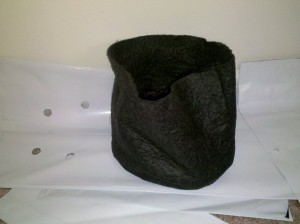
Smart Pot
Smart pots are great containers for all types of gardeners.

Some reasons drainage is important:

  • Too much water is bad for your plants if they don’t need it.
  • Do everything you can to prevent mold and mildew.
  • Leaving water in the grow space can mean spills for indoor gardeners
  • Bugs and Pests love a little extra water potentially filled with nutrients or sugars.
  • Roots filled with too much water are being suffocated because they are not receiving enough oxygen
GUIDE: Building a Simple Drain Table – Part 2

This is part 2 of the DIY Drain Table Guide. Look at part one here.

Okay after you have the right size tub and trays for your set up you can get started.  The size you get depends on your needs but I recommend getting a really sturdy bottom tub(drain off tub where waste goes).  The tub should be able to withstand the pressure of water with out bowing out enough to make your trays fall and CERTAINLY without cracking or breaking.

If a water container you have in one of your hydroponics systems is too weak to withstand the pressure of water constantly pushing on it could crack or break and leak the potential GALLONS of water all over your room and whatever electronics you may have on your floor(Even though all indoor gardeners should be making sure all of their electrical parts are placed on the wall or above where water could potentially spill or spray on them RIGHT?)

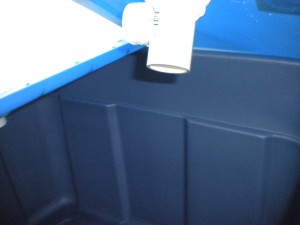
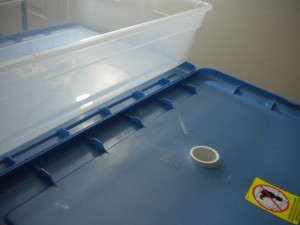
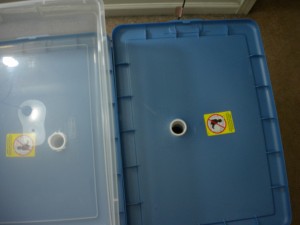
You’ll want to use a drill to drill holes 1 or 2 inches wide in the lids of the containers.  Position the hole so that they will drain into the tub the lids will be sitting on.  Refer to the pictures below.

Notice there is a two inch hole drilled into the lid of the container with a two inch diameter PVC joint connector put through it as a drain hole.

Hole from above
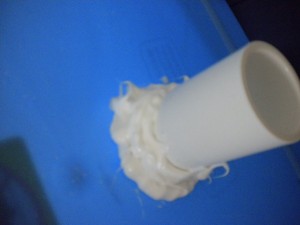
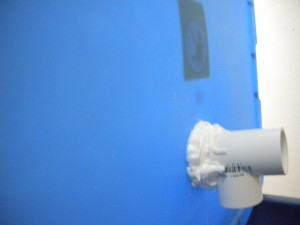
Sealing the drain so water is FORCED through PVC.
To seal the PVC elbow drains in place you can get water proof silicone or a type of strong water proof caulking and apply it with a caulking gun.

Let the sealant set long enough that its not loose – this could take up to 24 hours so BE PATIENT.  Better things come to those who wait. Once the bond is tight you will be able to sit your trays on top of the lids and the drain wont fall off under the pressure of your plants plus extra water.  

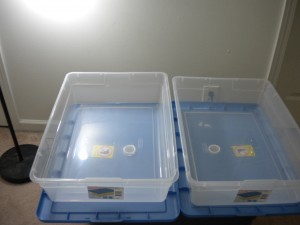
Position your tray on top of the lid like you will have it in your final set up.  You want to put a hole in the space where the PVC hole is so the water from the tray drains out of the hole and through the PVC drain down into the bottom tub/reservoir.

This is pretty much what you’ll have at the end – You can drill holes where the white circles are to drain the clear tray.

A drill should work fine if you are careful not to crack the plastic.  It shouldn’t be a problem either way considering you should be using containers sturdy enough to hold a lot of weight over long periods of time.  If one of your containers break your plants could end up submerged in their own dirty waste water.  You want to plan and account for things like this in the planning of your hydroponic set ups to ensure safety of equipment, plants, and most importantly you and your house.  

Another way to put holes in the plastic trays is to burn a hole.  BE VERY CAREFUL WITH THE FIRE! I heated up a glass rod with a camp fire starting torch – one similar to what you use to start a grill.  Once the rod was glowing orange I pushed it through where the PVC drains were to make a perfect hole.  

Good luck in your constructions and please comment or contact me with any questions.