Reaching Top Level Gardening

The only way to be the best gardener possible, is to try to be the best possible.  If you only put forth a little effort, you will only get a little return.  In this case, your return is your harvest.  Even when you give it 100% and make your garden your first priority, you won’t be 100% successful all the time.  Do not be discouraged!  There is hope for gardeners of all skill levels.  Gardeners can start to grow in the direction of perfection by aiming for perfection.  Aim for maximum yields and healthy plants and you will be rewarded.

Moral of the Story:  It’s easy to keep a plant alive, but nearly impossible to grow one perfectly.

The idea for this post was inspired by Darren Rowse at ProBlogger.

Using Hydroponics for Self-Sustaining Food Production

Today I was watching TV and saw a special on the damage a high magnitude earthquake would do to a city like San Francisco, California.  The damage was unbelievable!  Traffic in and out of the city would be at a stand still, if it was even operational.  Communication lines would be down.  A whole mess of things I don’t want to be in.  A specialist said the people who were the most independent and self-sustaining, would be the most likely to survive in a crisis like that.

Hydroponics is a clean and green way to grow food practically anywhere.  Not only can you grow anywhere, you can MAXIMIZE anywhere.  Hydroponic systems are very efficient and practically run themselves with the right equipment and knowledge.  The point is the people of San Francisco and all other urbanized areas, can be just as green as anyone else.  Just because you are a renter in a small apartment with zero yard space does not mean you can’t have a small wheat grass box, a flood and drain tomato table, and a simple deep water culture herb tote for all your cooking spices.  35-40 cubic feet of space(a 3×3 box about 4 or 5 feet high) is more than enough to take up a serious hydroponic hobby and home food production center.  There is nothing better than the satisfaction of eating your own harvest.

Hydroponics are by no means limited to vegetables.  If you are like me and really like fresh strawberries all year round, you have a reason to start an indoor garden!  Not only will you have your favorite fresh fruit to eat whenever you want, but you will also learn A LOT about the plant you choose to grow.  You may find that you can grow a better berry than the local farmers depending on your area.

Pass this knowledge on to a friend whom you think is wasteful or unaware of the many benefits of having a home hydroponics garden.

AzaMax: Hydroponic Solutions for Pest Control

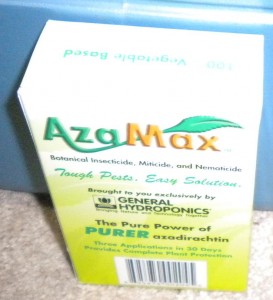
AzaMax by General Hydroponics has a lot of different uses and applications.  Today I will be focusing on the reservoir applications for recirculating and run to waste type systems. The amount of AzaMax to use depends on the size of your hydroponic system and type of infestation you are dealing with.  For a minor to severe spider mite infestation, only the weaker end of the product recommendations are required to eliminate the problem without over affecting crop quality.  Believe me, I’ve seen a few different pest control options, a lot of the products do work like they say, however you may have to live with the slight taste of bug spray on your prized fruits and veggies.  AzaMax is one of the few hydroponic solutions that is safe for the reservoir and can be mixed right in with the nutrient solution.  When the plant absorbs the solution this way, it pest proofs the plant from the inside out.  The inside out method is useful because the solution can be applied at any time without getting residue on fruits or veggies close to consumption.  It also ensures there will be no light burn on the leaves from the water magnifying the light.

Be warned – The AzaMax solution may change the color of your water a bit to a more milky color.  This is natural and also happens when you mix it with water for foliar applications.  Since AzaMax has the nice little measurement cup added to the bottle you can squeeze up the same amount or a semi precise amount without busting out the glassware.  For my reservoir applications I try about 5 ML of AzaMax for every 5 or so gallons of water.  That is about 1 Ml per gallon of water which is about .034 fl oz.  The solution I use ranks below the lowest end of the spectrum according to AzaMax’s chart that comes with the bottle.  Remember, those tables are guides and your application may vary from what others use.  The solution I mention is what I use as my preventative measure!  If you notice pests for weeks after your initial application, try adding more AzaMax on your next reservoir change.

Get General Hydroponics AzaMax at Amazon today to protect your indoor garden investment. You can also read customer reviews here.

Stay tuned on pest control with HPE – I’ll be posting more articles about AzaMax and its many uses in the future.  I’ll also be posting some good home made natural pest remedies soon.  If you have any comments or questions about AzaMax feel free to email me or reply with a comment below.  Stay Green!

How Much Should YOU Water Your Plants?

When people are first starting to garden, they are unsure of how much water their different plants need to thrive.  To find out specific plant watering needs you can do a Google search on that species and find out ideal watering conditions.  From there you can either set up a drip irrigation system on a timer to automatically water your plants or hand water them daily.  You can get a moisture meter from a nursery or hydroponics shop and use it to find the relative moisture in each plant’s soil.  Make sure to wipe off the ends of the probe for your moisture meter each time in order to get a proper reading.  If you don’t use the tool correctly than you have wasted your money buying it.  Hydroponic waterings are a little different and will be discussed in a later article.
If your plants are droopy or limp they may need more water if the soil is dry or less water if it is saturated.  Plants also need plenty of oxygen in their root system and in their water.  If you drown out the roots with water they will receive no oxygen and actually suffer from the watering.  I recommend drip systems for soil and soil-less grows alike.  The timer on the drip system gives the gardener full control of timing and duration of waterings.  The pump can be in a water filled reservoir with an aeration device attached to an air pump.  The air pump will promise fresh oxygen to your water 24/7.  This method does have a higher start up cost but will certainly pay its self back in time saved.  As icing on the cake your plants will thank you for offering consistent, aerated, and daily waterings.

There are plenty of other benefits to drip irrigation for indoor gardeners.  When you are unsure of how much to water your plants, use a consistent method to monitor how much you actually are giving them.  With a large reservoir of aerated room temperature water the roots will receive the same watering experience every time. Keep that in mind.  If the plants are receiving the same type of waterings every day at the same time, and environmental conditions remain the same, than it will be easier to see how your rate of watering is affecting plant growth.  Also remembering to take factors such as root growth, pests, and fertilization into account for other possible changes in growth.  A digital timer will allow you to set up multiple waterings a day at the same time every day, based on when your day begins or your lights turn on.

The more light each plant receives, the more water it will need.  A plant outside in the sun will likely need much more water than a plant in a container inside under cool fluorescent tubes.   If the plant is using more energy, it needs more water to absorb the nutrients necessary to continue growing at max capacity.  Other environmental conditions such as wind and humidity can come into play when trying to find how much water your plants use on a daily basis.  If there is a lot of wind in the growing environment the plant can dry out faster.  Humidity is also lowered during windy periods.  The combination of less water in the air and air flow drying out the grow medium will lead to dry roots quickly.

One last point to keep in mind:  Do not let your plants stay wet or soaked in water for days on end.  The growing medium needs to dry out at least every couple days.  Occasionally letting the medium dry out will prevent mold and mildew.  An even greater benefit is the extended root growth.  Roots will grow in search of water and nutrients.  That means a good drought is necessary every once in awhile as long as its not severe.  If you notice your plants leaves hanging too much or wilting then give them water right away!  Keep these tips in mind and use common sense and your green thumb will be glowing in no time!
It Starts with Good Genetics

Have you ever started a batch of seeds and had a really top notch plant that just seemed better than the rest?  Have you ever been to a friend’s place and seen an interesting plant you would like to add to your collection?  It is actually relatively simple to do these things without going out and buying another version of the same plant.  When a cutting is taken from a ‘mother plant’ and dipped in rooting hormone, roots will form and it will become a new plant.  The new plant will be exactly like the old one in every way.  That is the reason you hear people talking about cloning plants.  There is no top secret cloning machine that pops out perfect plants ready to flower every time.  Although. . . that would be nice… but that takes the method out of proper clone taking practices.

If you get a seedling that is just plain better than the others or is one you would like to keep for your next crop, keep it around.  Once its established you can cuttings from strong stems to become healthy new plants.  There is sacrifice when you give up your best plant, but it more than pays its self back.  Your next harvest could be a set of clones from your strong mother plant.  That means every plant will be as strong as the strongest one on your second round and however long you keep the mother thriving.  You can take clones of clones for up to 20 generations.  There are limitless ways to keep genetics around.  Sometimes after so many cuttings are taken, the plant may become weaker and grow slower than it originally was.  That means its time to get out the seed starting kit and look for a new mother.

Hydroponic Cloning Tips

If you have wilting clones there could be a number of issues with your hydroponic cloning method.  Make sure to have a thermometer to measure temperature and humidity accurately throughout the day.  You can find digital ones at a department stores or hydro shops that will tell you the current and high/low temps and humidity throughout the day.  The digital ones aren’t expensive in comparison to the knowledge you’ll have.  If you are using a metal halide or other high powered lighting system, the clones must be a few feet away so they receive minimal light.  If they get too much light they will try to work too hard with roots they don’t have.

If the temperature is getting to be in the 80’s F move the lights up more or add a circulation fan on a timer so the humidity stays high.  Having a fan on for an hour at a time 2 or 3 times a day will really help to move the hot air.  Try to use cool burning bulbs like fluorescent tubes so your temperature will stay down.  A high humidity of 90% or higher will help your fresh cuttings more than anything else.  Spray the walls of a clear container with water and put it over your cloning system.  You can also attach spray emitters to a small water pump to spray water automatically for the first few days to ensure success rate.  The humidity needs to be high so the leaves of the cutting can absorb water from the air because it does not have any roots to do that job yet.  It may need a small hole or two for air flow so the temperature stays low and the cuttings have access to as much oxygen as they need.

Use an aeroponic or deep water culture method with aerated water to keep the roots or stems in a 100% humidity environment until they are established for transplant.  You can find cloning systems at your local hydroponics store, online, or even build your own!  Hardware stores and hydroponic shops should have pretty much everything you need to build your own.

Choosing the Right Set of Grow Lights

This post will no where near cover everything you need to know about choosing grow lights.  This post will give you some very helpful hints and considerations to take into account before spending money on an expensive system.

-Number of chambers : Will you have all your plants in one space for their whole life time.  If so you may want to consider a Metal halide Bulb and Ballast for the grow cycle and a high pressure sodium/metal halide conversion bulb for the bloom phase.

-Amount of Space : If your grow spaces are large you will need high powered lights so that all the plants get light.  Keep in mind 400 watt and higher MH and HPS bulbs will benefit greatly from air cooled hoods which require strong inline fans to cool.  The cost of these items may raise your initial setup fee but will pay off by the first harvest by the success of the crop yield and quality.  Without an air cooled hood a 400 watt HPS bulb must be 3-4 feet away from the plants to keep temperatures down.  With an air cooled hood some plants can be nearly touching the glass.  If you have a high powered inline fan the plants can most likely grow up to the hood.  This makes a big difference in yield because light is diminished at higher rates at farther distances.

-2′ x 2′ or 3’x3′ gardens can bloom under 400 watts

-3’x3′ or 4’x4′ gardens could easily use 600 watts

-4’x4′ or 5’x5′ gardens can use 1000 watts of light

-Number of plants: Depending on your style of growing you may want to get a set of 2 lights instead of one big light.  3 x 600 watt lights can outperform 2 x 1000 watt lights in the exact same conditions.   The three 600 watt lights can cover a greater area without losing light from distance.

-Height of Grow Space: If your grow room or grow box is not very tall and you are also concerned with heat, you may want to use compact fluorescent tubes from the hydroponic shop.  You can get high powered tubes for grow and bloom phases.  The height of the ballasted light set is only a few inches so it can fit in short places.  Its great for the grow phase or a mothering chamber.  The bloom tubes will flower plants but sometimes they are lanky unless you use a product like BushMaster.

Confusion about Food Grade Plastics

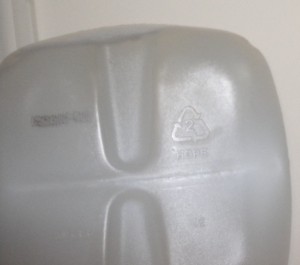
Food grade plastics should be a minimum requirement in all hydroponic systems. When designing a home hydroponics set up or buying one from the local hydro shop, check the labels and do your research. If you don’t demand food grade plastics you could be digesting harmful chemicals and toxins with every harvest. It may also be beneficial to your plants to use food grade plastics so they don’t absorb deadly contaminants.

I use plastics with a Number 2 or Number 5 on them for the parts in my own hydroponic setup. Reservoirs, flood trays in a recirculating system, and plant containers are all possible examples of things that require these type of plastics. To find out if your drip lines, water pumps, and emitters are food grade plastic you may have to contact the manufacture. If you are unsure of a product’s quality I would stay away from it until you can do further research. High grade food plastics can also have an FDA approval which should be easy to research.

Remember: Always check the quality of the plastics you are using and double check their qualifications. To clarify the information here I have provided a link to The Daily Green which has an outstanding explanation of the 7 types of plastics.

Reminder – Keep the Grow Space Clean

No matter what plant you are growing or where it is, cleaner conditions can help you and your plants. Here is a list of some quick tips for a clean growing environment.

1. Wash your hands before and after each session with the plants. Wear gloves when handling the plants.

2. Keep special clothes and shoes to wear in your grow area. Keeping outside contaminates away from the grow space can save you the worry of pollen being on your clothes, it could keep out potential pests, and it will reduce the amount of germs brought into the space.

3. Sterilize your equipment including scissors when ever you can.

4. Wash out old containers or throw them away. If you let them sit they could grow mold or mildew and this could become a problem if it goes unnoticed.

5. Vacuum or sweep any medium or soil on the floor so pests can’t make nests in places you aren’t even growing plants.

Plants get enough stress the way it is. If you make sure to reduce as much stress as you can your plants will thrive. These simple cleaning tips will keep your grow space clean and your plants happy!

Humidity is an Overlooked Factor in Cloning Systems

From my experience and what I’ve been reading on hydroponic forums, people all around are having faster cloning rates using a humidity dome. Humidity domes come in many forms. A simple dome is a clear plastic structure with just a few holes for oxygen exchange. The structure sits so that it is covering all the plants without smashing them. Spraying a fine mist along the walls of the dome will help boost the humidity. The more plants per sq. inch of space will also increase the humidity, but having clones packed in too tightly could cause them to fight for light, air, and moisture. The struggle may cause unnecessary stress instead of beneficial humidity. Make sure to keep an eye on the temperature when the humidity dome is on. It may lock in heat in its enclosed structure. Simply remove the dome for a few hours so the temperature can lower and fresh oxygen can be swept to the leaves. This is a good time to re-mist the dome so the humidity is high when you put it back into action.