Collect Rainwater to Fill Your Reservoir

A large hydroponic system can use a lot of water.  Most indoor gardeners are concerned about the environment and wan’t to reduce their carbon footprint.  Growing your own food at home is a great way to be green.  Gardeners don’t want to be consuming more than they have to because that would be completely counter productive.  There are ways to get your water for free and recycle at the same time.  You can use any sturdy food safe container that can withstand your area’s outdoor conditions as a reservoir for rainwater.

Depending on when it rains in your area you may need to plan to catch the rain water during its season.  Collecting rainwater is easy and even though it may not cover all your water uses, it will certainly reduce the amount of water you pull from your city or well.  You don’t have to be an indoor gardener to have uses for rain water, although you should run your water through a reverse osmosis system to make sure its clean.  RO water is better gardeners anyway because you know exactly what you are putting in.  If you would just like to go buy a water collection system your local hydroponics shop should have something you can use.   The water barrels at the hydroponic store are usually 55 gallon barrels with a lid.

I plan to write a detailed guide in the near future on how to start your own homemade rain collection system.  In the meantime, Hydroponic Economics will be accepting pictures of anyone else who has started a rainwater collection system.  Send your pictures to mailbox@hydroponiceconomics.com and you may be featured on the website!
GUIDE: Homemade Recirculating Drip System

Drip systems are economical and save time.  They ensure plants are fed daily with the correct amount of water and nutrients as specified by the gardener.  A digital timer is a useful tool for any drip system.  The timer will turn your water pump on daily at a specified time so you don’t have to be there to manually turn it on.  If you are trying to plan for a new garden, sketch out your ideas before you go to the store.  You may be overwhelmed by all your options.  If you have a rough idea when you get to the hydroponics shop, you can show someone working there.  They will help you choose the tools you need.  Setting up your first drip system or building your own hydroponics set up may seem hard, but it is actually simple.  Gardeners can choose to build a really simple drip system or a very elaborate system with self regulating levels of nutrients.  Start with what you understand so you can experiment with more options as you learn.  I suggest reading the Introduction to Drip Systems if you are new to drip hydroponics and do not understand all the parts required.


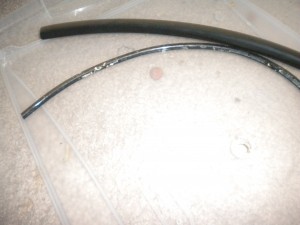
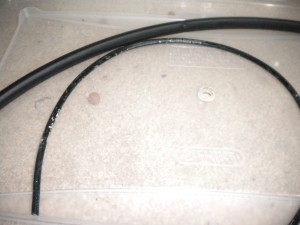
The two types of water tubes used in this system are 1/4 inch and 1/2 inch Connect clear air tubing to an air stone to add oxygen to your nutrient reservoir.
The size of air pump you need depends on how many gallons you plan to aerate. The box will usually tell you the size range the pump is meant for. A little extra aeration doesn't hurt!!!
This is one configuation of drippers you can use depending on your needs.

Before you buy anything do some research.  Find out what parts you need for your drip system.  Be creative!  Since you are not buying an out of the box drip system you get to choose what parts to use.  I recommend a filter for your half inch tubing.  The filter will catch nutrient pieces and other contaminants that could potentially clog your drippers.  Also grab on/off valves for your 1/2 inch tubes and your 1/4  inch tubes.  The on/off switch will allow you to use the same tubes every time without having to cut the ones you are not using.  Don’t forget to turn the switches back on when you go to use the system!

TIP: Always test your drip systems!  A clogged dripper or a mistake in a drip line could leave you with wilted plants.  MAKE SURE TO WATER PROOF YOUR GROW SPACE!  If you are growing plants inside make sure the space is water proofed and all electrical pieces are off the ground and away from water spray range.  Spills happen in ways you wouldn’t think of and can cause major problems including mold or an electrical fire.  Keep towels around the grow space in case a spill does happen you will be prepared.  Having a “it won’t happen to me” attitude will not save your precious plants or floors.

The pictures are pretty easy to follow, but I’ll add instructions to go along with the pictures.  The system that the pictures model is an open recirculating system.  An open recirculating drip system is used as a nutrient reservoir and waste run off all in one.  The plants are fed and the run off runs back into the reservoir which is not air tight.  If you don’t have a PH or ppm meter I suggest using run to waste methods until you are comfortable with reservoir changes.  The run to waste method does blow through nutrients, but it ensures a good crop and a relatively steady PH.  Use the guide on Building a Simple Drain Table to use the run to waste method.  The exact same system explained in the drain table guide can be used for a recirculating system.  You just add the components I am about to discuss in the bottom reservoir and fill it with your nutrient solution.

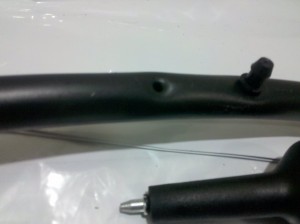
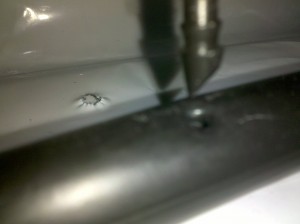
Be careful not to punch the hole all the way through the other side.
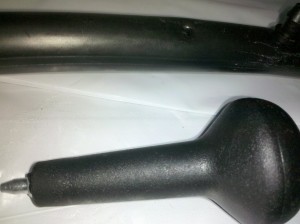
This is a hole put in the 1/2 inch tube by the tool in the picture. You use a connector to connect the hole to a 1/4 inch drip line.

Once you have your home made drip system planned out you are ready to get into the action.  Punch holes into your half inch tubing where you want 1/4 inch tubes to come out. If you mess up there should be plugs with the hole punch you bought.  You can get extra plugs at the hydroponics shop.  Try not to mess up because the plugs are some what of a duct tape fix and they may leak if the hole is too big.

  
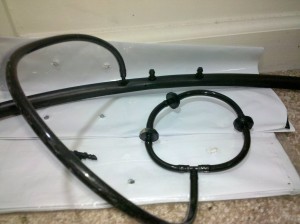
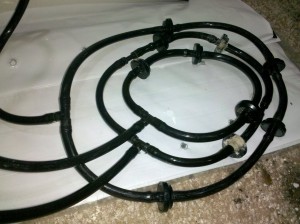
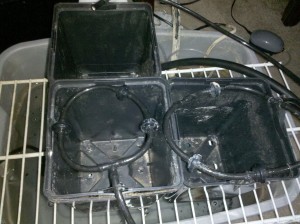
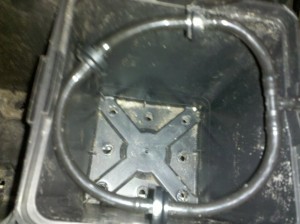
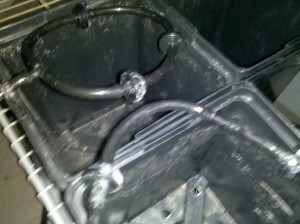
Having a picture to look at will give you an idea of what you want to do. This picture has 2 types of feeding delivery systems. There are rings of drip emitters and open ended 1/4 inch tubing.
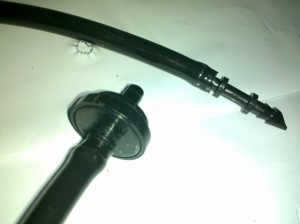
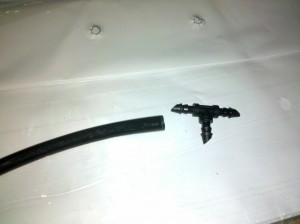
The connector at the end can go to another 1/4 inch line or be place in the holes created by the hole punch to bridge 1/4 inch tubes to 1/2 inch tubes.

I use the straight connectors to go into the 1/2 inch tubing instead of T connectors.  Every time I have tried to use a T connector directly from 1/2 inch tubing, it leaks.  Other indoor gardeners sometimes have better luck, but I don’t like to take chances.  Be sure to push the tubing as close to that inner circle as you can to avoid leaking.  I cut my tubing straight at the ends so there is no open space for leaks at the connections.  Home made drip systems require basically the same work as an out of box drip system.  Systems don’t usually come pre-cut because you don’t know what lengths you want or the amount of drippers per plant.  Drip kits usually just come with the parts you need to build a starter drip system.

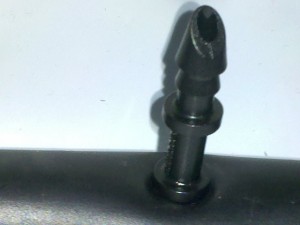
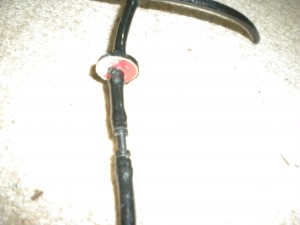
Put the connector in snug so it doesn't leak.
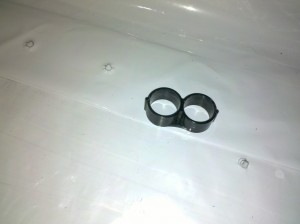
This is what the bridge looks like sitting in the 1/2 inch tubing before the 1/4 inch tubing is connected to it.
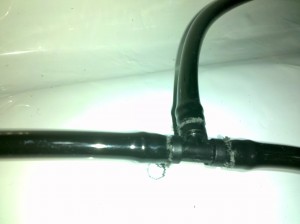
The T connector can turn one 1/4 inch tube into 2 drip lines or be used to complete a circle drip delivery system so the whole root zone is watered

Connect 1/4 tubing to your bridge and run it the length you need plus some extra.  I used a T connector to start the circle for the drip system.  This type of system will ensure the whole root zone gets water/nutrients.  It is hard to remove once the plants get big but they should need a transplant by the time they reach that size.  Be careful on the type of drip emitters you choose.  There are many to choose from.  The main difference you need to know about is the difference between inline and compensating drip emitters.  Inline drip emitters are meant to be in a straight line on a flat surface.  I used inline drippers for this system.  If you are watering different types of plants in different types of containers you may need compensating drippers.  Compensating drip emitters can go up hills and drip at the correct rate.  Inline drip emitters may not work properly on a hill.  Compensating drip emitters also go at the end of the 1/4 inch tube and are usually not run in a series.

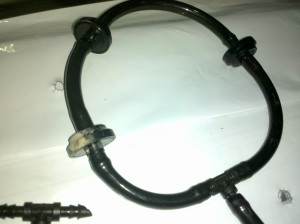
This T connector connects the 1/4 inch tubing coming from the 1/2 inch tube to the 1/4 inch tubes that are connected to the circle of drip emitters.
Connect your Inline drippers to form a circle or straight lines depending on your garden.
Connect as many drip emitters in a series as you need but make sure your pump is strong enough to handle the load.
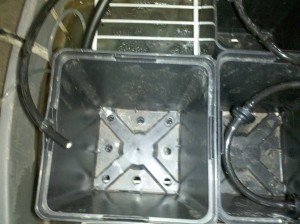
Circle of Inline Drip Emitters to be placed in a container with the plant in the middle.

Repeat the process as many times as you need for the amount of containers you want to water or feed. They don't have to be the same size!

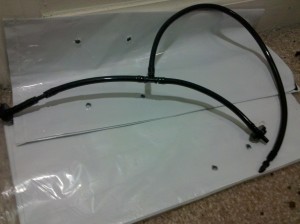
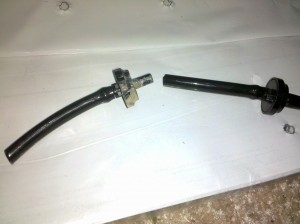
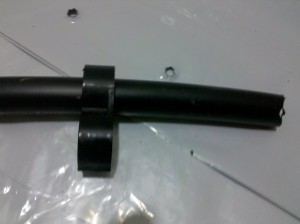
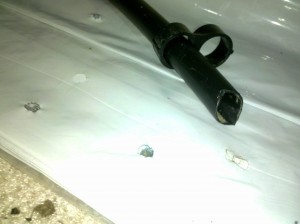
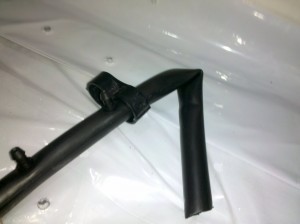
Bend the 1/2 inch tubing so there is a good kink. Wrap it a few times so it is triple kinked.
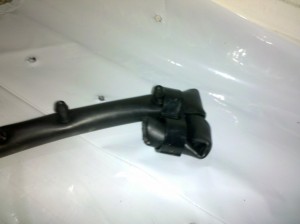
After a triple kink the 1/2 inch tube should be closed off so it wont leak. The clamp will pressurize the tubing so the whole system is filled with water.

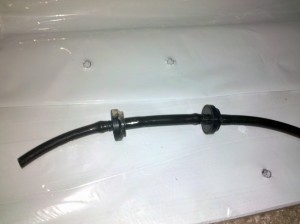
Put the other end of the 1/2 inch tubing snugly onto the 1/2 inch connector.

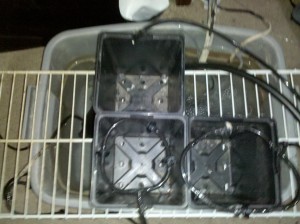
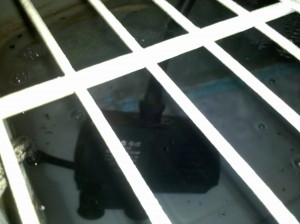
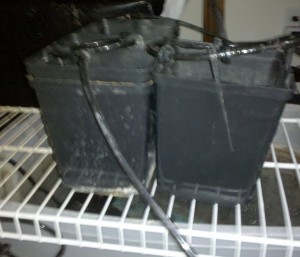
The water pump is submerged in the nutrient solution which is aerated by your air stones connected to your air pump.  For this open system I use a grate that was once a shelf to hold the containers for the plants.  The containers in this system only have holes on the bottom.  The nutrient solution rinses through the growing medium then back into the reservoir.

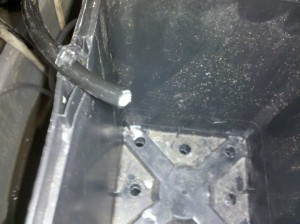
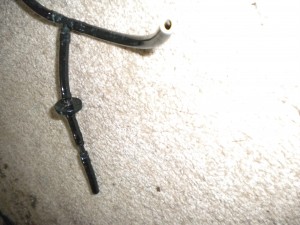
This picture shows the end of the 1/4 inch tube that is cut off and pumps out your nutrient solution at the fastest rate.

These are some shots of what your system may look like.  This guide is to serve as a sketch for you.  It should spark ideas on exactly what you want to do with your system.  Experiment with different things to find what works best for you and ultimately your plants.  You will have to play with your timer settings to find the right amount of time for the drip emitters to run to obtain maximum absorption.  If anything is unclear please mention it in the comments and I’ll clear it up for you!  Hydroponic Economics is here to help you set up the most efficient hydroponics garden possible!  Good luck Green Thumbs!

How Often Should You Change Your Water Reservoir?

QUICK ANSWER : Every Seven Days

Longer Answer: When you are trying to decide when to change your nutrient reservoir in your hydroponic recirculation system, there are a few things to consider.  The size of your reservoir, the amount of nutrients remaining in the solution, ph, and how clean the water is. If your water looks gross, it probably is gross.  Gross water = Gross plants.  Gross deserves a capital G for that equation.

The bigger your reservoir the further you can go between res changes(Res change is short for water/nutrient reservoir change ).  Big reservoirs may be more forgiving then a small reservoir.  Small reservoirs may change by hundreds of ppm in a single day.  Hydroponic systems require close monitoring of nutrient levels to avoid burning plants.  If your reservoir loses water to evaporation make sure to top it off with plain water or a very low ppm solution.  Res changes mostly apply to recirculating systems.  Non-recirculating or “run to waste” hydroponic systems only require you to change the solution every two weeks.  The nutrient solution stays clean and the PH is maintained in a non-recirculating system.  The most important part of a good hydroponic system is a clean nutrient reservoir.

A clean nutrient reservoir loaded with Earth Juice Bloom and Azamax

Hydroponic Economics is on Twitter!

Hydroponic Economics is now open for tweeting!  Head on over to twitter @hydrohelp to become a follower.  The twitter account will be used to keep in touch with readers and keep readers in touch with me.  There is a lot of good information on this site, but there are many other resources for all your indoor gardening needs.  Twitter will feature articles I’ve been reading myself, links to other hydroponics blogs, and links to all sorts of industry news.  Stay focused with Hydroponic Economics and keep up the green work!

Advanced Wind Technology for Better Air Circulation

If desk fans or computer fans weren’t enough for your indoor gardening air circulation needs, check out what the engineers at Dyson have created:

The Dyson Air Multiplier is a great innovation to air flow technology.  The new Air Multiplier may be a little too expensive for some hydroponic setups, but I know there are some people out there who only want the best of the best.  If you have a Dyson Air Multiplier or use one in your indoor garden, please contact me!  You may be featured on this website!
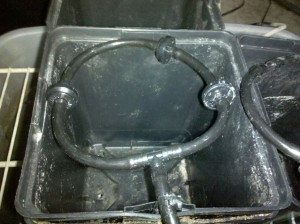
Image source: Dyson.com

Mother Nature has Wind, You Should Too

Fans are not just for cooling your high powered grow lights and ballasts.  I use fans in every grow space to create wind.  Wind will help to move the air around in your room so it does not stagnate and get used up.  Plant leaves like oxygen and breathe like we do.  They need a constant supply of fresh oxygen to be used at any given time.  If your air never moves, your plants are losing all the extra oxygen they could be pulling from fresh air.  An exhaust duct with a strong inline fan will move some air from negative pressure, but it is no where near what the plants are used to from Mother Nature.

Take a look out your window.  If there are trees around you, see if their branches are blowing in the wind.  Think about how brutally bent you’ve seen some trees and plants after a storm.  If the plant is not uprooted or snapped, it seems to recover from the storm.  You do not want to create a wind tunnel that has your plants curving to the ground, but a nice breeze is a good idea.  The best thing about indoor gardening is you become Mother Nature.  That means you choose the time and strength of the wind.

I use desk fans of various sizes to control air circulation in my indoor garden.  I look for fans with various speeds that can be easily hung in the space I need.  Letting the fans sit on the ground causes loud vibrations that get annoying after a few hours.  I suggest hanging inline fans as well for the same reason.  High power inline fans can get extremely loud if not hung.You can decide the location of the fans inside your grow room.  I like to position at least one towards the center of the light so the hot air is pushed where the exhaust fan can pull it out.  Another good place for a circulation fan is close to the intake fan.  The circulation fan will move the colder fresh air where it can be used by all your plants.  Check your plants needs to make sure this won’t make your medium too dry or too cold.  Sometimes having a warm ballast in the room is needed for heat depending on your complete cooling system.

Wind will make your plants tough and force them to thicken their stems.  Thicker stems can be beneficial for supporting a plant’s weight and ensuring the proper amount of nutrients and water to each stem.  If your plants never experience wind they may be limp or droopy.  If you do not introduce a plant to wind early, it may develop too thin and weak.  A plant that is weak will suffer stress when it is first introduced to heavy winds.  It should eventually adjust and strengthen its stem, but you may be diminishing your yield from a lack of planning.  Starting seeds inside that will be transplanted outside need to be hardened off.  You must gradually expose them to more light and wind until they can handle the harsh outdoors.  You may have two fans of different strengths placed in two different spaces in your grow room on two different time settings.  Having this much variation would vary the speed, and direction of the wind throughout the day.  That type of air circulation is closer to the real experience for the plants.

Clean Air = Clean Grow Room

If you are concerned about high yields and high quality, you are concerned about sanitation.  A factor most indoor gardeners forget about is air cleanliness.  With the right air filtration in enclosed chambers, grow rooms can stay clean.  Putting an organic air filter on the intake fan of your grow room will help reduce mold, dust, pollen, and insects from entering.  Air filtration is one of the many reasons why all indoor gardens should be enclosed and air tight.  These filters are put on the same way a carbon filter is put on to the exhaust portion of the grow room.  The filter is attached via clamps.  The clamps hold the ducting on the lip of the filter.  Try to find insulated or sound proof ducting to reduce the noise of air movement which can become quite annoying.  You can also get mufflers to reduce the noise of air flow.  The type of filter needed for a hydroponic system can be found at online hydroponics retailers or at your local hydro shop.   Keep your green thumbs up!
Choose Forgiving Nutrients in a New Hydroponic System

When you buy a new hydroponic system or build your own, you have to be careful and observant the first time you use it.  Since you are not familiar with how your plants will grow in your new system you have to be extra careful to make sure you do not push them too hard.  Many things come into play when trying to figure out how much to feed your plants.  The first season you have with your system will most likely be the worst one.  Once you get a feel for your system you realize where you can make adjustments.  The next season will be much better because you already know what to expect.  Nutrient burns and salt lock ups are very common mistakes made by new indoor gardeners trying to push their plants too hard before finding out what they are actually using.  In my opinion, it is safer to diminish your overall harvest weight for the sake of quality.  If you cut back on the feeding regimen before there is salt lock up or over fertilization, you will end up with a better quality food product.

You should always stay on the light side of a nutrient solution when using a hydroponic system for the first time.  To dilute your solution you just add plain water.  Use hydroponic fertilizers that are water soluble so the nutrients will soak into the water in your reservoir.  When oxygen is being delivered to the reservoir you will get much better results with your nutrients.  The aerated nutrient delivery is a much more efficient way to feed plants over traditional watering practices.  Usually OMRI listed nutrients are safer and more forgiving.  If you have questions about a specific bottle just ask the person working at the hydroponics shop.  They will be more than happy to show you which nutrients are more forgiving.  I suggest using only half what the bottle recommends for the first run.  When you start to see signs of over fertilization you know your solution is too strong.  If your plants are showing signs of nutrient deficiencies you may need to strengthen your nutrient solution. PH and Electrical Conductivity (EC) meters can help keep you in the safe range, but they are not always necessary if you can’t afford them.  Of course there is much much more to nutrient solutions, but it cannot be covered in one post.  These guidelines will help you stay out of trouble and keep your plants healthy until you fully understand YOUR hydroponic system.

Using Analog and Digital Timers to Automate Your Garden

  
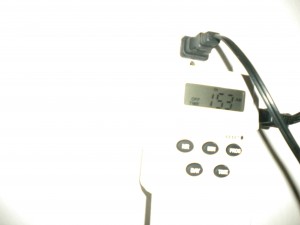
This 24 hour timer allows you to set the digital time and has 6 different on/off settings. You can also choose what days for the timer to run. This is useful if you are going on vacation for 2 weeks and you are still feeding your garden regularly with a dry day at the end of the week for the soil to dry out and expand root growth. The dry period will reduce the risk of over-saturation problems.

Electronic timers have a variety of uses in the grow room.  I use relatively cheap timers from a department store, but the turnover rate is rather high.  If you plan on leaving your system running for a few days without checking it, you may want to invest in the high end timers to ensure they will not die or malfunction on you.  The cheap timers come with a battery backup so the time is not lost in case there is a power outage.  That does not mean that the device plugged in to the timer will still run at its designated time.  There will not be enough power for that.  All the battery does is ensure the device plugged into the timer still comes on at the right time given the power comes back on.

SAFETY TIP: Keep electronic components, surge protectors, timers, extension cords, and all devices with a plug off the ground of the grow space.  Hang them high on the wall where they will not possibly be sprayed.  Also make sure they are not in the path of ANY potential flood. You can also make a waterproof box for your electronic components. DO NOT OVERLOOK THIS STEP!!  IT COULD SAVE YOUR LIFE AND YOUR HOUSE!

Digital Timers are useful for things like air circulation, water pumps, and sometimes air pumps if you need your aeration cycled.  If you are trying to manually control temperature and wind a timer will come in handy.  It will allow to set precise on/off timings for your fans.  Make sure to check the timer you buy to make sure it has what you need.  Some do not have the 3 prong connection and can only use smaller 2 prong cords.

SAFETY TIP: I know what you are thinking, “I’ll just get a plug converter to make the larger size fit.”  DO NOT OVERLOAD SURGE PROTECTORS, TIMERS, OR OUTLETS.  Do not attempt to give a circuit something it is not rated for.  Using the right size electrical components is a good and SAFE habit to get into from the start.  Losing your house to an electrical fire while you were gone is not worth saving a few dollars on a timer or extension cord.

Most people will use digital timers to control their water pump.  The timer will tell the pump when to run so you can control your watering and feeding schedule without being there.  You can set any type of schedule you want with timers.  You will have full control without ever being present.  Many cloning systems need timers to have a mister or fogger automatically raise the humidity every day.  Digital timers can also be used for lighting systems to precisely control the light cycles.

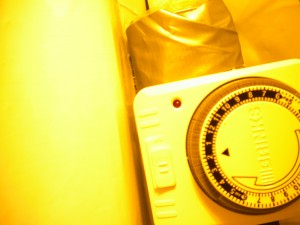
Analog timers can be used when you need many intervals of on/off cycles.  Things like aeroponic and bubbleponic cloners might use something like this.  These timers also work fine for lighting systems.  Just push down the pins or put the on/off pins on the times you need.  Pay attention to the timers clock and the order of times.  Not all analog timers have the times in the order they would happen.


Introduction to Drip Systems

Drip systems are an extremely important component to any top level gardener using soil or top feed systems.    Drip systems can be used outdoors to irrigate small or large gardens and lawns.  They are a great investment for indoor gardeners because it takes the manual labor out of watering and feeding.  It also benefits your plants by ensuring they receive water every day in proper amounts.  The extra time will allow you to create a bigger garden or simply spend less time with your garden for the same benefits.  Indoor gardens must consider the gardener and the plants needs because the relationship is dependent on each other.  If someone feels they are spending too much time in the garden for little reward they may be discouraged and give up the greener lifestyle.

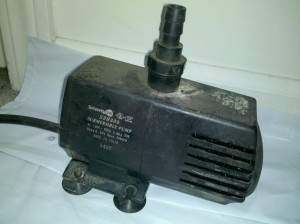
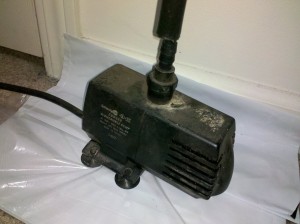
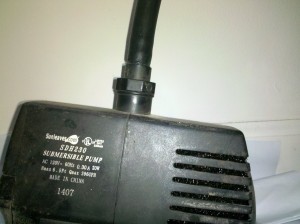
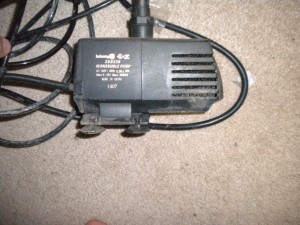
Submersible pumps like this one have rubber suction feet to stick to the bottom of your water or nutrient reservoir

I’ll start by explaining the heart of the drip system.  The most expensive part of your drip system is the water pump.  There are submersible and non-submersible water pumps.  Small gardens and reservoirs will usually use a submersible pump.  If you are setting up your first drip system a small submersible pump should be enough.  Water pumps in the US are rated by Gallons Per Hour(GPH).  The GPH rating of your water pump will come into play when you are deciding what size water pump you will need.  I’ll explain how to calculate the necessary GPH for your drip system in a later article.

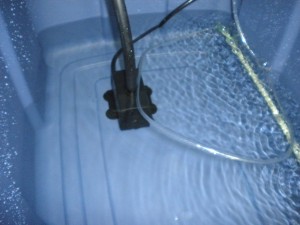
The thick blue storage tote is the container or reservoir for the water.

Creativity might be handy when deciding what to use for a water reservoir.  If you are at all concerned about your health, and you most likely are if you have decided to grow your own food, you should try to stick to food grade plastics for all the parts in your garden setup.  You can buy reservoirs at hydroponic shops, but they can have a high ticket.  It is easy to find something around the house or at local department stores to use as a reservoir.  You can also go to US Plastics to order food grade plastic.  A bigger reservoir can mean a longer span in between reservoir changes and topping off with water to compensate for evaporation.  I always get reservoirs with lids or make my own.  Lids will help to prevent algae from growing in your water.  It can also keep pests and other contaminates out of your solution.

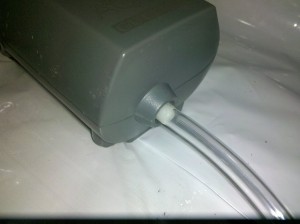
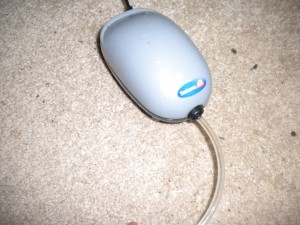
The next important piece of the drip system is the air pump.  The air pump brings fresh oxygen from the room through an air tube and out of a submerged air stone.  The air stone will help to keep the reservoir full of oxygen.  The water will bubble and agitate the water so it does not become stagnant.

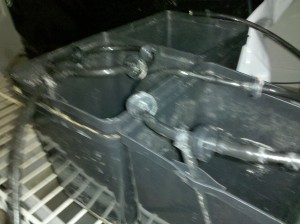
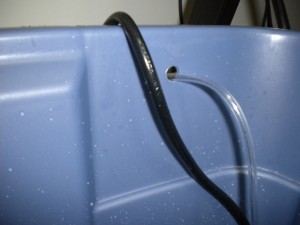
Drill a hole through the reservoir wall towards the top so you can put tubes and cords through it.

If you are making a home made drip system, you will need 1/2″ tubing for the water to transfer from your submersible pump through the drip lines.  Use a hole puncher made for drip lines to poke perfect holes in the 1/2″ tubing.  The holes are for connectors to be put in to make bridges between 1/2″ tubing and 1/4″ tubing.  Most drippers connect to 1/4″ tubing.  The great thing about homemade drip systems is you can customize them to your hydroponic setup.  No matter what type of garden you have, a drip system should be your next upgrade.  If you already have a drip system than be sure to watch for the upcoming articles about building bigger and more advanced drip and top feed systems.

The air pump delivers fresh oxygen via air tubing to the water or nutrient reservoir

You can get all sorts of connectors to for the tubing so anything is possible.  When the 1/4″ tubing is secured to the connectors attached to your 1/2″ tubing you are ready to add drip emitters, drip lines, or sprayers.  Whatever you choose as your water delivery method, make sure there is somewhere for it to drain off.  In recirculating systems the run off goes back into the water reservoir to be used again.  It’s more economical this way for water and nutrients if you are using them.  The other option is a run to waste option.  I have also put a guide up for building a simple run off table.  Its a very simple design that anyone can build.  Homemade hydroponics can be easy with the right knowledge and the right set of tools.  Refer to the pictures below for more details and if you would like to know more about drip hydroponics check back in the next few weeks to get some in depth knowledge.  Sign up for the RSS to get the articles sent to your favorite feed reader or email address!

Inline drippers have 1/4" tubing on both ends so the drip line can continue running to the final destination. The Red dripper will drop 1/2 gallon of water per hour into the medium while the pump is on.

The open ended 1/4″ tubing will deliver the most water per hour, but small pumps have a hard time holding a steady stream for multiple 1/4″ tubes. Distance also slows down the performance of the pump
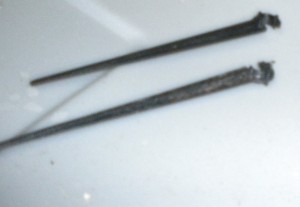
Stakes are used to hold the drip lines in place. Make sure the medium is secure around the stakes. Try not to damage roots when placing stakes in growing medium.