Air Pump Broke on Hydroponics System

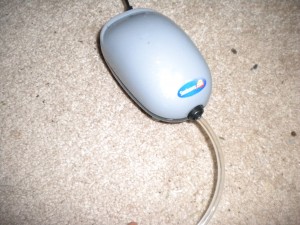
I have heard of many indoor gardeners plagued with broken air pumps.  Don’t blame the broken air pump on a poorly built product, blame it on a poorly trained user.  Sometimes air pumps won’t turn on after a power outage of some sort.  The reason this happens is water is siphoned into the air pump.  The water destroys the electrical components and the air pump no longer functions.

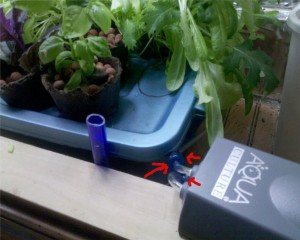
There is a preventative measure growers can take to protect their hydroponic garden from broken air pumps.  The answer is a check valve.  Check valves prevent water from siphoning water into the air pump in the case of a power loss.  They are cheap and easy to install.  You can find check valves in department stores, pet stores, aquarium stores, and of course hydroponics stores.  They are the same type of check valve you put on an aquarium air pump.

Hydro systems with a reservoir should be using an air stone.  The air stone is powered by the air pump.  Nearly all hydroponic systems including drip systems will need an air pump.  A check valve is something everyone should get when ever they get a new air pump.

To install a check valve simply cut air tubing to be secured to both sides of the Check Valve.  Make sure to face the valve the right way so air can flow.   Check Valve will make your hydroponic system more dependable.  Its an awful feeling to lose a good harvest to a hydroponic equipment failure.

Click Here to get your check valves from Amazon.com
Hydroponic Growth Medium: Rockwool or Starter Plugs

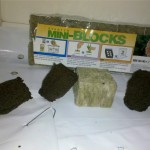
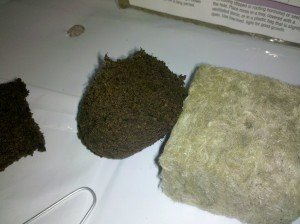
Both mediums have small precut holes perfect for plant stems. You can also start your own small hole somewhere on the cube for stems.

Hydroponic growth medium is an important choice depending on your grow style.  Different growth medias have different strengths and weaknesses.  Many growers turn to hydroponic growing methods for their propagation systems.  By doing so, growers are given a wide array of options to optimize their growing efficiency.  Economical growers do not want to see a decrease in yield or harvest quality due to a growing media issue.

Cloning medium
Try different cloning mediums to find what works for YOU.

Below are the pros and cons for both mediums.  You should experiment with both to see what you find.  You never know what you may find out from trying different soil less mediums.  Search for what works best in the system you use.

Starter Plug Pros:

-Simple, Plugs usually come in a float n grow type system with instructions.

-Only need to be dipped in water to be ready to go.

Starter Plug Cons:

The float n grow system is not really re-usable, rendering the starter plug replacement packs nearly useless.

-Aside from the float n grow – the starter plugs seem to be susceptible to powdery mildew but careful planning can defend against it.

Rockwool Pros:

-The design is made to give the roots the best air to moisture ratio, if used properly.

Rockwool is not messy whatsoever.

-Holds moisture well – Important for cloning.

-Comes in various sizes.

Rockwool Cons:

May not be a good choice for plants that require a dry start  for success.

-Rough handling, and lack of attention could lead to an incorrect air to moisture ratio.

-Should be sitting flat.

I cannot say which will prove to be more successful to you, but I had better luck with the rockwool cubes.  The Starter Plugs stayed in water for too long.  I also tried re-using a float n grow through multiple sets of cloning cycles.  The float n grow needs to be cleaned and sterilized to go through a refill.  The rockwool cubes did not do well sitting in a flood tray of water, but they did hold up well in a bubble cloner.  Go for 100% and try out all the different cloning mediums!  Share your experience below!

Time to Change Your Hydroponic Reservoir: Avoid Salt Lockup

Hydroponic Nutrient Reservoir
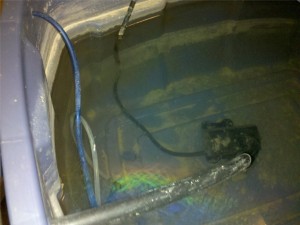
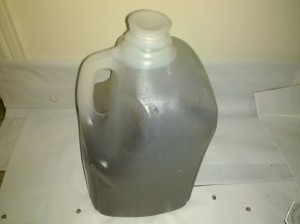
The water in this reservoir is not fit for a hydroponic system.

Reservoir changes are an essential part to all hydroponic systems.  The reservoir is where your oxygenated water and nutrient solution rests in between feedings.  You can read up on res changes if you are unfamiliar with them.  Depending on the size of your reservoir, hydroponic growing system, and nutrient solution your reservoir should be changed every 7-14 days.  Recirculating hydroponic systems need to be monitored closely for signs indicating its time for a res change.  If you procrastinate too long, your plants may become victim to the dreaded salt lock up.  Look for these 5 signs to ensure you don’t wait too long!

1. Discolored Reservoir Water – Hydroponic systems usually have nutrients and potentially an insecticide like Azamax mixed into the reservoir.  After recirculation the solution picks up extra things you do not want to continually recirculate through your system.  If your nutrient solution is not the color it was after you mixed it, it may be time for a res change.

2.Dead bugs – Dead bugs can have germs and carry diseases you do not want transfered to your plants.  If you see floating dead bugs in your reservoir water, change it!

3. Wrong PH/High PPM – If the PH of your water is too high, you could damage your plant’s root system.  You can get products that will adjust your PH, but use them in moderation.  There could be a greater problem you are missing out on if you continually lower your PH with solutions.  A high PPM can lead to nutrient burns and salt lockouts.  You can add plain water to offset a high PPM, but a reservoir change is in place if you made your nutrient solution too strong.

4. Plants are deficient in one nutrient, but over fertilized by another – Using multi part nutrient solutions can give a grower a lot of precision.  If you notice your plants are showing signs of deficiency for potassium, but look over fertilized, they could just need a different ratio of nutrients.  A reservoir change will allow you to start your nutrient mix from a fresh pallet.

5. Two Week Rule – If you have been using the same res water for more than two weeks, its probably time for a change.  Letting your res water evaporate and get low can also spike your PPM.  Don’t let a huge reservoir fool you!  You still need to monitor your PH and PPM because the nutrients do not evaporate out of the water.

Good Hydroponic Growing Medium: Hydroton Clay Pebbles

Hydroton Clay Pebbles
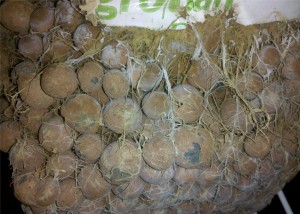
The root system of this plant held the clay pebbles close together to form a solid root ball

The growth medium you choose for your plants is important.  The hydroponic growing medium can determine the time settings you need to run for your drip emitters or ebb and flow system.  Today I’ve written a little post about my experience with expanded clay pellets.

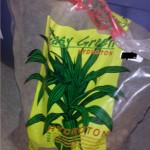
The expanded clay I used was Easy Green Hydroton.  It comes in two sizes: 4/8 and 8/16.  I used a mix of both and had great results.  Expanded clay pellets mix well with other mediums for hybrid mixes as well.  Make soil less mixes from grow mediums that are clean.  New packaged growth mediums should be labeled sterile and most are PH balanced.  In the picture you can see I have a rockwool cube attached to a thick hydroton root ball.

Easy green Hydroton
Bag of hydroton clay pebbles

The hydroton drained well and could be watered many times a day.  Expanded clay wicks moisture from rockwool so be sure to place a drip emitter on your rockwool cube.  My rockwool cube had the main part of root system in it.  If that part of the root system dries and dies the rest of the root system is useless.

You will have to play with the watering intervals for your plants in this growth medium.  Hydroclay dries out fast so water often.  To avoid over fertilization fill your reservoir with a weak soluble fertilizer.  A weak nutrient solution can be fed to your plant many times a day without causing nutrient burn or salt lock up.  

Read customer reviews of the popular Hydroton brand Clay Pebbles here.

GUIDE: How to Mix Fertilizer; Mixing Nutrients in a Hydroponic Reservoir

Mixing nutrients is an essential part to all hydroponic growing systems.  Plants require nutrients to grow.  Hydroponic systems are designed to ensure maximum nutrient uptake.  Use this guide to mix your nutrients correctly every time!  Mixing nutrients in your reservoir is easy – follow the pictures if you are confused.

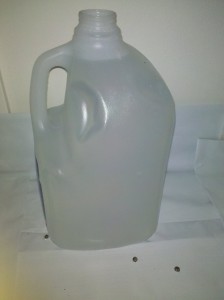
Water for Hydroponic Reservoir
Start with plain water to mix with your hydroponics nutrient.

Start with reverse osmosis water if you can.  I use one gallon jugs to fill water and mix nutrients.  Growers with bigger reservoirs will want to use a 5 gallon bucket to mix nutrients.  Make sure the container you use is food grade.

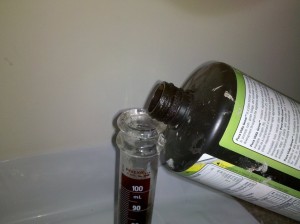
Get a clean measurement tool like a cylinder. Read the label of your nutrients to determine the measurement of nutrients you need per gallon.  If you are using a five gallon bucket make sure to multiply by 5.  I like to start with half of what the bottle recommends to ensure I don’t burn my plants.  Pour your high grade organic nutrients into the measurement tool to make sure you have the correct amount.

Pour Nutrients Into Measurement Tool
Pour your hydroponic plant nutrients into your measurement tool.
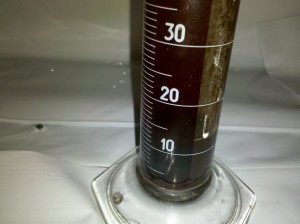
Hydroponic Nutrients
Measure and double check your plant nutrient measurement before adding to your water.

Make sure you double check your nutrient measure.  It is good to know the amount of nutrients used and at what time in the plant’s life cycle.  Jotting down quick notes of these metrics and their results can leave you with valuable information for your next crop.  Grow logs are an essential tool in building a better growing environment.

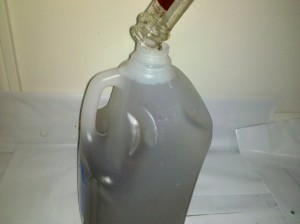
Mix Hydroponic Nutrients with Water
Once you have the correct amount of nutrients, pour them into you water that is to be mixed in the reservoir.

Line up your measurement device with the lip of your container and pour your nutrients in slowly.  If you tilt the cylinder too much you may overshoot your container.  If you spill some the measurement you took is now wrong.  The loss will not affect your grow in a severe manner, but it is nice to have close to accurate measurements.   Even if you are trying to achieve 100% efficiency you are unlikely to do so.

Mixed nutrients.
Cap the container and shake the nutrients until they are well mixed.

High Powered Grow Lights Need High Efficiency Hoods

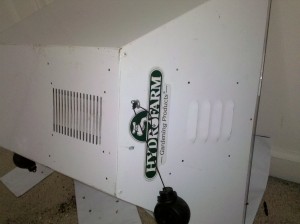
Hydrofarm Grow Lights
Vented hoods reduce the temperature of your high pressure sodium, but plants still need to be pretty far away to stay cool.

Grow Lights come in various sizes.  The bigger the bulb the hotter it will be.  Most plants thrive at temperatures under 82 F.  Some high pressure sodium grow light kits come with a reflector, but no hood.  An enclosed hood is one of the most important pieces of a grow light setup.  On the left there is a picture of an enclosed vented hood.  The hood is not technically air cooled.  Air cooled hoods are much more efficient for cooling hot grow lights.  High pressure sodium and metal halide bulbs both require air cooled or water cooled hoods to run at cool temperatures.

High Pressure Sodium Grow Light Kit
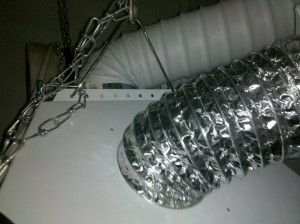
Air Cooled Hood with intake and exhaust ducting.
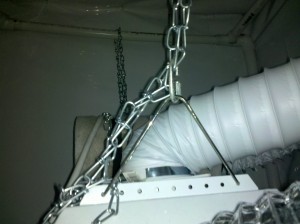
Air Cooled Hood attached to a carbon filter Exhaust duct

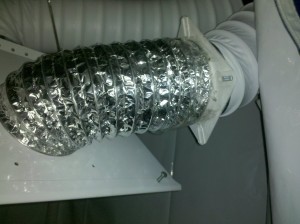
Use powerful inline fans to push air through your hood.  The air needs to be ducted outside the grow environment to keep the grow box cool.  If you are looking for high performance air cooled hoods, go for the ones with bigger ducting holes.  The hydroponics shop and local hardware stores will carry duct converters for increasing or decreasing duct size.  Ultimately a bigger fan will be needed to drastically reduce HID light temperatures.

TIP:  Get Vinyl Ducting to reduce the annoying sound of intense air flow.

Hydroponic Tomatoes

At the local super market I saw a label that read “Hydroponically Grown” on a pack of tomatoes.  I instantly had to purchase them to add to the salsa we were making that night.  The

Hydroponic Tomatoes
Hydroponic Tomatoes before Consumption

hydroponic tomatoes were very ripe.  They were very tasty and seemed no different than a set of perfectly grown soil tomatoes.  But how often do you see perfectly shaped soil grown tomatoes?  There is nothing wrong with soil grown tomatoes, but I had to pay respect to the hydroponic farmers.  Commercial hydroponic farming is very efficient and eco friendly.

Hydroponically grown food can use up less land space to grow more bountiful crops.  Commercial hydroponic food production can be great in a green house.  The greenhouse protects the hydroponic equipment from harsh outdoor conditions.  Hydroponic greenhouses give growers the benefits of clean hydroponics with outdoor sun cycles.  After all, the sun is the best grow light you can get!

Try your own taste test!  If you find some hydroponic or organic tomatoes at the local market buy them both!  You can also get other kinds of tomatoes and compare all the grows yourself.  A lot of times the quality of the product depends more on the farmer than the style, so don’t let one comparison set your mind on one type of food production.  Post your comments below on your experience with buying hydroponic tomatoes!

Does Azamax Affect Taste?

Many indoor gardeners are looking for organic pest control answers.  Some growers forget about certain natural resources they should be using to help avoid pests.  Natural pest guards are plants like garlic and fly eating plants.  The indoor gardener faces a mini pest that is hard to detect and multiplies rapidly.  The dreaded spider mite!  Spider mites are indoor grower’s worst nightmare.  General Hydroponics offers an OMRI listed pesticide that can kill spider mites.  The solution can be used up to the day of harvest and can be sprayed on fruits and veggies.

I have played with Azamax myself to find if the residue would leave a taste on my harvest.  The taste of Azamax will be left on your food depending on how you applied Azamax.  If you can avoid bugs the last week of harvest you should be able to effectively rinse it out of the plant.  Some growers use a final flush solution to clean their hydroponic plants.  Mixing Azamax in the nutrient reservoir is effective for preventative pest control, and quick solutions.  It is easy to put too much Azamax in your reservoir, but it is also easy to fix.  Just add more plain water to your reservoir to help offset the percentage of Azamax.

Foliar applications are the quickest way to kill bugs using Azamax.  I use 5ml Azamax per 2L of plain water for foliar applications.  Using Azamax as an organic bug spray is very effective against spider mites.  DO NOT WASTE YOUR SPRAYS!  If you spray too much Azamax on your plants you will be left with a funky tasting food.  The key is moderation and effective aiming.  Mist the whole plant very lightly from a foot away to give it a spider mite shield.  Directly spray the areas with the most spider mites.  Spray the undersides of the leaves to kill hatching babies.  Spider mites multiply very rapidly, but Azamax will slow down their reproduction.  Azamax can affect the taste of your crop if you use too much.  Follow the preventative pest control measures to move Azamax to your last resort.

Before harvest time spray your plants with plain water.  Start spraying them 2 or 3 days before harvest to rinse off the Azamax residue.  Don’t spray them under intense lighting because you will burn the leaves.  Try feeding your plant only plain water right before harvest to flush the remaining Azamax.  Finally dunk your crop in water as you cut it down to remove the rest of the dust, pests, and sprays.

Get General Hydroponics AzaMax at Amazon today to protect your indoor garden investment. You can also read customer reviews here.

Hydroponic Economics wants to know how your experience with Azamax has been!  Kick off the conversation in the comments section below.

Motivation from MaximumYield.com

In the latest issue of Maximum Yield there was an article about high yields in tight spaces.  The article is motivational for new gardeners who may be discouraged to start an indoor garden.  A simple indoor garden can provide cheap organic food for a family.  It’s economical and eco-friendly. The gardener knows exactly what is going into the food.  The knowledge of the food’s growth can ensure there are no harmful chemicals or pesticides being used.  Despite the food and agricultural industry’s best attempts to bring families clean food, sometimes there are contaminations.  Think of all the times you have heard about major food recalls on the news.  These kind of things seem to be fairly rare and random, but there are ways to protect your self.

High Yields in Tight Spaces : Where a Little Can Mean a Lot

“Ever consider container or vertical gardening? Container gardening is an intriguing option for anyone living in tight quarters, as they are compact and easy to move around. Indoor container gardening is a natural extension of an outdoor garden. Any size home is a great space that will accommodate all kinds of plants. ”  – Aubree Gail Gagne

Read the rest of this great article at Maximum Yield.

GUIDE: Installing an Air Pump in a Hydroponic System

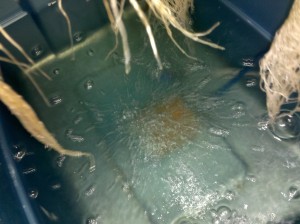
Notice all the bubbles being created, it is hard to see, but there are actually multiple air stones in the reservoir. These plants are thriving in this system.

Virtually all hydroponic and aquaponic systems will require an air pump of some type.  The nutrient reservoir must be oxygenated to maintain maximum efficiency.  If you do not want perfect plants what are you doing here?

Setting up an air pump in your nutrient reservoir is really simple.  I’ll outline the steps below.

1. Figure out the length of air tubing you need for the air stones to sit in the reservoir where you want them.  Leave a little extra tubing- you don’t want too much because air loses power over distance.

2. Put a hole through the side of your reservoir if you want your lid to seal.  Put the hole close to the top where water won’t spill out.  The hole is where the air tubing goes through.

3.  Put your air tubing through the hole you made before connecting the air pump or air stone.

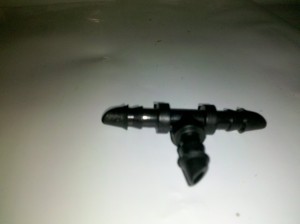
4. Connect any T connectors you plan on using.  T connectors connect two air lines together to aerate two separate stones.  One large air pump can aerate many air stones in one reservoir or provide all the oxygen to many reservoirs.  I use small air pumps for each reservoir so all my eggs aren’t in one basket.  If one air pump aerates all the reservoirs and it malfunctions, all your reservoirs are donezo!

T connectors are used to bridge multiple air lines to the main air line.

5. Cut your air line before it meets each air stone to put in check valves.  Check valves ensure you air pump does not siphon water in the event of power loss.  Siphoned water into your air pump means a broken air pump.

Check Valves
Check Valves prevent water from being siphoned to your air pump.

6. Connect your air lines to your air stones and place them where you want them.  I like heavier air stones that stay in place at the bottom of the reservoir.  If you have multiple air stones, spread them out so your entire reservoir is oxygenated.

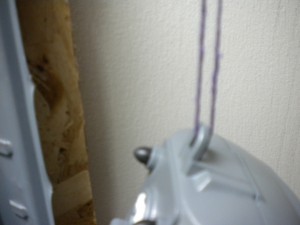
7.. Now is good time to hang your air pump if you plan to do so.  Air pumps can be noisy and sometimes give off a loud vibration that gets really annoying.  A hanging air pump should be a quiet air pump.

8. Connect the other end of your air tubing to the little connector coming out of the air pump. (shown below)

9.  Plug in you air pump and oxygenate that reservoir!.

Hanging Air Pump
Hanging air pumps reduce noise by eliminating loud vibrations.
Sunleaves Durapump Air
Air pump connected to 1/4inch air tubing oxygenating a large nutrient reservoir.