Grow Box Guide: How to Build A Grow Box


Build Grow Box
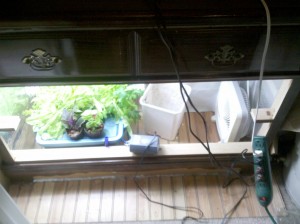
Here is an example of a Grow Box made out of a dresser. It is very easy to do because the frame of the grow chamber is already made.

So you want to start an indoor garden but don’t know how to build a grow box.  Building a grow box is actually simple once you understand the mechanics.  Today you will learn every thing you need to know to build your own grow box.

The following guide will walk you through the basics of constructing a grow box out of an old piece of furniture.  A lot of indoor gardeners are also very enthusiastic about recycling, so this should really hit home for a lot of you.  The dresser grow box could be considered a grow cabinet, whatever you want to call it, the function is the same.

5 Reasons You Need Grow Box Plans:

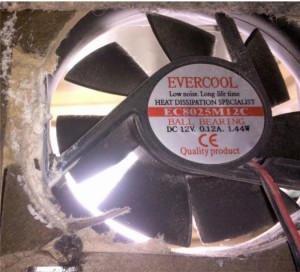
1. Grow Room Ventilation: There is too much to say here.  You will obviously need some sort of exhaust.  The size of fan you need depends on the size of your grow box or grow room.  This simple grow box uses PC fans which can be wired to an old PC power supply very easily.  You can also control the timing of the fans by putting the power supply on a timer.

WARNING: Do not use the biggest power supply you can find.  Stick to a smaller power supply with low wattage because the fans use very little power.  If you do not know what you are doing, use a pre-made fan that you can just plug in.  For 20 bucks you can get a dryer type ventilation fan that can be attached to ducting.
Grow Room Ventilation
Cut a hole in the back of your box and screw your fan into place. You can also use epoxy or strong glue.

2. Reflective: Reflectiveness should depend on your budget.  Aluminum foil is probably the cheapest material, but it certainly doesn’t reflect the most light.  Since you will likely be using small grow lights, you will want to get the most out of it.  White poly or Mylar are the premium choice.

3. Water proof/Bug proof/Mold proof: Water proofing is one of the most important things about building a grow box.  All hydroponic systems should be in water proofed grow boxes, or outdoors where they can’t possibly make a mess.  I’ll discuss bug proof more in the next point.  Mold proofing takes a little common sense.  Don’t use carpet for the floor of your grow box or anything dumb like that.

4.  Air tight: You will want your grow box to be air tight so that light doesn’t escape, bugs will have a harder time getting in, and you will want control of the ventilation.

5. Odor control: Some people enjoy having fresh herbs, vegetables, and fruits growing in their house, but don’t want their house to smell like a garden or green house.  Some people just don’t like that smell.  You can get a carbon filter for the unwanted smells, but you will need to get an inline fan, which could dramatically raise the price.

Electrical Components

Please make sure all of your electrical components are away from possible water sources.  You should place your outlets on the out side of the grow box and hung up.  The last thing you want is water in your electrical components.

Key Components
Grow Room Fan
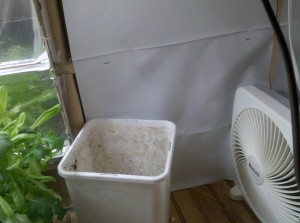
The small desk fan provides plenty of air movement in this small grow chamber.

Indoor Grow Lights: CFLS
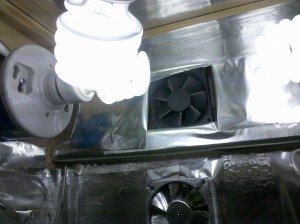
Here you can see two of the small ventilation fans and a few 23w CFLs. You want to get the most surface area of each bulb facing towards the plants.

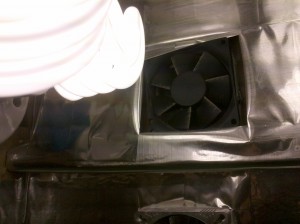
Grow room fan
Notice the fan is pushing air OUT of the box. The fan at the top is drawing the heat from the lights and pushing it outside the grow box. The lights are what make the grow chamber's temperature rise. You don't want your plants to catch a fever!

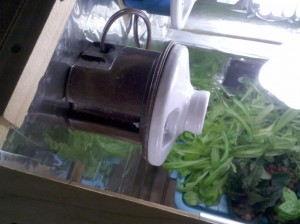
CFL Grow Light
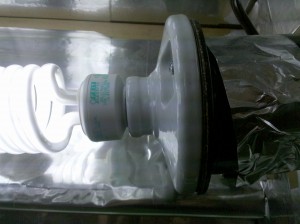
Another angle of the CFL Grow Light

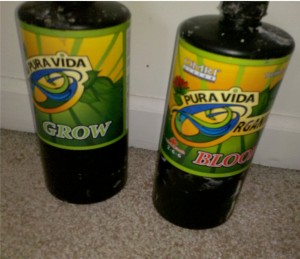
Pura Vida Hydroponic Nutrients: Product Review

Hydroponic Nutrients
Organic Hydroponic Nutrients

Pura Vida is a pretty well known brand of hydroponic nutrients, and has been tried by a lot of different gardeners.  Pura Vida hydroponic nutrients are great for indoor gardening because they come in liquid format.  You measure out the desired amount of nutrients, and pour them into a gallon  of water.  After mixing the nutrient solution, it is ready for use.

You apply Pura Vida nutrient solutions with normal irrigation.  The best time for feeding is usually in the morning, when the plant is just starting its metabolic processes for the day.

Note: The Pura Vida Organic Solution was OMRI Certified Organic.  The Pura Vida Grow was not organic.  The plants did not seem to notice the transition.

The first things you need to know about the Pura Vida combo is there are micro nutrients built in. It is a two part solution, but only one part per phase. One part per phase is talking about the growing phase of the plant, Grow or Bloom.

You only need to use the grow for the first part of their life. You only need to use Bloom for the second part of their life.

If you are new to hydroponics, I recommend starting with that type of simplicity. You are making up for the simplicity with the quality of nutrients.

Advanced Gardener’s Box: There are instructions for an aggressive two part formula on the back labels of these bottles.  The PPM of the nutrient solution is MUCH higher than the one part formulas.  Only experienced gardeners should attempt the aggressive formula once you know how to grow your particular variety of plant.  It is very easy to salt lock your plants with this aggressive formula.  You need to do frequent water changes to ensure balanced PH.

The Negatives:

I tested the nutrients in a large variety of hydroponics systems including three different drip systems.  On the drip systems that used drip emitters, about 1 in 10 drip emitters would clog from the organic material.  One way to defeat those clogs is to mesh out the chunks of fertilizer before you pour it in your reservoir.  There are also pre-filter systems that can catch some of those pieces.

In open-ended 1/4 inch tube drip systems, with no drip emitter, the nutrients worked beautifully.  The key to success with the open-ended tube system is to lower the ppm of your nutrient solution while buffing the number of regular feeding times as the plant grows and expands it’s root system.

The open 1/4 inch tube allows the root systems to get optimal amounts of aerated water.  Use an aeration stone in your reservoir so the nutrient solution stays oxygenated and moving.  The open ended 1/4 inch tube allows the water to connect with more air molecules before landing in the plant container.  This system works for hydroponics, soil-less, and even soil growing methods.  Talk about versatility.

Overall

Consider trying these nutrients if you have never used them.  The bottles cost a little more than the lower end hydroponic nutrients, but thats for a reason.  Do not under estimate the strength of these nutrients.  Make sure to lower the ppm of your nutrient solution so you do not get salt locked plants.  These nutrients can go up to three weeks with no water change in a 15gallon + reservoir.  However, you should monitor your PPM for optimal conditions.  Water changes every 12-14 days with a standard plain water rinse out is typical.

Look for the OMRI Certified bottles at your local hydro shop or you can order them online.

Looking for More Information?

Best Price On: Pura Vida Oraganic Nutrients.

Happy Growing!

GUIDE: Build a Super Cheap Bubbleponic Cloner

Stronger Clones Start Here

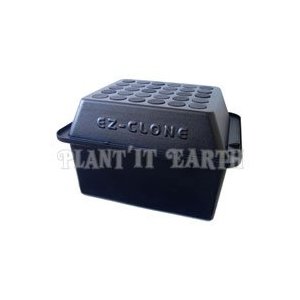
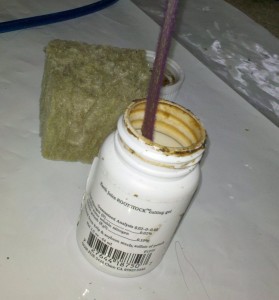
Bubbleponic cloning systems are an easy to build solution to weak and limpy clones.  The entire system will not cost you very much.  If you use neorepene discs, like the E-Z Clone uses,  you will have an efficient cloning system that uses no growth medium.  The aeroponic cloner you will have after this guide can root clones in as little as 7  days with an organic rooting gel like Earth Juice Earthstock.  There are plenty of other types of rooting gels and powders.  Clonex and Olivia’s are two other gels that work well.

Example

Aeroponic Cloner
Check out this Pre-Assembled Aeroponic Cloning System

Supply List

-Storage Tote

-Neorepene EZ Clone Discs

-Air Pump

-Air Tubing

-Air Stones

-Power Drill w/ drill bit that is the same size as your discs.

Light Proof Your Tote

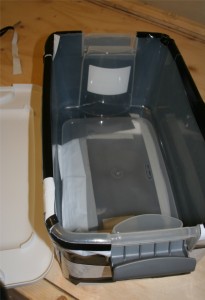
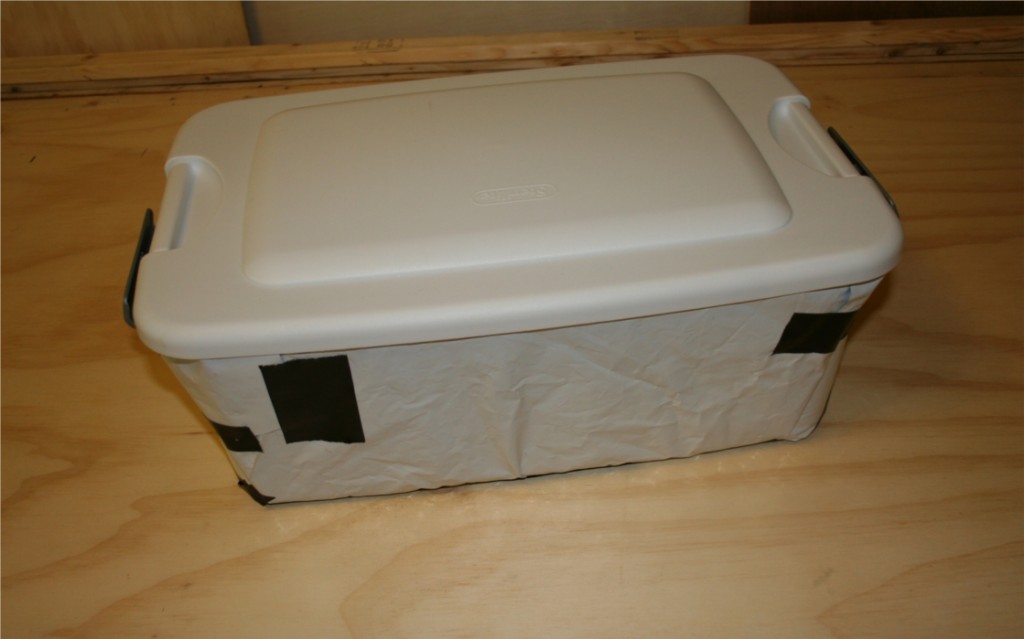
Future ReservoirIf you bought a light proof tote, you can skip this step.  If it is clear or semi clear you need to wrap it in a reflective material.  You can use Christmas wrapping paper if you do not have access to something else.  You just want to make sure no light comes in through the walls of your tote.  The storage tote will be the water reservoir for your cloning system.

Use HDPE Food Grade plastics for your storage tote if you plan on cloning consumable plants like fruits or veggies.  Food grade plastics ensure the safety of you and your family.  If the cloning system is only for flowers, there is no risk since you will not ingest the chemicals.

Continue reading “GUIDE: Build a Super Cheap Bubbleponic Cloner”

Natural Pest Control: AzaMax Applications


Words from the wise: Use your AzaMax applications carefully! The best way to spray your garden with this organic pest control is lightly! Azamax is Strong not harsh.

Step 1: Read over the AzaMax instructions.  The bottle came with a little chart detailing the volume needed to obtain different strength solutions.

Step 2:  Stay on the lower end of the chart when making your solutions.  Remember – you can always spray the solution a few different times to ensure the plant is covered.

Step 3: Fill up a beaker or your spray bottle with water.  You want to use something with liquid measurement so you can easily calculate how much Azamax to add.  You will notice the Azamax has a self measuring compartment.  Squeeze the bottle to get Azamax into the measurement area.  Use enough liquid to require 2 -4 ml of Azamax so it is easy to measure.

Step 4: Mix the Azamax with the water to form your solution.  Shake the bottle vigorously to completely mix the solution.  This should only take about 10-15 seconds.

Step 5:  As you spray your plants continue to gently shake your bottle.  Continuous shaking will ensure the solution stays mixed throughout the spraying process.

Step 6:  Spray the Azamax about 6- 8 inches from the plant depending on the power of your sprayer.  The large hand pump sprays should use more distance to avoid plant damage.

Step 7: Spray directly on any pest sites or spider mite eggs.  Spray the under sides of the leaves and the top of the soil or growth medium.  Spraying the medium will kill hatching eggs nested away from light.

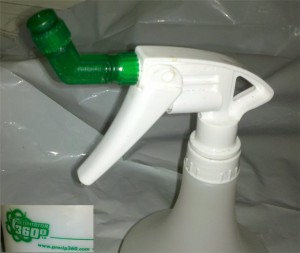
PrecipitatorUse the Precipitator 360to get the undersides of the leaves easily.

It takes about 7-10 days for every insect to die off.  You can spray again safely the seventh day.  If you have a really bad infestation, you could try spraying every four or five days.  If you do not have time for as many applications, try using a slightly stronger solution.  Large quantities of any type of spray will affect the taste of your final product.  Let us know how you use Azamax or any other Pest Control option in the comments below!

Get General Hydroponics AzaMax at Amazon today to protect your indoor garden investment. You can also read customer reviews here.

GUIDE:How to Successfully Take Plant Cuttings From a Mother Plant

The key to keeping mother plants small lies in taking strong cuttings.  Strong cuttings will root fast and grow into large plants of higher quality.  Weak clones are susceptible to disease and bug infestation.  Cloning is very rough on the mother and fresh cutting.  Avoid taking too many clones from one mother plant in one day.  When mother plants lose a lot of their vegetative growth, they can become weak.  A weak mother plant can only provide weak clones(a problem you are already trying to avoid).

Follow these step by step instructions to ensure you have a successful cloning system.

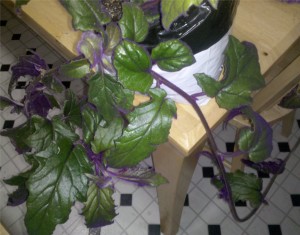
The mother plant could produce 4 or 5 fresh cuttings at this point.

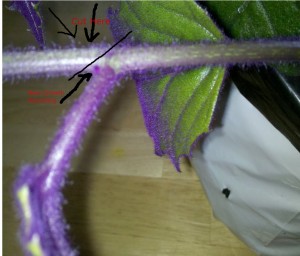
First identify the best part of the plant to clone.  This can vary a little depending on the type of plant.  For the most part you want to have a long enough stem to fit through your growth medium.  Use a razor blade or trimmers to cut a clone at a 45 degree angle.  Cut at a node where another branch will grow out.  The old stem will appear to split into two new stems.  Those two stems can turn into two strong clones or one very strong clone.  You have the power to decide.

Plant propagation
The line is exactly where you should cut your clone. Below the line the new growth is sprouting out.

Once you have cut the clone from the main stem, you want to cut off any large leaves because they will drain the cutting of its moisture.  Do not fear, the leaves will grow back.  The bottom 6-8 inches of the steam should be completely clear of leaves.

Dip the end of the stem in your favorite Cloning Gel. I prefer Earth Juice for organic applications and Clonex for flower types.

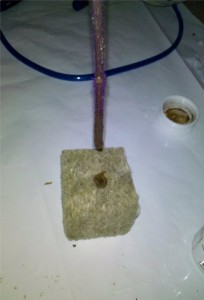
Next put the cutting into its own growth medium to be put into your cloning system.  The growth medium could be a rockwool cube, a net pot of hydroton, or a neorepene disc.  After a few hours if you notice your clones are sagging or wilting, gently mist them with plain water.  DO NOT OVER DO IT. You want the plant to feel the need to grow roots to find water and nutrients.  Good Luck Gardeners!  Feel free to leave comments below if you have any questions.

Fluorescent Grow Lights: Get Intense Vegetative Growth with Less Space

Indoor gardening tends to revolve around grow lights. grow lights have a very large effect on harvest weight. The more intense the light is, the faster your plants will grow, right? There is no practical light you could use to replicate the sun’s powerful beams. Instead, growers turn to high powered grow lights. High power lights use a lot of power and are usually really hot. They may not be practical for most indoor gardens.


High pressure sodium and metal halide light bulbs are really hot after they have been burning. They also crank up your electric bill. There are a few alternatives to this type of lighting. Metal halide bulbs are meant for vegetative growth. In most indoor gardens, the vegetative phase includes smaller plants. Swapping out your metal halide for a fluorescent grow light may save you space and energy. Fluorescent grow lights do not require large air cooled hoods because the fluorescent tubes stay relatively cool. At least cool enough for most plant growth.

Fluorescent Grow Lamp
Fluorescent Grow Lamps can be used for grow and bloom phases as long as you use the right bulbs.

A small salad greens garden for the family and your pets could be grown with ease under a few fluorescent grow lights. The grow lights you will want to use are not standard shop lights. Although low power shop lights will work for cloning systems, use indoor grow lights from a hydroponics shop. You can also order grow lights online. They are usually much cheaper online.

There are also fluorescent grow light bulbs for the bloom phase. They feature a red/orange spectrum. They are powerful enough to bloom tomatoes, strawberries, and other plants that do not require tropical light. Fluorescent light fixtures come in different sizes and lengths. Find the grow lights that will best suit your grow room.

Easy Grow Lights
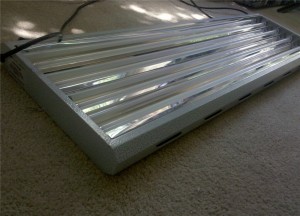
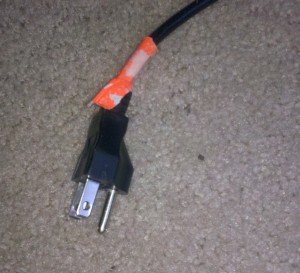
Fluorescent light fixtures are usually outfitted with internal ballasts and a simple three prong cord.

The Hydrofarm 4-Foot T5 Grow Light System is a well respected Grow Light Set Up. Hydrofarm offers affordable grow lights that are cool enough for plant growth. Read over 50 customer reviews at Amazon.com

Grow Room Ventilation Made Easy


-General rule of thumb: 400CFM exhaust to 100CFM intake.  Play with these numbers to see how the temperatures and air flow change.  I suggest hanging digital thermometers in various locations and heights in the grow room.  There are thermometers that also tell you the min/max temperatures from the day.  Knowing those temperatures allows the grower to understand how their daily temps are fluctuating.  Indoor grow boxes are much more efficient when they are running cool.

-Clean Green Tip:  Clean grow rooms are happy grow rooms.  Use carbon filters on exhaust fans and HEPA filters on intake fans.  Use gas duster cans to spray away any dust on fan blades.  Spider mites love to live in dust and travel through the air.  Avoid spreading a spider mite infestation with a little preventative pest control.

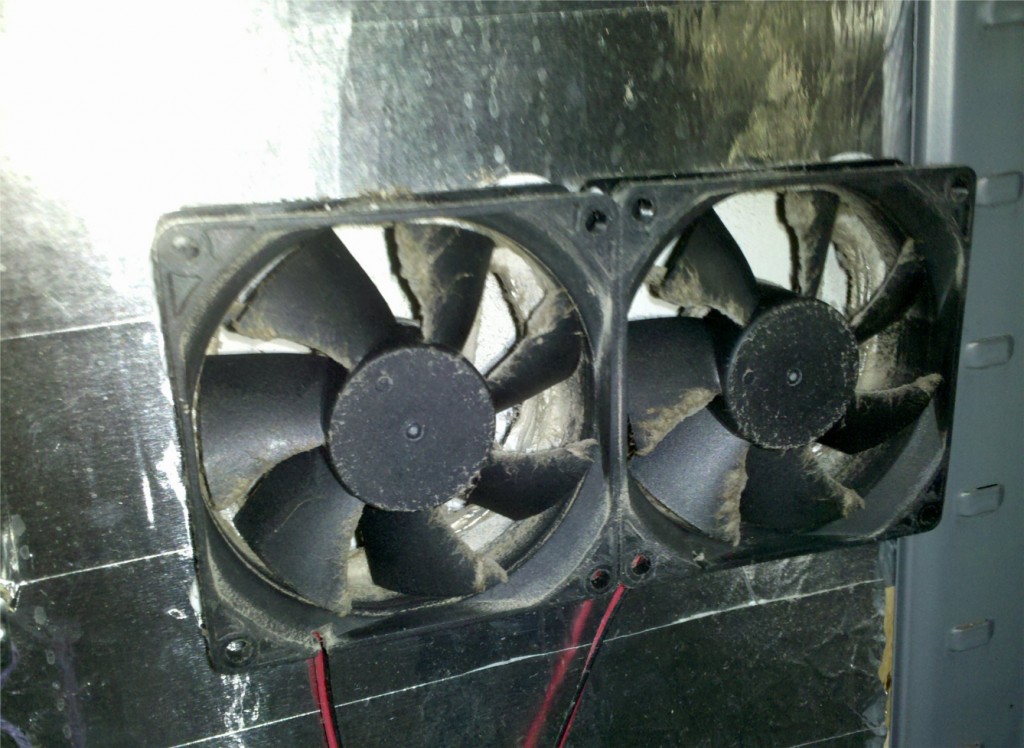
80mm PC Exhaust Fans
PC fans are great for small grow box ventilation and circulation.

There are a few different ways to ventilate your grow room depending on the size.  Small PC grow boxes, and any box roughly 2’x2’x4′ could be ventilated with PC fans or one small ducting fan.  Small bathroom exhaust fans would work but may be too loud for the application.  A closet grow room will need a 4″ or 6″ inline ducting fan.  The inline fan can ventilate the room and clean the air with a carbon filter.  If you are using metal halide or high pressure sodium light bulbs you will want the inline fan to push the air through air cooled hoods.  Below is an example.

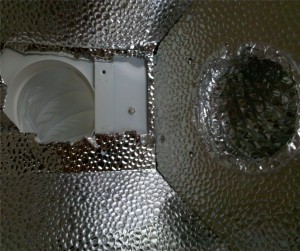
2 ducting holes for air flow.
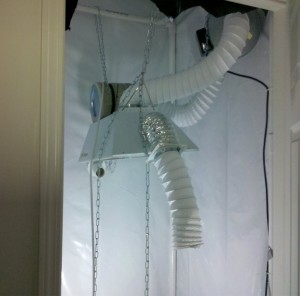
The hot grow lights are cooled in this hood. The white ducting is the entrance for the air that is coming from the inline fan. The air is pushed through the shiny duct and to the outside of the grow box.
The grow light setup
It is essential to cool hot lights in some way. You will notice healthier plants and great results!

Key to indoor gardening: Experiment with everything to see what works in your grow room.

If you understand the principles behind the practices – you will be able to make things work with what you have.  Try using a bathroom exhaust fan as the grow room exhaust.  Bathroom fans are rated with CFM just like inline fans.  They practically work the same.  Control the flow of air with quiet insulated ducting.  The noisy vibrations will certainly get annoying.  Look for more posts in the future about ventilation and grow room air circulation.

Click Here to read about the 4″ Inline Fan with Carbon Filter on Amazon.com

Have a Weak Drip System or Less Than Powerful Sprayers?

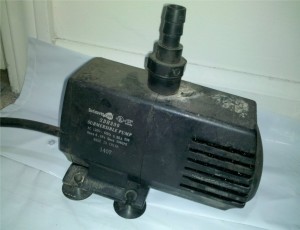
Submersible Water PumpBefore deciding your homemade drip system is non-functional, check your work.  Did you plan the needed gallons per hour your pump would need to push water through the whole system?  Water pumps are rated by GPH(Gallons per Hour).  You will need to know the minimum GPH your drip system needs to pressurize the water and make it through your drip emitters.

New growers seem to back away from home made drip systems because they are unsure of the necessary parts.  Drip irrigation kits are usually over priced and come with some pretty barebones parts.  The kits may also come with a small reservoir, that you are required to use because the pump is attached to it.  Avoid the woes of drip system kits by making your own irrigation system at home.

Home Drip System
Outdoor Drip System with a strong water pump at the heart of the reservoir.

Hydroponic shops carry all the parts you need to set up a custom drip system.  Start with a plan.  If you have not built your grow room yet, you will need to know the number of plants you plan on having and at least the distance the drip line will travel.  It is important to know the distance of the drip line to calculate the power you need for your water pump.

To find out the needed GPH rating start with the length of tubing you are going to use.  For every foot of tubing you use, regardless of size, subtract 1-2 GPH from the water pump’s rating.  Check the packaging for the drip emitters you would like to use.  The packaging should tell you the PSI rating.  Take the PSI and multiply times the number of drippers.  Subtract that number from the remaining GPH of the pump in question.  If the number of GPH remaining is very low or negative, you need a stronger pump.

Calculating GPH for a Drip System:  (2 GPH x 1 ft of tube) + (PSI rating of Drip Emitter x Number of Drip Emitters) = rough estimate of the necessary GPH.   There are outside factors not mentioned in this equation.  The number of connections the water has to travel through will affect the needed GPH.  Bridged drip line connectors like tees and elbows can slow down your water.  Be sure to wash your pump’s pre filter out during reservoir changes to ensure there is no blockage cutting down your GPH.  Follow these simple guidelines to ensure you don’t buy an expensive water pump you don’t need or wind up with a less than functional drip system.

Top Feed
Strong water pumps can forcefully pump water out of open drip lines to feed even the most demanding plants.

Delicious Home Hydroponics Salad Harvest

Organic Hydroponic Garden
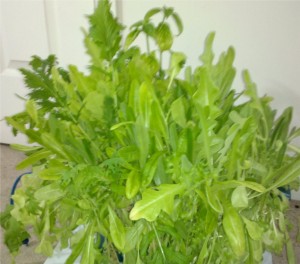
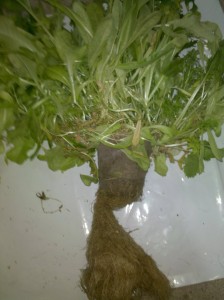
Thriving Mesclun in a mini DWC system.

Why should you use hydroponics to increase your yields?  The same reason you started a garden!  If you have ever had a successful harvest, you know the feeling I’m talking about.  Some growers are discouraged by organic fertilizers when it comes to hydroponic gardens.  Fear not growers, water soluble organic fertilizers are available online and at local hydroponics shops.  Some greens can even be grown using tiny amounts of fertilizers. Basils, lettuce, mesclun, and other leafy plants can be grown organically in hydroponics system with very little fertilizer.

Organic indoor gardens can be maximized with the use of hydroponics.  Organic hydroponic systems are like normal hydroponic gardens, but with a little more care to detail and quality.

Organic Hydroponics
The seeds for this plant were started in soil. The container with the soil was planted directly into a mini DWC System for extremely explosive vegetative growth.

The salad mix in the picture was started in a jiffy pot full of soil.  When the seeds sprouted, the jiffy pots were put into a mini DWC system.  The roots grew through the soil and into the DWC environment.  There was explosive root growth when the roots entered the high humidity environment.

The salad grew very fast under simple CFL lighting.  Small hydro setups can produce big results with the right knowledge.

Indoor Organic Garden
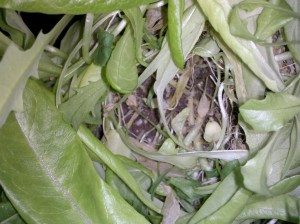
This is a single 3 inch jiffy pot full of soil. Each Jiffy yielded at least 2 or 3 servings of salad greens under only CFL lighting.

Drip Systems: 5 Problems You Can Avoid

Drip system maintenance is key to running an efficient hydroponic drip system.  Below are 5 problems to watch for in your drip system.  Avoid these problems and you’ll be keeping your plants from automation gone wrong!

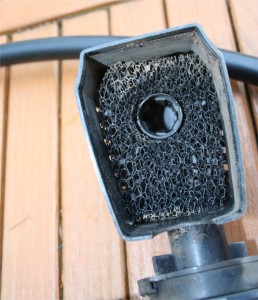
Hydroponic Water Pump Pre Filter
The foam filter inside of this water pump catches small particles before they have a chance to interrupt your drip system.

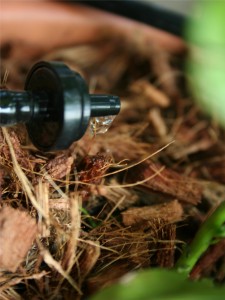
1.Drip Emitters – Clogged drip emitters are most likely the number one problem in drip systems.  The best way to fix them is cut them off and try a fresh one.

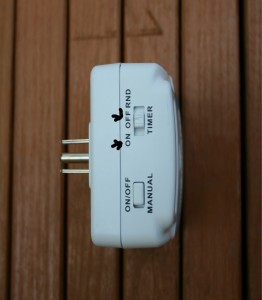
2.Timer On/Off Switch – Have you ever turned the switch on your timer off so your drip system wouldn’t run during a reservoir change?  Always double check to make sure that switch is back to ON when you are done.
3. Timer Malfunction – Timers can shut off for various reasons: water damage, battery or power failure, clock malfunction.
4. Reservoir Levels – Reservoir changes are necessary for productive hydroponic gardens.  Evaporation and usage will drain your reservoir.  When reservoir water evaporates, the nutrients and salts remain in the water.  The extra salts create a higher ppm nutrient solution.  Add plain or low ppm nutrient solution to get the levels back to where you want them.
5. Avoid Over Watering – Don’t run your drip system intervals for too long.  Start with small intervals and increase or decrease frequency depending on your plant’s performance.  It may take them a few days to react to changes so be patient.

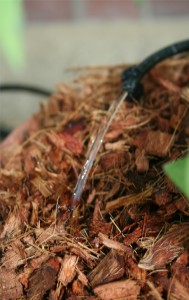
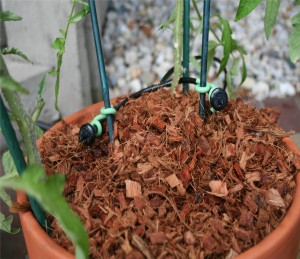
Functioning Home Made Drip System
Both drippers are problem free!

Did you know you can buy and read customer reviews for Drip Emitters on Amazon? Check it out here.