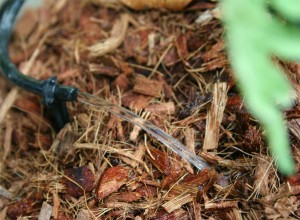
Automated gardens are the most efficient way to grow fruit and vegetables. An outdoor garden can still be automated because the sun is the light and you have no control over that. Watering and feeding can also be automated to ensure your plants are getting everything they need. Self-watering containers may be the only way to keep plants from drying up in the middle of a hot summer day. If temperatures are getting above 85F your plants are probably thirsty! It is too big of a hassle to hand water your plants all day to ensure they get what they need. You may not be there when they need the water and your plants should not rule your life. You may be making a homemade irrigation system to water your plants while you are on vacation, but when you return you will ask yourself, “Why don’t I always use an automated system?”
If you are new to drip systems you will want to read the Introduction to Drip Systems to get acquainted with the parts I’ll be discussing. For this project you’ll need:
- 1/2 Inch Drip Line
- 1/2 inch tube end clamp
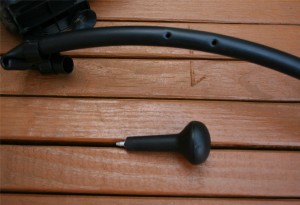
This is the tool you need to punch holes in your 1/2inch tubing - 1/4 Inch Drip Line
- Drip Line Hole Punch(mandatory)
- Submersible Water Pump
- Drip Emitters
- Sunleaves DuraPump Air
- 8′ Clear Air Line Tubing
- Round Air Stone
- Reservoir
- Tupperware container
- A Digital Timer
- Possibly extension cords
As always, your first step is to plan out your container garden. Find the arrangement you want to use to maximize sunlight. Keep in mind that your tubing will have to reach from your reservoir to your container garden. The size of your water pump will
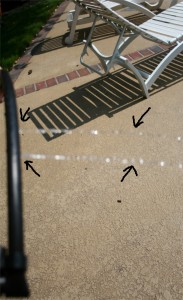
determine how much reach you have to play with. Don’t forget your water pump also has to power through your connections and drip emitters. Water pumps are one of the most expensive parts of the home made drip system, but they usually come with at least a one year warranty. Once you realize the productivity ratio of self-watering containers you will not want to go back to daily hand watering.
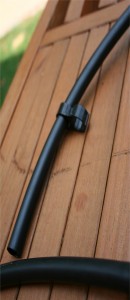
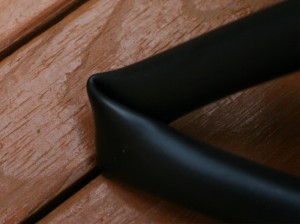
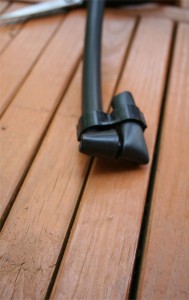
Put the end of the half inch tubing through one end of an end clamp and create a kink. Wrap the tube around the kink 2-3 times and thread the end through the other side of the end clamp. The result should be a closed off water proof end to create pressure throughout the drip system tubing.
Put the other end of the 1/2 inch tubing on the end of the water pump.
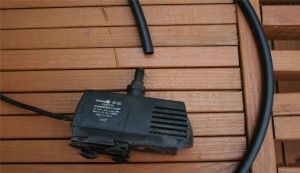
Once your pump is assembled you are ready to make your drip lines. Punch holes in the half inch tubing where you want your 1/4 inch drip lines to start. Don’t push through the vinyl or whatever material tubing you are using too hard or you will go through both ends and create a leak.
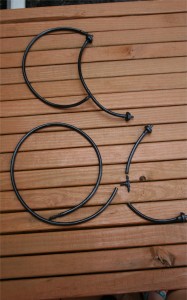
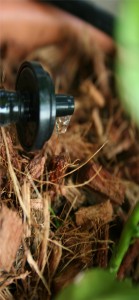
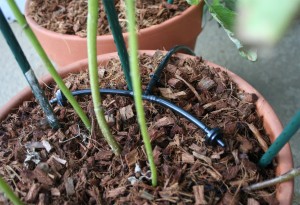
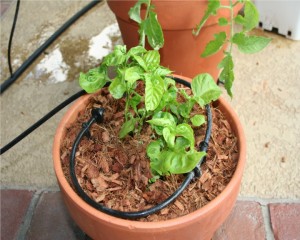
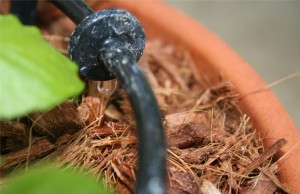
There is a wide array of drip emitters you can choose from at your hydroponics shop. You can get inline or compensating drippers which are explained in more detail in the Introduction to Drip Systems guide I mentioned earlier. You can also get mini sprinklers and other types of emitters for different purposes. This system is built with compensating drip emitters because the half inch tube sits on the ground and the 1/4 inch tubes climb the length of the container.
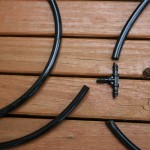
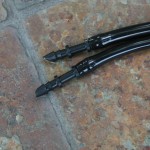
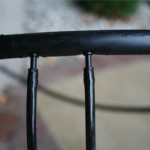
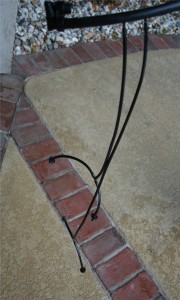
Put 1/4 inch straight connections on the end of the drip line with no drip emitter. The straight connector goes into the hole you made earlier in the half inch tubing. The connection is how water gets from your 1/2 inch main tube to your individual drip lines. Fewer connection bridges and fewer drip emitters means more power and further reach.
This is a lengthy guide for a homemade drip system, but bare with me and you’ll be on your way to irrigation freedom! Next step is to prepare your water reservoir. You’ll want to drill or burn a hole through the side of your reservoir to put the half inch tube through. If you just want your lid to sit on top of your reservoir that is fine, you can tape it down. Expect greater evaporation rates and contamination if you don’t use a sealed lid. Keep in mind a cleaner grow space is better grow space.
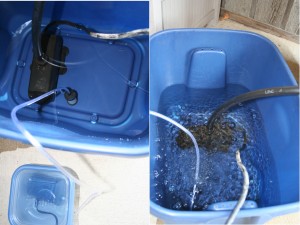
You will have to put the end of the half inch tube that is connected to your water pump through the hole before connecting the pump. The water pump will not fit through your 1/2 inch hole! This step is really easy using a drill with a 1/2 inch circle drill bit. If you are using plastic make sure you don’t crack the side of the reservoir. If it does crack easily you are probably using a material that is too weak to hold water for long periods of time.
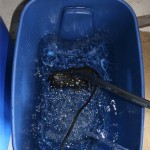
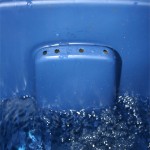
For this outdoor reservoir I bought a container that already had holes in the handle. Since it could rain in the area where the reservoir is it could fill with rain water and knock the lid off the top. You can drill your own drain holes with a simple drill bit if you are planning to use a container without them.
Once your water pump is in place and suctioned down to the bottom of your reservoir you are ready to add the aeration device. The air pump will oxygenate the reservoir and ensure the water keeps moving. Stagnant water can get pretty nasty and your plants love oxygen in the root zone. If you are unsure on how to set up an air pump check out my guide on installing air pumps in hydroponic systems.
One thing you will probably not find at your local hydroponics shop is a cheap water proofed air pump. The lack of water proof air pumps seem to
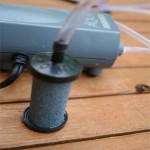
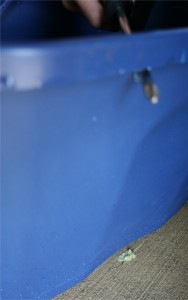
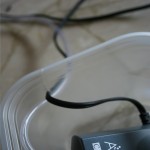
discourage most hydroponics gardeners from using the natural sun. A smart do it yourself gardener can find a solution. You will need to get a plastic container of some sort that comes with a lid that seals tight. Poke a hole in that container near the top. Make sure the hole is just big enough for your electric plug and air tube to come through. I used a screwdriver to create a small crack for both things to go through.
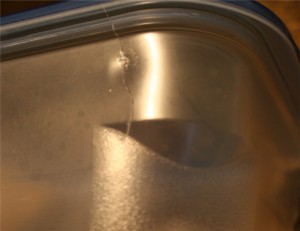
Put the air tubing through the hole before you connect it to the air pump. You do not want the hole to be bigger than it has to be. A large container is safer because the hole can be higher off the ground and away from potential flooding. Do not put the hole through the lid of the container because rain will get into your electronics!
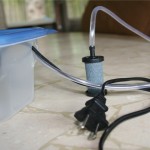
I placed the reservoir and water proofed air pump in a covered area with electrical outlets. I had to use extension cords to get the air pump to reach the outlet. I also needed a 3-prong extension cord for the water pump. The digital timer you use to automatically turn your water pump on and off also needs to be in a covered area where rain can’t get into the parts.
Novice gardeners – don’t get the idea air pumps are too complex or unnecessary for you. That’s your first mistake as a novice gardener! Automate your irrigation and add oxygen and whatever else the plants need. Reaching for 100% is how you get perfect plants! Click on the picture below to see what an air pump does.
Your friends will be jealous when they see how “high tech” your garden is! Now that your reservoir is up and running you are ready to finish your automated drip system.
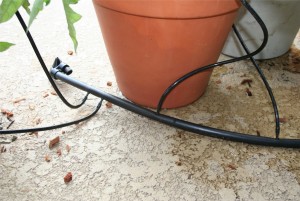
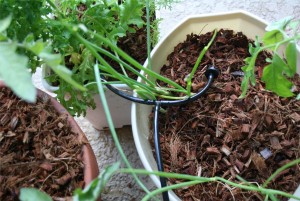
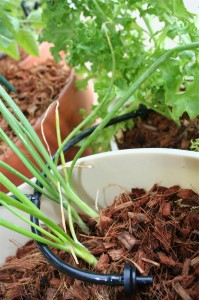
Position your containers around the drip line so all the lines can reach their desired area. I use two drip emitters on most of these containers because they are three gallons and up. On 1 -2 gallon containers one drip emitter may cover the whole medium over a drip period of a few minutes. At the very least it will keep your plants alive while you are on vacation. Having a small drip cycle with outdoor plants will adjust for rain. Say you are gone for a week and it rains for three of those days. Those three days it was unnecessary for your drip system to run! It may have had a detrimental factor because of excessive watering. Make sure your containers have good drainage and choose your medium carefully. Well mixed growing mediums are key to ensuring your plan’ts success. Different plants benefit from different growing environments and growing mediums.
TIP: People who have been paying attention can skip this tip because they already realized from the article I suggested on Digital Timers, there is a way to automate their watering schedule. Some digital timers come with a day setting. The day setting will allow you to run your drip system every other day or in different intervals. You may want your drip system to run 3 times a day alternating with 1 time a day. If this tip is confusing you, come back to it later when you have worked with timer settings for your drip system.
Thanks for the great read, even if it did take quite a long time to read! (English is not my native language) Can I ask where you get your sources from? Thanks!
@Magnolia Hello thanks for reading, I’m glad you enjoyed it! There really are no sources, everything on this site that doesn’t have documented sources is from my personal experience. Hope to see you around again!
Dr. Steven Pratt identifies blueberries as one of the three major “Superfoods” that will change your life and your health.
I want to quote your post in my blog. It can?
And you et an account on Twitter?
I feel far more people need to read this, very excellent info.
Im obliged for the article post.Really thank you! Really Great.
Great text and nice blog.
Hi there, just recently found your website via Google, and been coming back regularly. You have a cool site! Do you mind if I link to it from my Website here?
@Wyatt Gede Hello thanks for reading the post! You are more than welcome to link to the page from your website. Thank you!
Basically need to say your article is brilliant. The clarity as part of your article is basically impressive and i can consider for granted you are an expert on this field. Perfectly with your permission enable me to grab your rss feed to retain as much as date with succeeding publish. Many thanks a million and please maintain up the sound operate. Excuse my poor English. English is not my mother tongue.
I like the layout of your blog and Im going to do the same for mine. Do you have any tips? Please PM ME.
You really make it seem so easy with your presentation but I find this topic to be really something which I think I would never understand. It seems too complicated and very broad for me. I am looking forward for your next post.
All of this “talk” of yard work is wearing me out 🙂 What did the carrot say to the wheat? Lettuce rest, I’m feeling beet.
I just finished reading this interesting article that discussed the biggest ways in which gardening has evolved during the past two decades. It concluded that pesticide free and all-year gardens are all the rage these days. What do you think?
@Harland – I agree 100% with that article. Pesticide free is a must, harsh chemicals in pesticides can make people very sick, and I am starting to believe our food industries are part of the reason people are getting sick these days.
I’m not blaming them 100% of the way, it is also the consumer’s fault for not educating themselves and checking label credibility. I prefer to grow my own food for that very reason.
I know the FDA is trying hard to regulate the food industry, but sometimes the responsibility goes to the company or farmer.
Now people like you and I can help protect ourselves by growing as much of our own food as we can. The point of growing your own food is to see what is in the food. Do you see where this is going?
In order to maintain the health of you and your family, all year round, you need to grow your own food all year round.
Maintaining a diverse garden is A LOT of work. When you spend so much time demanding the highest quality and cleanest food possible, you want the most out of your labor. That’s how I got involved with hydroponics. It doesn’t replace soil, it compliments it.
The sun provides us with free energy in the summer, sometimes too much in the form of heat. Your plants can suffer in the heat without water. On those hot days with high humidity and no rain, you need to water your garden. You can cut that time down with the drip system guide I have made here. Thats the beauty of hydroponics, you can cut your work down while maximizing your yields.
Year round gardening is a must to keep a good production of clean, healthy, pesticide free food for you and your family. When you are using house space or a green house to manage Mother plants and genetics for the next season, you will want to get the most out of every inch.