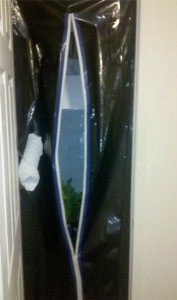
The first step to creating a grow room is a plan. Growing plants indoors can be tricky and you want to plan what you are going to use to achieve your goal. Without a plan you will build a random grow room built for just growing plants indoors. Depending on the plant you are growing, you may want different things in your grow room. You will want to plan the type of hydroponics or drip system you are going to use. Draw out every component of your planned Grow Tent.
Start with the frame. How do you plan on creating a frame for your environment. You will want an enclosed chamber. Air tight and light tight are the goal. Water proofing is MANDATORY. Water proofing your grow room set up will protect your house from taking heavy water damage and allow you to see any spills or leaks in your hydroponic system. Your frame will also need to support the weight of your grow light and the heavy hood that comes with it. You will also want to hang fans and filters from the frame so make sure you use a sturdy material.
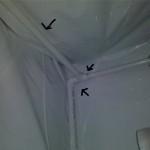
Different materials will suit the needs of different growers. The grow closet in the pictures uses 1 inch or thicker PVC pipes for the frame. Wood and braces can construct a very sturdy grow box. If you are going to have a lot of weight hanging from the walls and ceiling, wood will be a good material choice for the frame. For PVC frames you will just use PVC joint connections to bring the pipes together. You can use PVC glue, epoxy, or industrial strength tape to secure the connections.
The walls are made of black and white poly. Black and white poly is similar to mylar on a roll but is usually cheaper. The black and white poly is overlapped at the connection points. Sewing the pieces of black and white poly and sealing
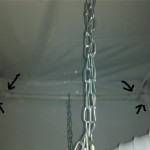
them with duct tape seems to produce a decent seal at a very low cost. Cheap hydroponic grow boxes are hard to find, but making your own can save you quite a bit of money for a sacrifice of time. You could also use a giant tarp to create the walls of the box, but black and white poly already reflects light.
Doors are a tricky part to building a grow room. This is where a good plan will come in handy. Building a wooden door is simple with the right tools. You can cut a square hole in a wooden board to create a door frame. Add hinges and a board that will cover the hole and you have a simple door. To make a simple door in mylar or black and white poly you can get a tarp zipper. The tarp zipper is meant to be sewn to the right and left sides of where the door is supposed to be. To open the door you simply unzip the zipper. Refer to the picture.
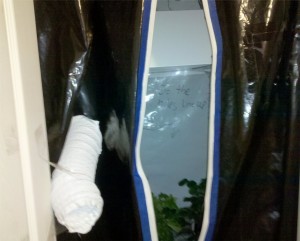
Once you have an enclosed grow room, you will need to ventilate it and create air circulation. Powerful inline fans can push air through ventilated grow light hoods and air filters. If your grow room is air tight, an exhaust fan should create negative pressure, drawing air from any cracks or holes in the walls. Its important to draw the air out of the room by pulling air through filters before it enters or exits the grow space. Carbon filters will remove any odors before they leave your grow room. HEPA filters will filter out dust, pests, and mold through your intake fan. Small grow tents will not require an intake fan if
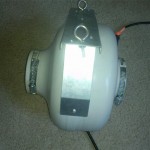
the temperature is low enough. A good rule of thumb is a 4:1 exhaust/intake ratio. That means 400 CFM(cubic feet per minute) exhaust for every 100 CFM intake.
Next hang your grow lights and the necessary accessories. Hang your thermometers and preventative pest control gear. You should be nearing the completion of your grow closet. You will have to make a few minor tweaks to get exactly what you want.
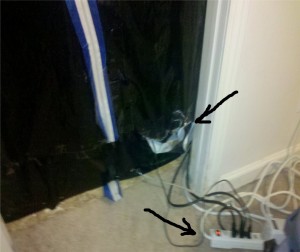
TIP: Run all of your electrical components to the outside of your grow tent. Make a small hole for plugs to get to the outer environment. If your cords do not reach from the inside of your grow room to the outside, you can run them to the top of the frame. Secure a surge protector up on the wall so that it cannot be possibly touched by water. Run the plug of the surge protector to the outside of the grow box so you have no electrical components exposed to any potential water damage. Protect yourself and your investment!
I’ll be posting more tips and guides on grow room/grow box building in the near future. Sign up for the RSS feed on the side bar or subscribe via email below because you won’t want to miss them! If you have questions about building indoor grow rooms, please spark up the conversation below!
Excellent stuff.
Nice to see you posting after a while, must have being really bored today 😉
That is some inspirational stuff. Never knew that opinions could be this varied. Thanks for all the enthusiasm to offer such helpful information here. Electronic Ballast: http://www.lightinges.com